SSH Connections
The SSH feature in Saturn Cloud lets you connect to Jupyter server and R server resources directly from your local machine. This allows you to use IDEs such as VSCode or PyCharm, or to interact with the resources from a terminal. You can also use SSH to move files to and from your local machine.
To use SSH in Saturn Cloud, you must do the following:
- Set up an SSH key pair.
- Add the public key to Saturn Cloud.
- Enable SSH access to your resource.
Set up an SSH key pair
You need to set up SSH to make the connection between Saturn Cloud and your local machine. First, create an SSH key pair. Please be sure to use an ed25519 key. There are some incompatibilities with RSA on OS X that have caused issues for some users. For most platforms, you can generate an ed25519 key with ssh-keygen -t ed25519
If you need help setting up the SSH keys on your local machine, check out any of these online resources:
- https://www.ssh.com/ssh/keygen/ (Linux/Mac)
- https://www.digitalocean.com/community/tutorials/how-to-set-up-ssh-keys-2 (Linux/Mac)
- https://www.redhat.com/sysadmin/configure-ssh-keygen (Linux/Mac)
- https://ubuntu.com/tutorials/ssh-keygen-on-windows#1-overview (Windows/WSL)
- https://learn.microsoft.com/en-us/windows-server/administration/openssh/openssh_keymanagement (Windows/OpenSSH)
Once you have your key pair set up, follow the instructions below to add your SSH public key to your Saturn Cloud account. The SSH private key will stay on your local machine.
Add your SSH public key to Saturn Cloud
Sign in to your Saturn Cloud account, click on your username, and select Manage [username] from the menu on the left. From the user settings page, add your SSH credential information. This is a secure storage location, and it will not be available to the public or other users without your consent.
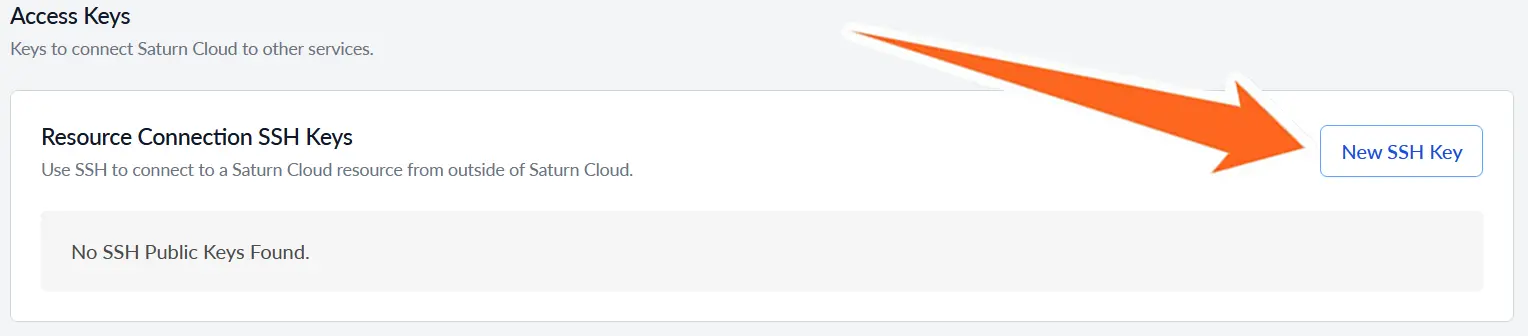
Under Access Keys, find the section called Resource Connection SSH Keys. Click on New SSH Key, and you will be taken to the SSH key creation form.
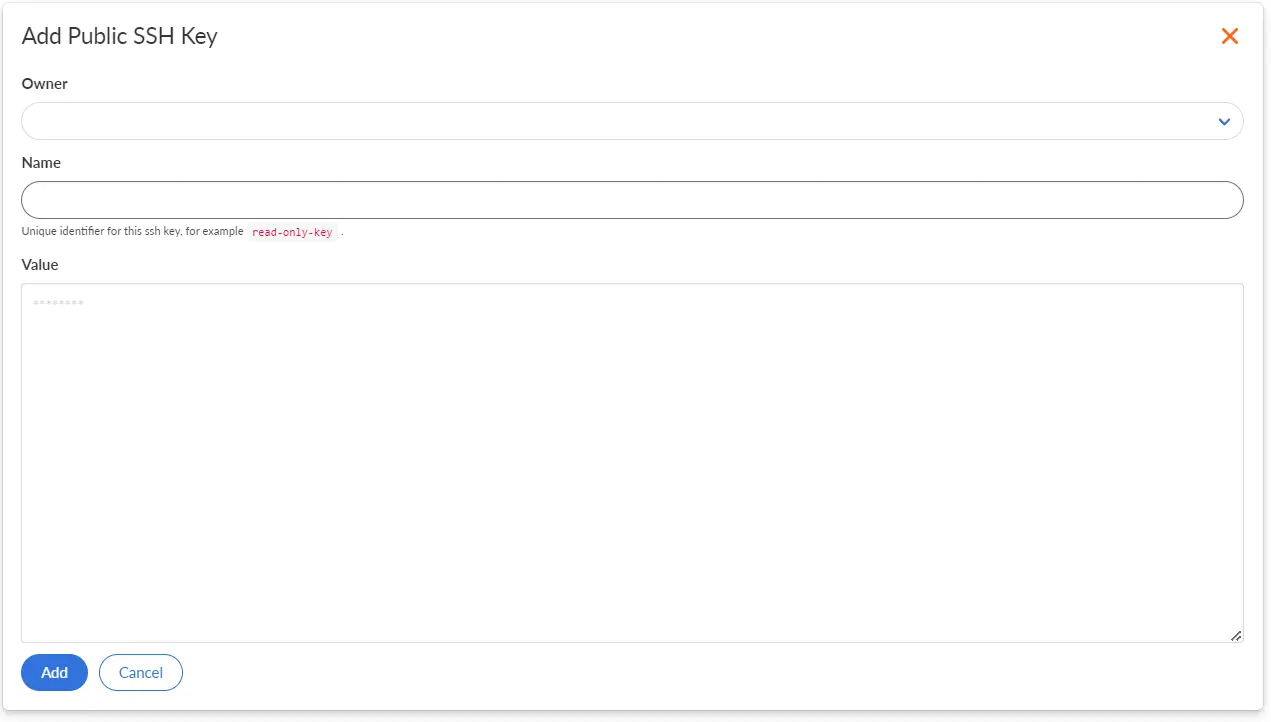
Select the appropriate owner, give the key a name, and copy the entire contents of your SSH public key file into the “Value” section.
With this complete, your SSH credentials will be accessible by Saturn Cloud resources!
Actively running resources
If you have resources that are running when you upload a new SSH public key, the resources will need to be restarted before the key can be used to connect.Enable SSH for a Jupyter server or R server resource
On the resource page, click Edit to edit the resource details. If it is running, you may want to stop it since the resource will need to be restarted when you make this change.

You will be taken to a page that allows you to edit the settings of the server. In the Additional features section, check the box that says “Allow SSH Connections,” and click Save at the bottom of the page.
![]()
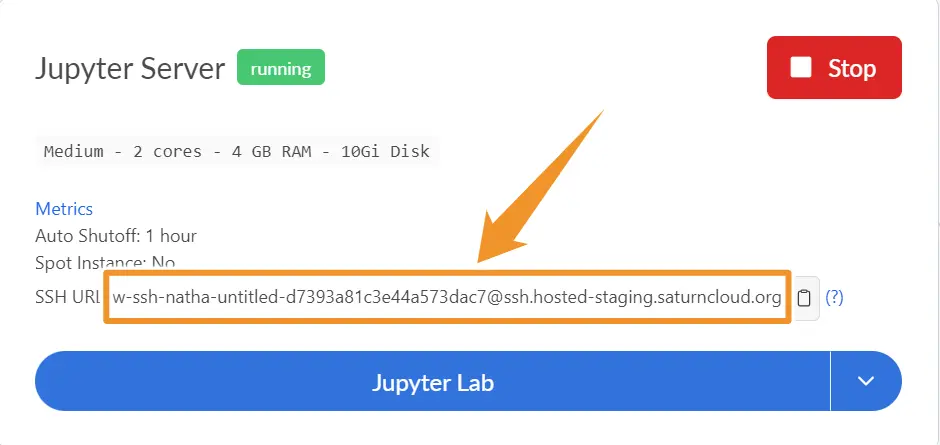
Start the resource, and you will see an SSH URL provided on the instance’s card. Press the clipboard icon to copy this string.
Connect to an external IDE
Now you can set up the connection to your preferred IDE. You’ll need to provide the IDE with the following:
- Host: Also called “Hostname” or “Server Hostname”. This is the part to the right of the
@in the URL above. - User: This is the part to the left side of the
@in the URL above. - Private key filepath: This is the location on your computer where the SSH private key is stored. This is the complement to the SSH public key you saved in Saturn Cloud.
VSCode
Using the Remote - SSH plugin, VS Code can connect to the running resource directly. To set this up, follow these instructions:
https://code.visualstudio.com/docs/remote/ssh
From the command palette (Ctrl+Shift+P or Cmd+Shift+P, depending on OS), select Remote-SSH: Connect to host…, then select + Add New SSH Host…. Paste the string copied from the resource card when prompted to enter the SSH command. VSCode will automatically parse the host and user values for you.
Add the entry to your ~/.ssh/config file. Open the file, and you will see an entry in the form:
Host <Host>
    HostName <Host (see above)>
    User <User (see above)>
Update the name (to the right of “Host”) above to match your server as you see fit. Then, from the command palette, select Remote-SSH: Connect to host…, then select your config entry name from the list.
PyCharm
Note: This functionality is only available in the Professional edition of PyCharm. It is not available in the Community (free) edition.
To set up PyCharm to connect to a running resource, follow JetBrains’ instructions here:
https://www.jetbrains.com/help/pycharm/creating-a-remote-server-configuration.html.
Choose SFTP for the credentials type, and create a new SSH configuration. Use the following values:
- Host: <Host (see above)>
- Port: 22
- User name: <User (see above)>
- Authentication type: Key pair
- Private key file: <Private key filepath (See above)>
- Passphrase: The passphrase to your key, if you set one
Once the new server configuration has been added, navigate to Tools > Deployment > Remote Host. From the new panel that this opens, select the new server configuration you just created.
To open a terminal to run commands, navigate to Tools > Start SSH Session…
Terminal (Mac/Linux)
For Mac and Linux users, you can access the server directly using the terminal application of your choice via:
ssh <resource URL>
If your key is not added to your SSH agent (or no SSH agent is running), the key can be manually specified:
ssh -i path/to/key <resource URL>
OpenSSH or WSL (Windows)
Using SSH on a Windows computer is slightly more complicated, but definitely doable. Although there are several different strategies, here we’ll focus on setting up and using OpenSSH (if you’re interested in other SSH clients, check out PuTTY).
OpenSSH is the open-source version of the SSH tools used by Linux administrators, and has been included in Windows installations since 2018. To use it, you will need at least Windows Server 2019 or Windows 10 (build 1809), PowerShell 5.1 or later, and an account with administrator privileges.
Once you have verified that you meet these requirements, you can check to see if OpenSSH is already installed. To do so, navigate to Settings > Apps > Optional Features. If you see OpenSSH Client and OpenSSH Server in this list, you’re good to go. Otherwise, click Add a feature at the top of the page. Find and install both OpenSSH Client and OpenSSH Server. Once setup is complete, return to the Optional Features list and verify that both client and server now show up.
Next, open the Services app from your start menu. Scroll through the Details pane on the right-hand side of the app until you see OpenSSH SSH Server, and double click it. In the startup window that pops up, on the General tab, select Automatic from the Startup type dropdown menu, then click Apply.
You can now access your Saturn Cloud resource by opening PowerShell and running the following command:
ssh <resource URL>
If you’d prefer an alternative to OpenSSH, it’s also possible to use SSH from a Linux Terminal on a Windows computer by using Windows Subsystem for Linux (WSL).
If you need help setting up or using WSL, check out the following links:
Move files to and from your local machine
To see examples of moving data to and from your local machine using SSH, see our loading data examples: