Dask Clusters
In Saturn Cloud, Dask clusters are groups of worker machines created for specific purposes, such as to use with an existing Jupyter server or to power a scheduled Prefect job.
To start a Dask cluster, you may either create it inside the Saturn Cloud UI or programmatically with code in Python. This tutorial will first show you how to do it in the UI (which we recommend), then will show the method for creating via the command line.
First, no matter how you are creating your Dask cluster, you must create a resource to attach it to. Typically this will be a Jupyter server but it could be a job, deployment, or Prefect Cloud flow.
Create a Dask cluster from the UI (recommended)
Open the resource page for the resource you want to attach a Dask cluster to and find the card where your Jupyter server is shown. Next to this card, you’ll see a button labelled New Dask Cluster.
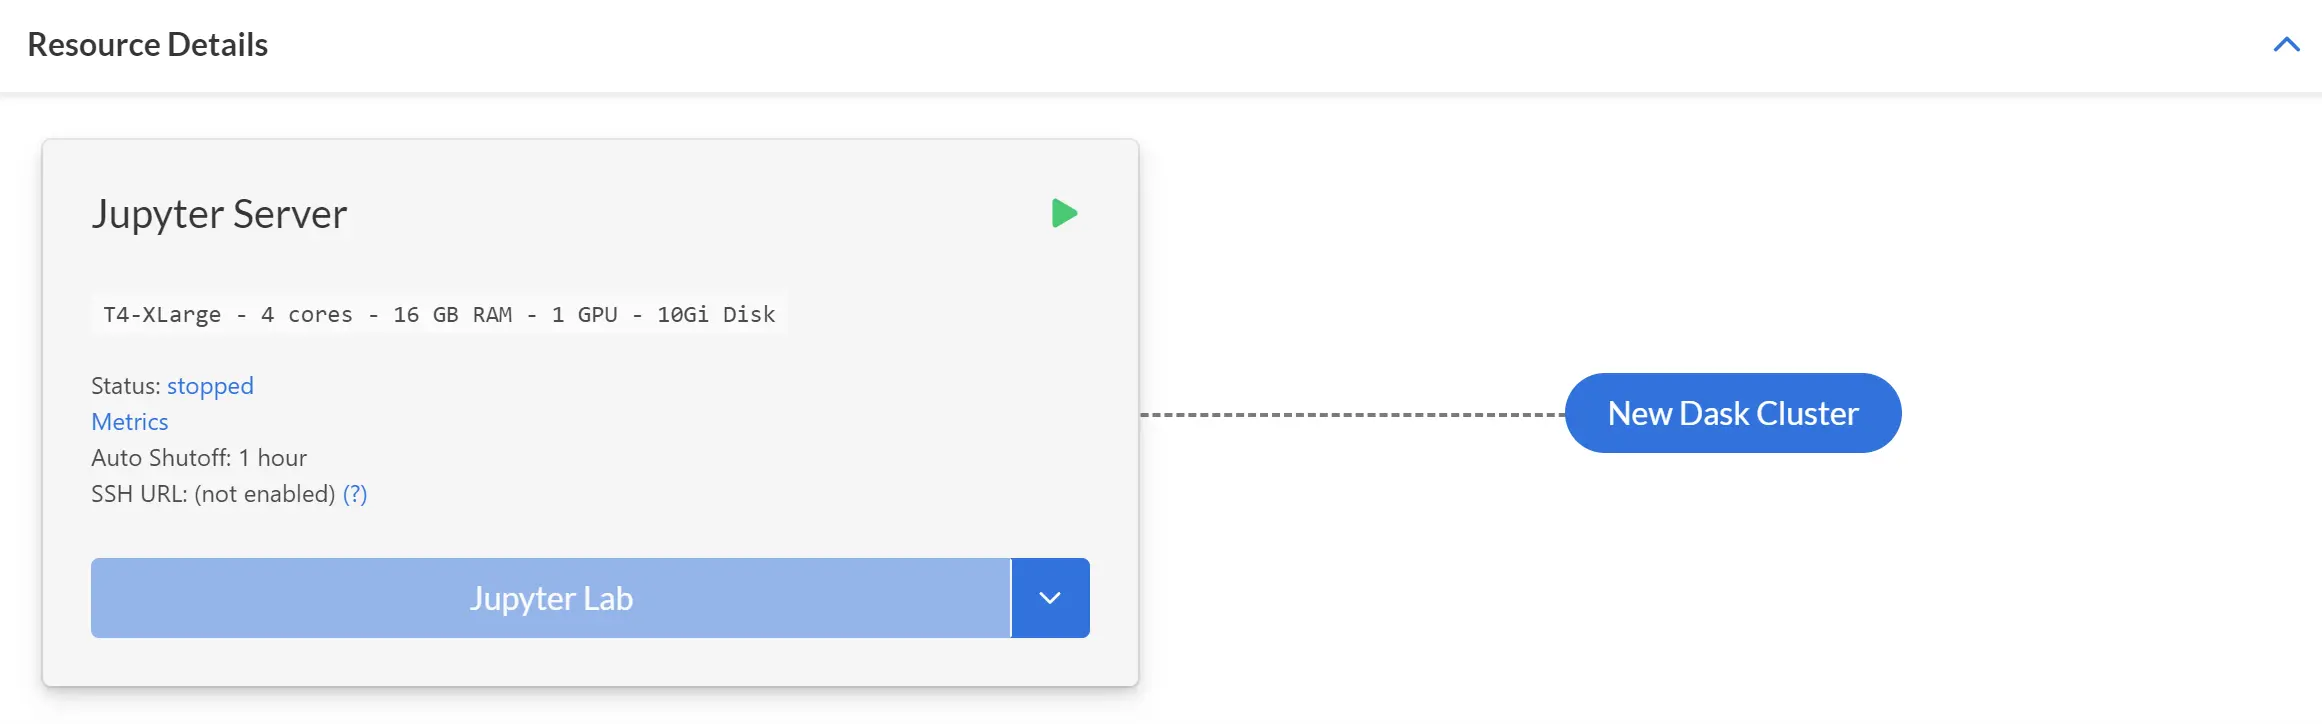
Click the button, and you’ll be taken to a form.
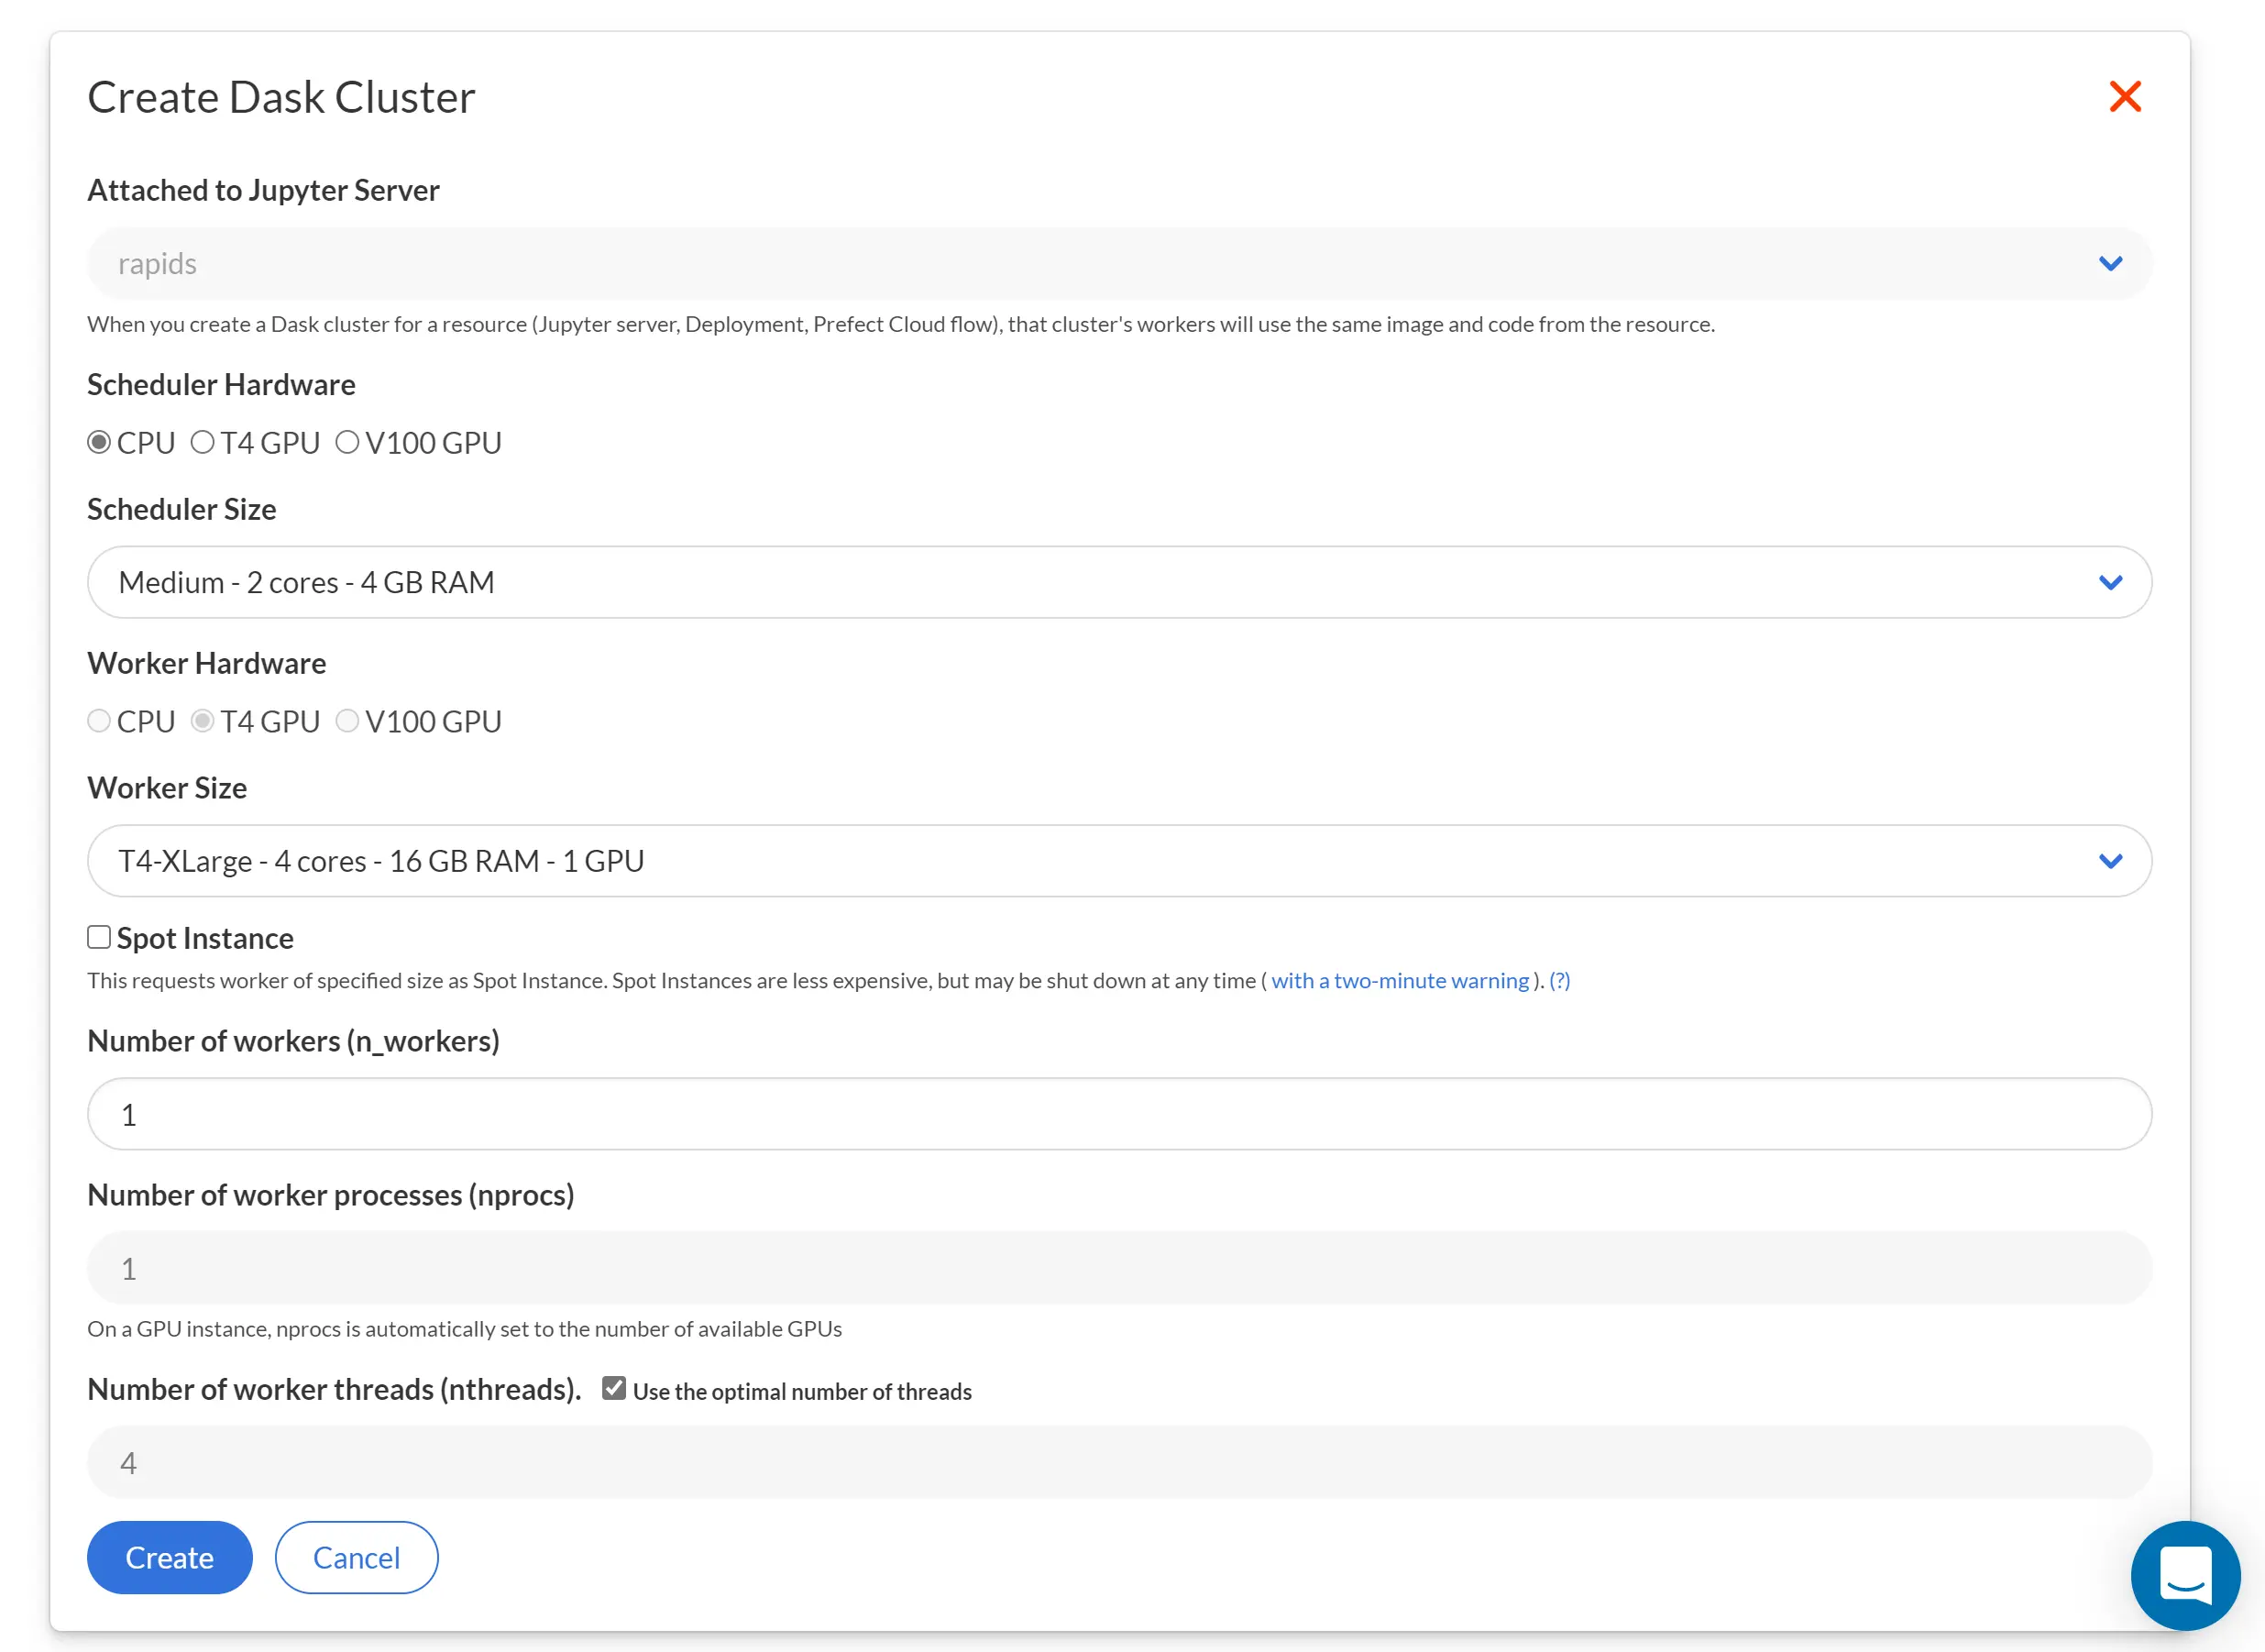
Select Parameters
The form will ask you to make some choices about the kind of cluster you want.
- Scheduler Size: the size of machine to use for the Dask scheduler
- Worker Size: the size of machine to use for each Dask worker
- Number of Workers: how many instances to start with
- Number of Worker Processes: the number of processes per machine (usually 1)
- Number of Worker Threads: the number of threads per process (usually the number of cores)
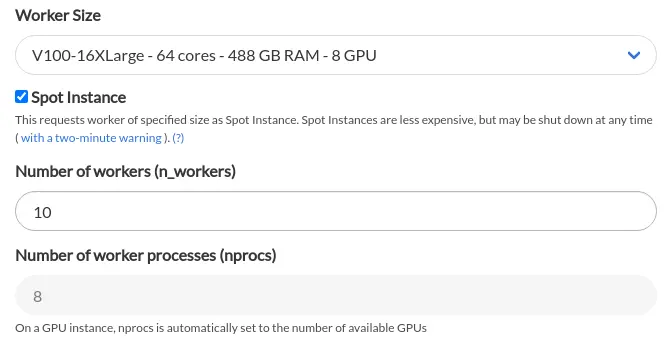
- Spot Instance checkbox: whether you wish to use EC2 Spot Instances, which may be less reliable but are cheaper than traditional EC2 Instances. Learn more about Spot Instances here!
Create Cluster
After you have filled in the form, click “Create” to save your choices. You’ll be returned to the resource page, which will now show a card for your Dask cluster.
The Dask cluster is NOT running yet at this point. You must click the green arrow to start it.
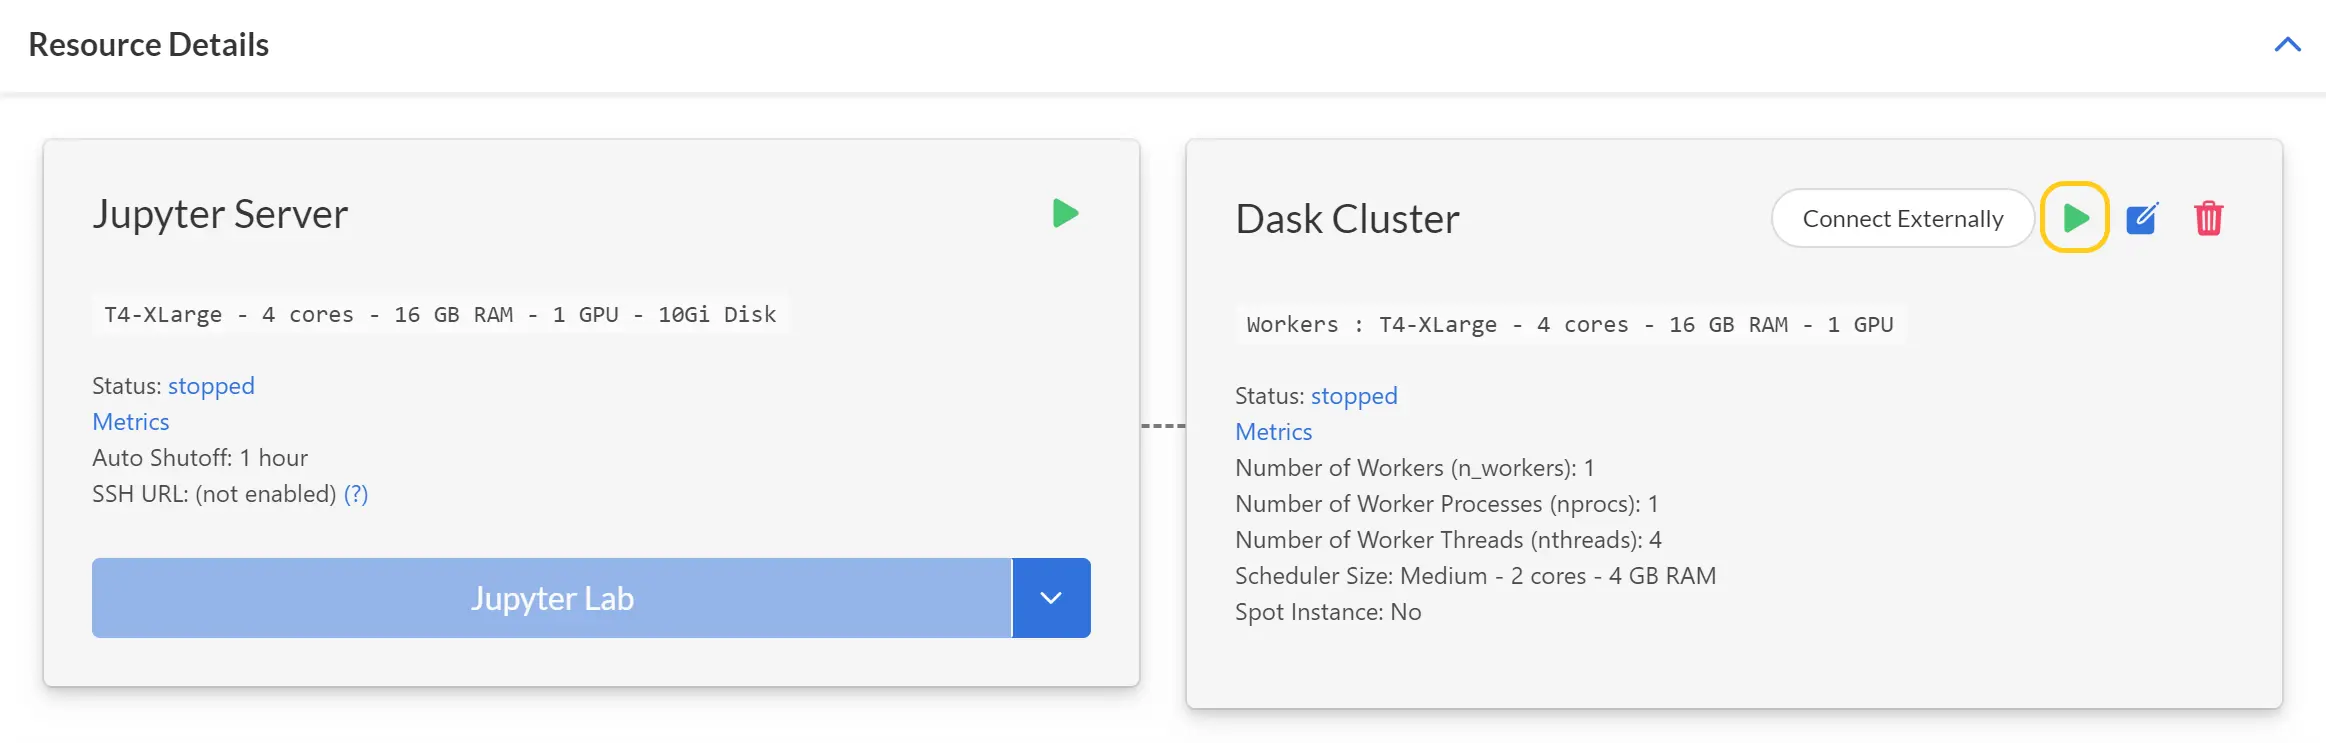
When the startup completes, your cluster is ready to use! You’ll access it from inside your Jupyter server, so your next step is to click the Jupyter Lab button and enter the workspace.
Create SaturnCluster Object
Now you are ready to connect to your cluster. Start the Jupyter Server and open a JupyterLab notebook. We need to use the SaturnCluster class, and no arguments are required because your cluster is already built. Just run the below code in your notebook.
sc = dask_saturn.SaturnCluster()
Connect to Dask
Now the “sc” object (you can give it any name you like) exists. You still need to connect it to Dask, however, which requires one more step.
client = Client(sc)
client
Now you’ll be able to see the parameters of the Dask distributed client you’ve just set up. Your Dask cluster is ready to use!

Spot Instances
Amazon EC2 Spot Instances let you take advantage of unused EC2 capacity in the AWS cloud. Spot Instances are available at up to a 90% discount compared to On-Demand prices. In Saturn, you can use Spot Instances for Dask cluster workers. When creating your Dask cluster, please make sure to check the box field for “Spot Instance” right below the “Worker Size” field as shown below.
Create a Dask Cluster programmatically
For various reasons you may not want to use the UI to create the Dask cluster. For instance if you have script that runs and you want the code to spin up a different sized Dask cluster depending on the situation. You might also want to connect to Dask externally and avoid the UI entirely. In these situations you can use Python code to create an appropriate Dask cluster.
You should first make sure your have the dask-saturn and dask.distributed Python libraries installed where you’re running the code. We include these libraries installed in all our Jupyter server environments, and if you’re building your own images, we strongly recommend you include these libraries as well.
You can create a Dask cluster as follows:
from dask_saturn import SaturnCluster
from dask.distributed import Client

cluster = SaturnCluster()
client = Client(cluster)
client
Adjusting cluster parameters
The default Dask cluster might not be sized correctly for your needs. You can adjust it using the following parameters to the SaturnCluster() function
- n_workers: how many instances to start with
- nprocs: the number of processes per machine (usually the number of cores)
- nthreads: the number of threads per process
- scheduler_size: the size of machine to use for the Dask scheduler
- worker_size: the size of machine to use for each Dask worker
- worker_is_spot: whether you wish to use EC2 Spot Instances, which may be less reliable but are cheaper than traditional EC2 Instances
For example, here is one setup for Dask cluster:
from dask_saturn import SaturnCluster
from dask.distributed import Client

cluster = SaturnCluster(
    n_workers=10,
    worker_size='8xlarge',
    scheduler_size='2xlarge',
    nthreads=32,
    worker_is_spot=True,
)
client = Client(cluster)
client
This is a lot of stuff, and may be confusing! We have documentation in our Articles section that discusses things like scheduler/worker sizes and the concept of threads. You can also read the details of the code on GitHub.
To begin thinking about the sizes of machines you want, it can be very helpful to use the describe_sizes() function.
dask_saturn.describe_sizes()

#> {'medium': 'Medium - 2 cores - 4 GB RAM',
#> 'large': 'Large - 2 cores - 16 GB RAM',
#> 'xlarge': 'XLarge - 4 cores - 32 GB RAM',
#> '2xlarge': '2XLarge - 8 cores - 64 GB RAM',
#> '4xlarge': '4XLarge - 16 cores - 128 GB RAM',
#> '8xlarge': '8XLarge - 32 cores - 256 GB RAM',
#> '12xlarge': '12XLarge - 48 cores - 384 GB RAM',
#> '16xlarge': '16XLarge - 64 cores - 512 GB RAM',
#> 'g4dnxlarge': 'T4-XLarge - 4 cores - 16 GB RAM - 1 GPU',
#> 'g4dn4xlarge': 'T4-4XLarge - 16 cores - 64 GB RAM - 1 GPU',
#> 'g4dn8xlarge': 'T4-8XLarge - 32 cores - 128 GB RAM - 1 GPU',
#> 'p32xlarge': 'V100-2XLarge - 8 cores - 61 GB RAM - 1 GPU',
#> 'p38xlarge': 'V100-8XLarge - 32 cores - 244 GB RAM - 4 GPU',
#> 'p316xlarge': 'V100-16XLarge - 64 cores - 488 GB RAM - 8 GPU'}
