Connect to Dask from SageMaker
At Saturn Cloud, one of our passions is to help users build their productivity and accelerate their machine learning from whatever working environment they prefer. This poses lots of interesting challenges for us, of course, but we really believe in making the experience of our customers as convenient as possible. Many of us are data scientists ourselves, and have struggled with having great tools that just don’t work for our practice.
As a result, we let you use Jupyter Lab in our cloud product, SSH from your IDE into Jupyter Lab, or let you just create and use machine clusters directly from your local IDE, no Jupyter server required.
This last functionality is brilliant, because it opens up so many possibilities for connecting with powerful Dask resource clusters in so many other tools and workspaces. In this post, I’m going to show you how you can combine Saturn Cloud with AWS Sagemaker to get all the power of Dask clusters in the Sagemaker environment. If you’re a regular Sagemaker user, but want to add Dask parallelism to your workflow, read on!
Introduction
Dask allows parallelization of Python code, including across many machines in clusters.
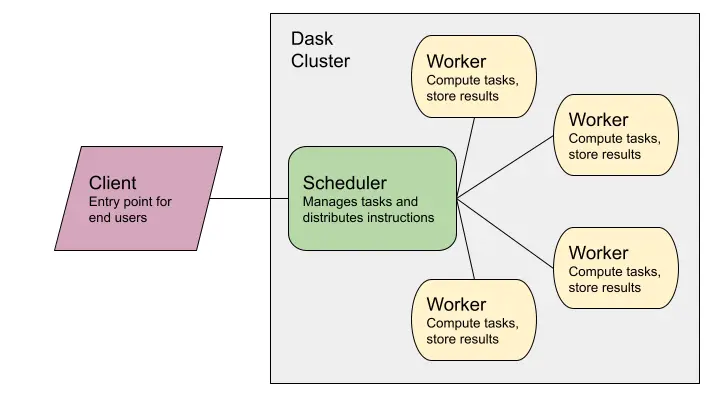
As this diagram illustrates, the pieces in the gray box constitute a machine cluster, and in this example, that’s what will be hosted on Saturn Cloud. Instead of the pink box (the Client) being a Jupyter server also on Saturn Cloud, this will be your Sagemaker instance. Your code will be transmitted from Sagemaker to the cluster Scheduler, which will distribute tasks to the workers.
Setup
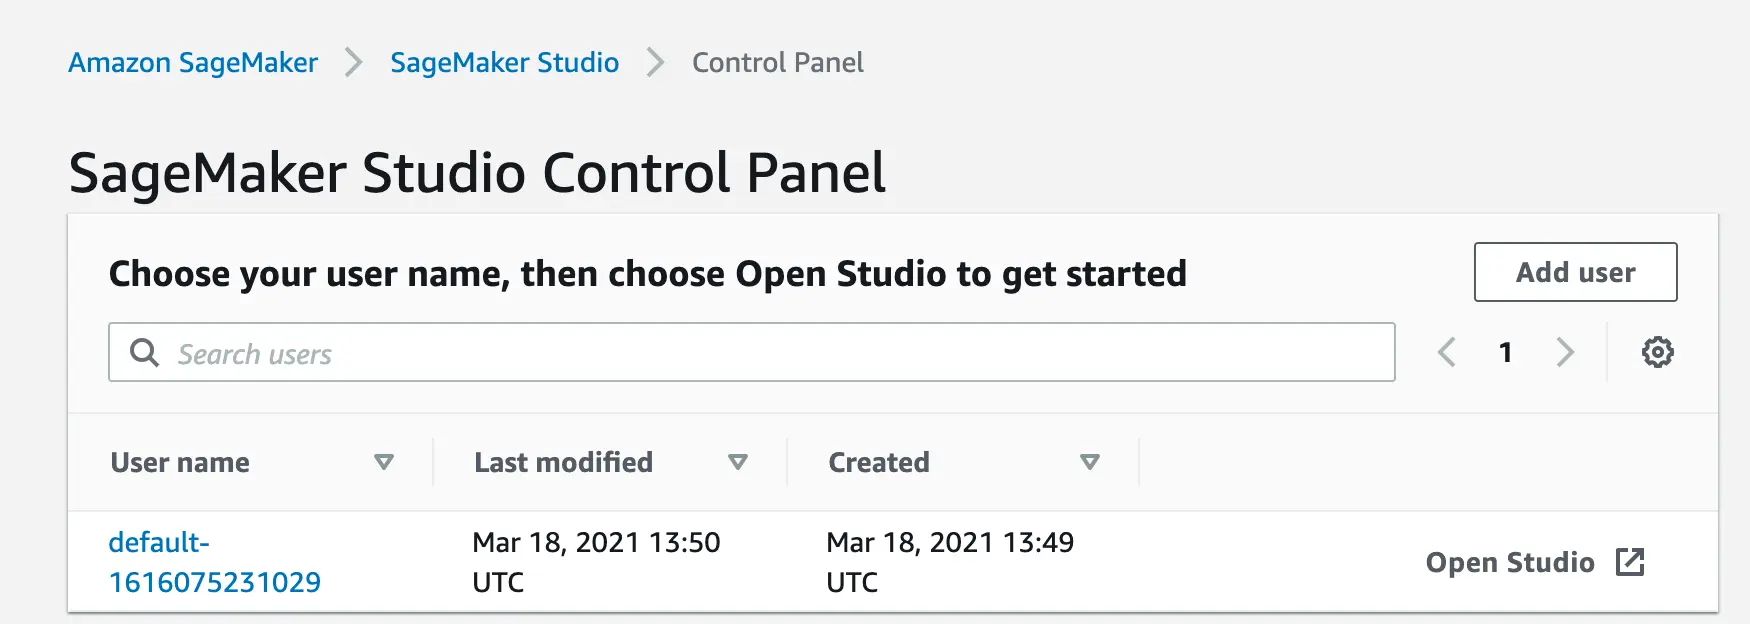
Log in to your Sagemaker environment and open a Jupyter instance. For this example, I’m using Sagemaker Studio, as shown in the screenshot below.
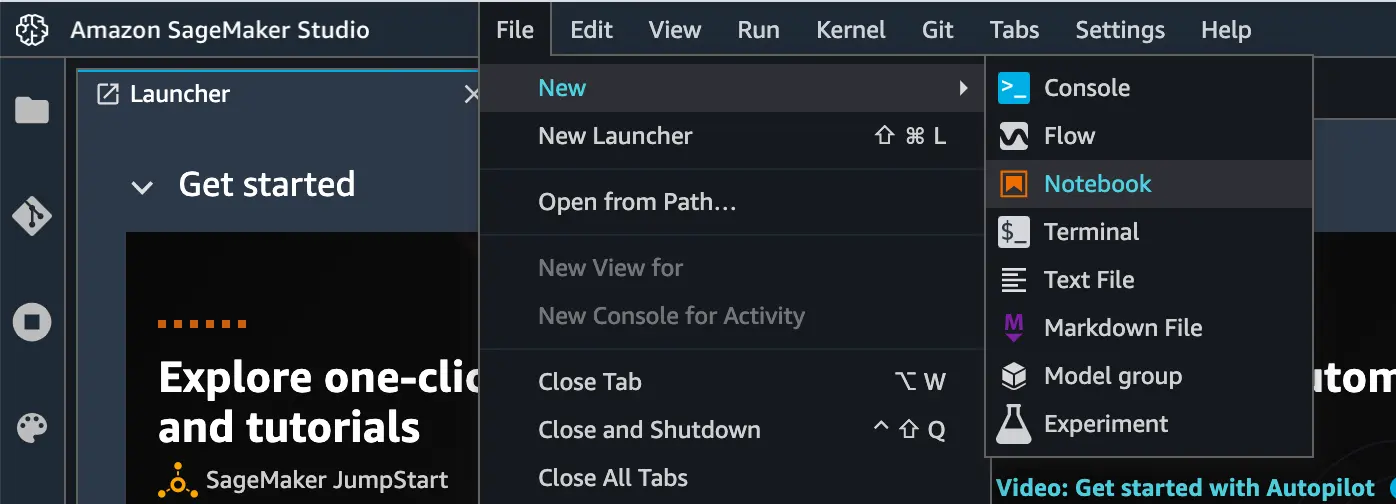
Inside Sagemaker Studio, open a new Notebook, and you’re ready to begin! You’ll be asked to select a kernel, and for this we recommend the “Python 3 (Data Science)” kernel.
Environment Management
This kernel won’t be complete for our needs, however. Whenever you use our direct machine cluster access functionality, you’ll want to pay attention to the working environments. If your local workspace has a different image, including different packages or versions, than the Saturn resources, you’ll need to resolve that before running Dask code or using your cluster.
To fix this easily, the first thing we recommend is checking that your Sagemaker notebook has the same versions of certain key libraries that your Saturn Cloud cluster image does, after you get things set up as shown below. These are the libraries that ought to be installed or updated if you use the Sagemaker “Python 3 (Data Science)” kernel.
- pandas: upgrade to 1.2.3 or better
- dask: install 2.30.0 or better
- distributed: install 2.30.1 or better
- dask-saturn: install 0.2.2 or better
pandas will likely be installed, but the version may be quite old in the kernel. Upgrading this is vital for Dask to work well for you.
All of this can be done with pip. In Sagemaker Jupyter Notebooks, you can use the %pip magic in regular code chunks to run these commands, so for me, it looks like the first chunk in this screenshot.

To find out about some conflicts early, you can run client.get_versions(check=True) after you set up your Saturn client object. (I’ll explain that in a moment!) But that check won’t tell you about pandas conflicts, so don’t forget pandas!
Creating a Saturn Cloud resource
If you don’t have a Saturn Cloud account, go to saturncloud.io and click “Start For Free” on the upper right corner. It’ll ask you to create a login. Otherwise, log into Saturn Cloud. Once you have done so, you’ll be brought to the Saturn Cloud resources page. Click “New Jupyter Server”

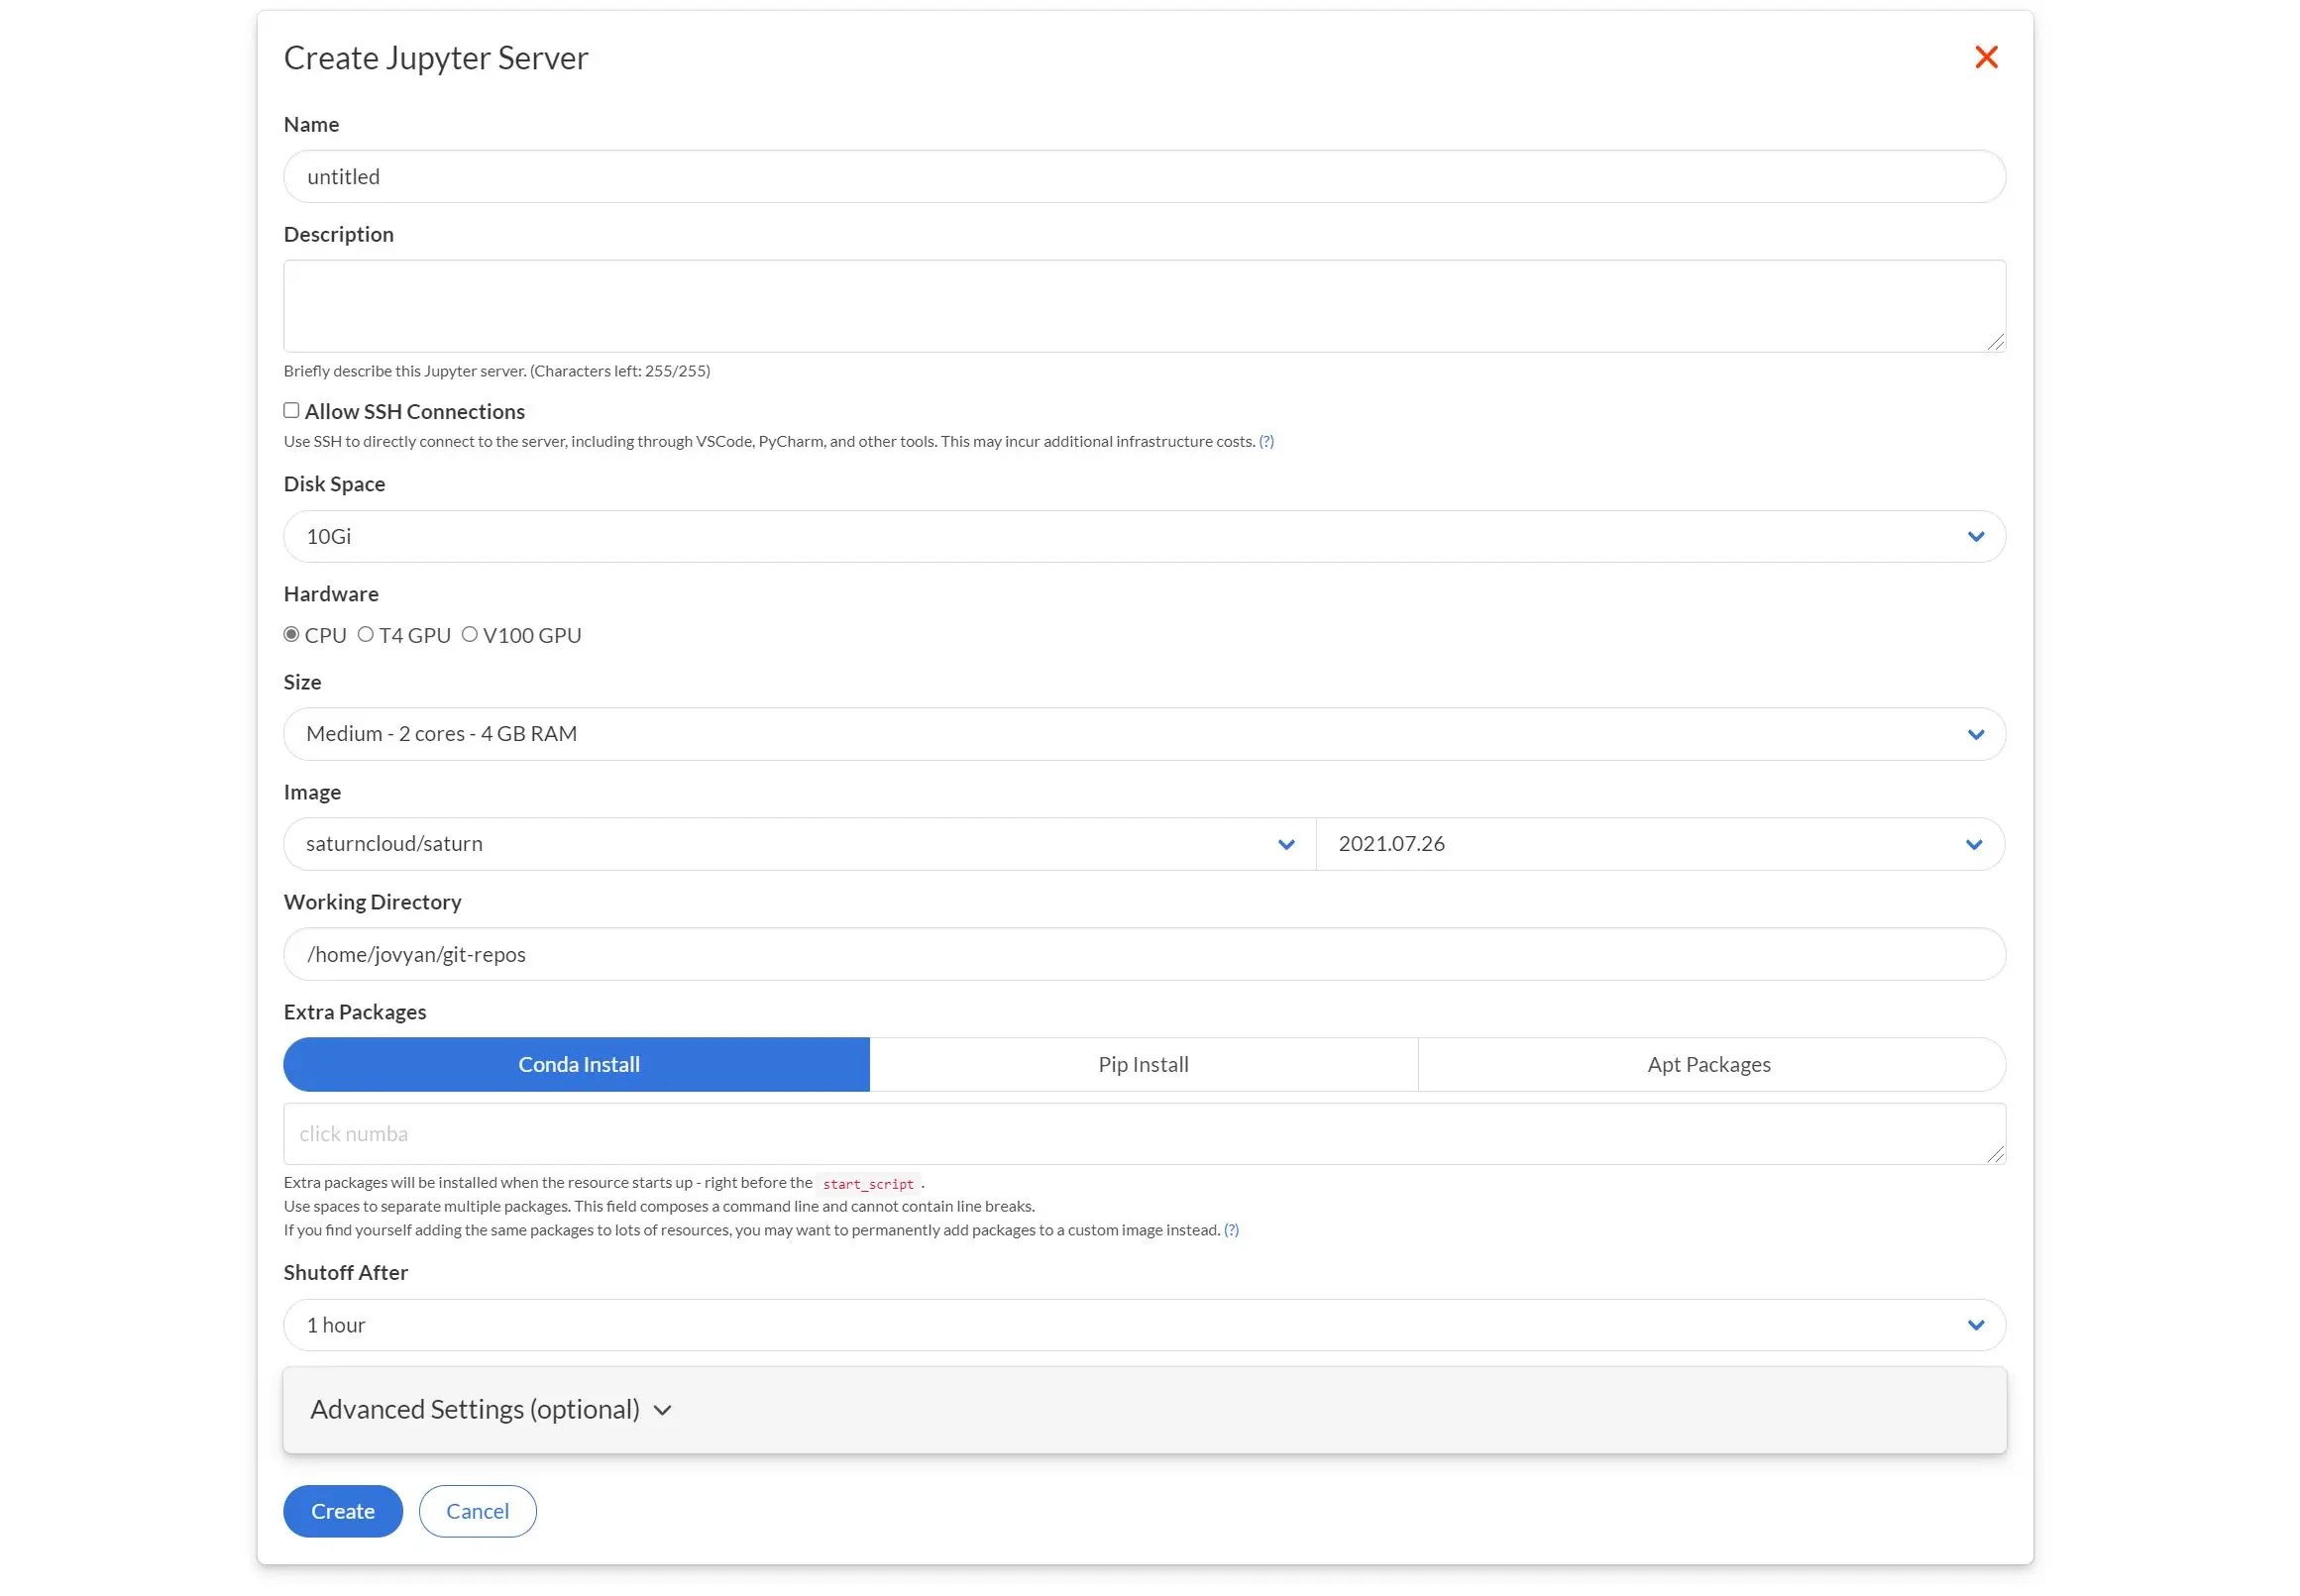
Given the resource a name (ex: “external-connect-demo”), but you can leave all other settings as their defaults. In the future you may want to set a specific image or instance size which you can do from the resource page. Then click “Create”
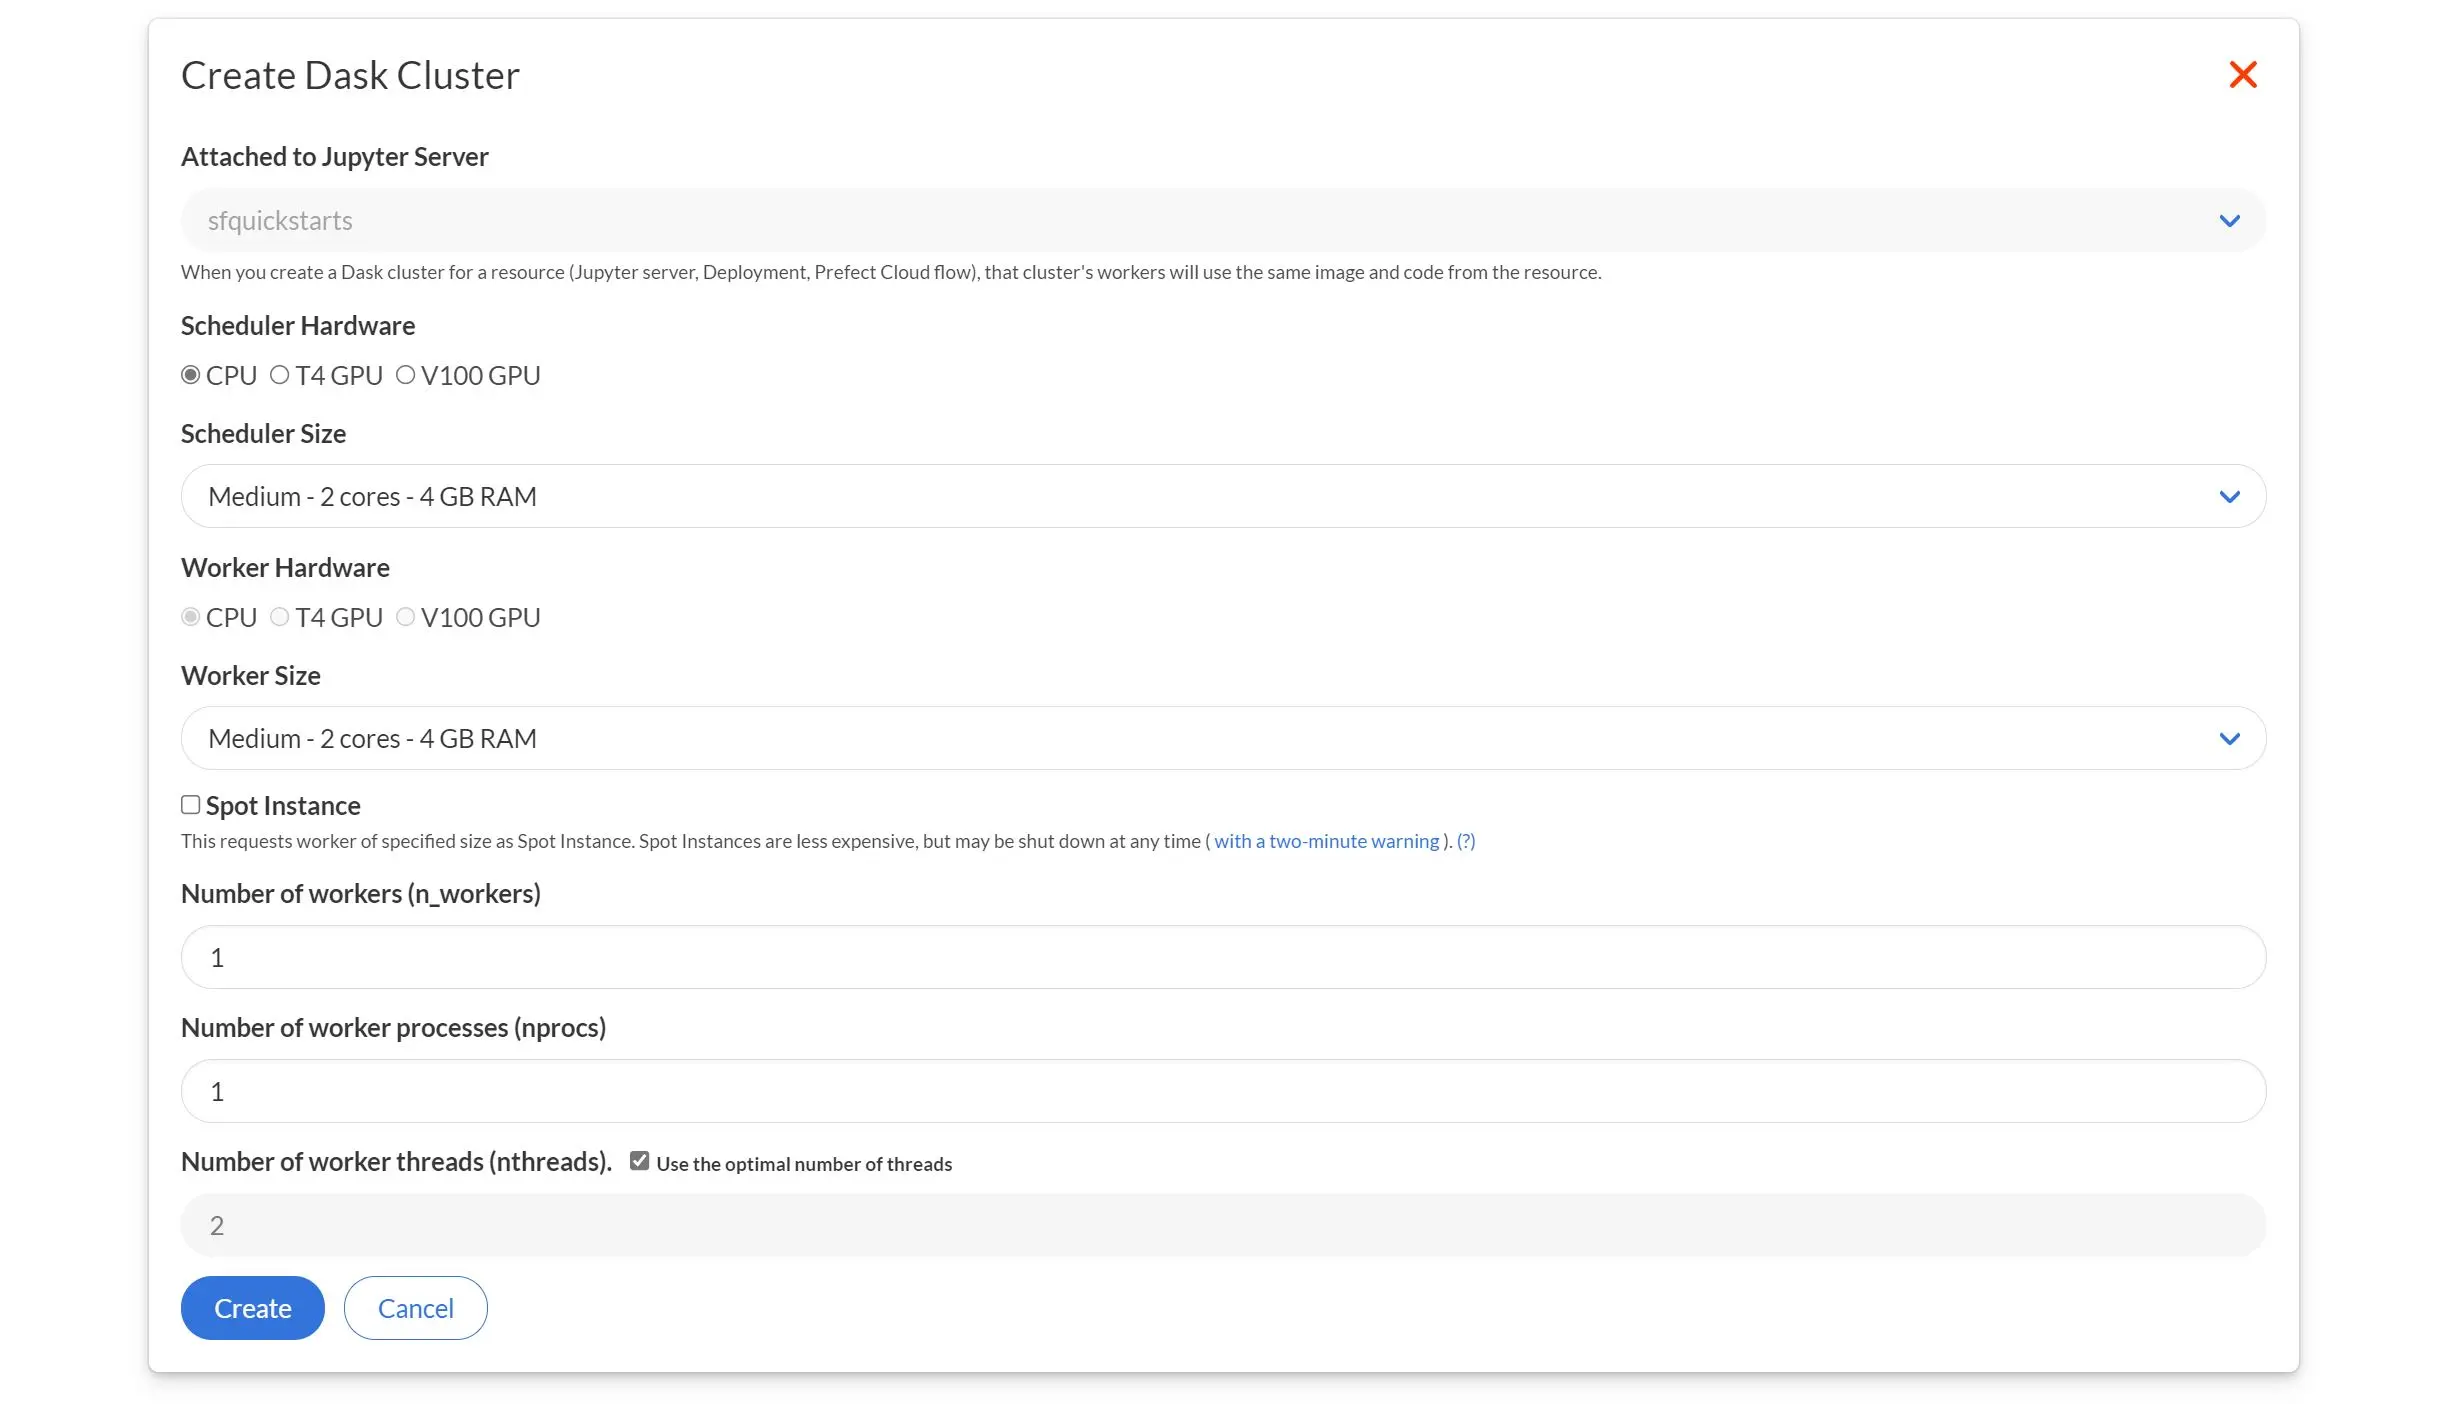
After the resource is created you’ll be brought the page for it. Next, we need to add a Dask cluster to this resource. Press the New Dask Cluster button, which will pop up a dialog for setting the Dask cluster. Choose the size each worker, the number of workers, and other options for the Dask cluster (see Create a Dask Cluster for details on those), then click Create.
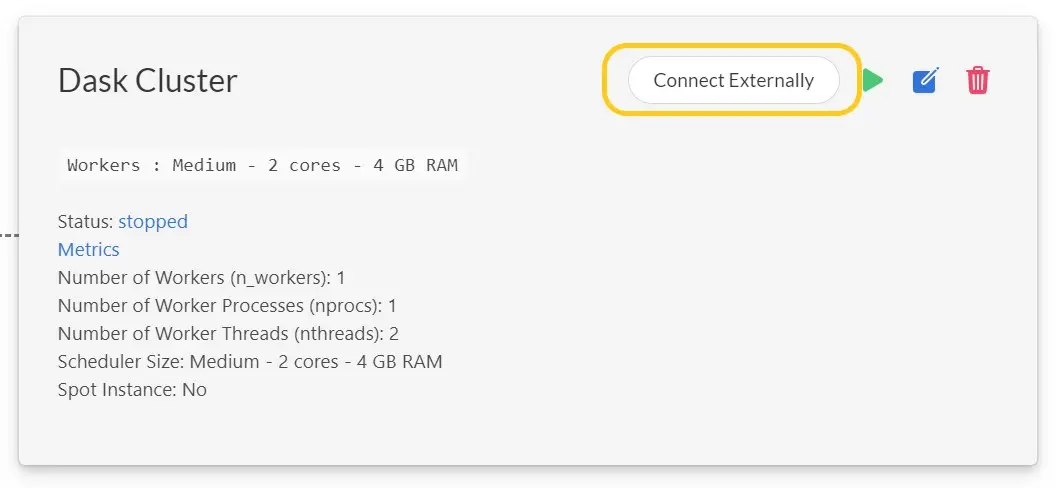
Once the Dask cluster is created you’ll see it has a Connect Externally button, which provides instructions for making the external connection.
First, ensure that the client connecting to the Dask cluster has the appropriate libraries, in particular the version of dask-saturn shown by the UI. You’ll also want to include dask and distributed, ideally with the same version as that in the cluster.
Next, set the SATURN_BASE_URL and SATURN_TOKEN environmental variables in the client machine to the values show in the dialog which let the system know which particular Saturn Cloud Dask cluster to connect to. For guidance on how to set environment variables, see our [environment variable documentation](https://saturncloud.io/docs/user-guide/how-to/connect/environment-variables/.
Finally, from within the client machine you can then connect to the Dask cluster from Python:
from dask_saturn import SaturnCluster
from dask.distributed import Client

cluster = SaturnCluster()
client = Client(cluster)
client
Run the chunk, and soon you’ll see lines like this:
#> INFO:dask-saturn:Starting cluster. Status: pending
This tells you that your cluster is starting up! Eventually you’ll see something like:
#> INFO:dask-saturn:{'tcp://10.0.23.16:43141': {'status': 'OK'}}
Which is informing you that your cluster is up and ready to use. Now you can interact with it just the same way you would from a Saturn Cloud Jupyter server. If you need help with that, please check out some of our tutorials, such as Training a Model with Scikit-learn and Dask, or the dask-saturn API.
Analysis!
At this point, you are able to do load data and complete whatever analysis you want. You can monitor the performance of your cluster at the link described earlier, or you can log in to Saturn Cloud and see the Dask dashboard, logs for the cluster workers, and other useful information.
You can also connect to Dask from Google Colab, Azure, or anywhere else outside of Saturn Cloud.
Scale your SageMaker workflows with Saturn Cloud
Now that you’re connected, you can leverage Saturn Cloud’s Dask clusters to process large datasets that would be too big for a single SageMaker instance, or train models in parallel across multiple GPUs.