Connect to Dask from Azure
Dask is a powerful Python library for running processes in parallel and over distributed systems. To get the full benefits of Dask, it’s often necessary to have a set of machines all acting as Dask workers so that the computations can be spread across all of them. But setting up a system of machines that are all correctly connected in a cloud environment like Azure can be tricky—things like permissions, network connectivity, and correctly starting and stopping the instances together can make setting up Dask a complex task. One way you can avoid having to manage a Dask cluster when using Azure is by having Saturn Cloud manage the Dask cluster for you—then with only a few clicks you can have a Dask cluster online and available to use.
Saturn Cloud is a platform for data scientists to easily work—allowing them to start and stop data science resources, use GPUs for machine learning, and run distributed code through Dask. Saturn Cloud is available to connect to through all major cloud providers, and even directly from running Python on a laptop. For Azure, you can use the Azure Machine Learning Workspace to create a notebook that uses Dask through Saturn Cloud. You could also connect from an Azure virtual machine or any other Azure resource that can host Python. Your Python code running in Azure will connect to the Dask cluster to execute the Dask commands, and then the results can be returned to your Python environment.
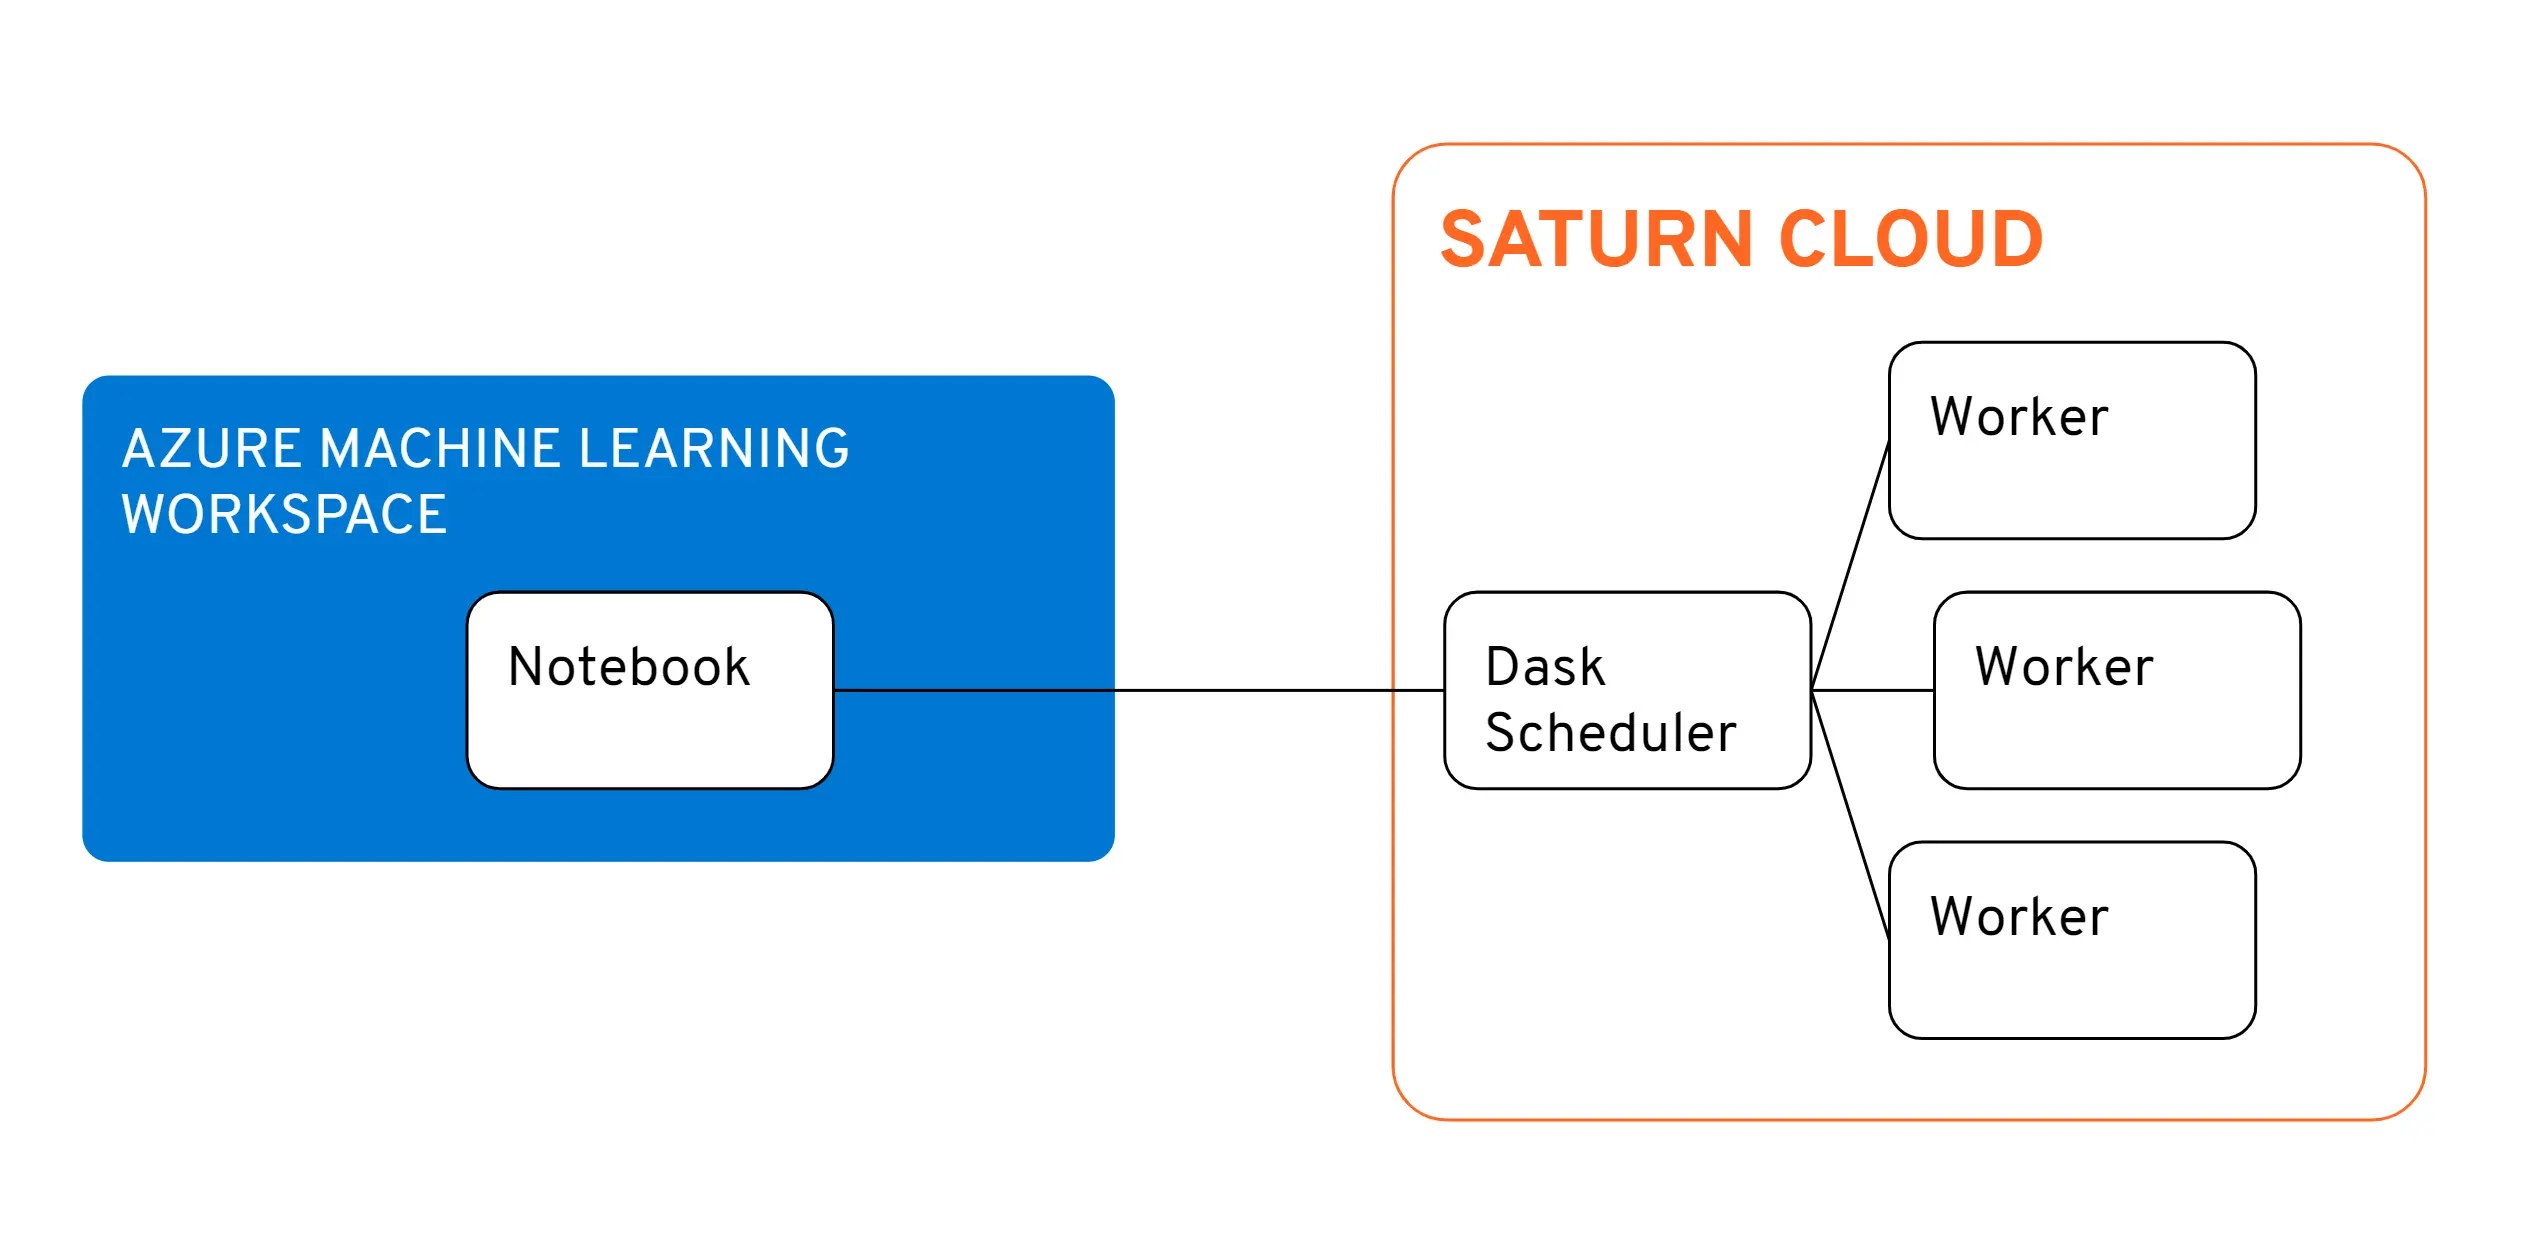
The rest of this article will walk you through the steps of running Dask from Azure through Saturn Cloud using an Azure Machine Learning Workspace.
Preparing a notebook on Azure
This section is to create a notebook in the Azure Machine Learning Workspace that has the proper Python libraries to connect to Dask on Saturn Cloud.
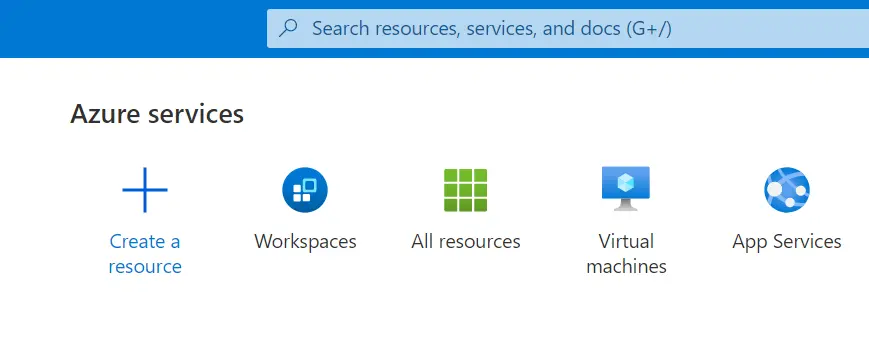
If you don’t already have an Azure Machine Learning Workspace you’ll need to make one. In the Azure main portal click “Create a resource” and search for “Machine Learning.” Choose the name, region, and other options appropriate for what you’re doing. For a deeper guide on creating the workspace, see this Azure article.
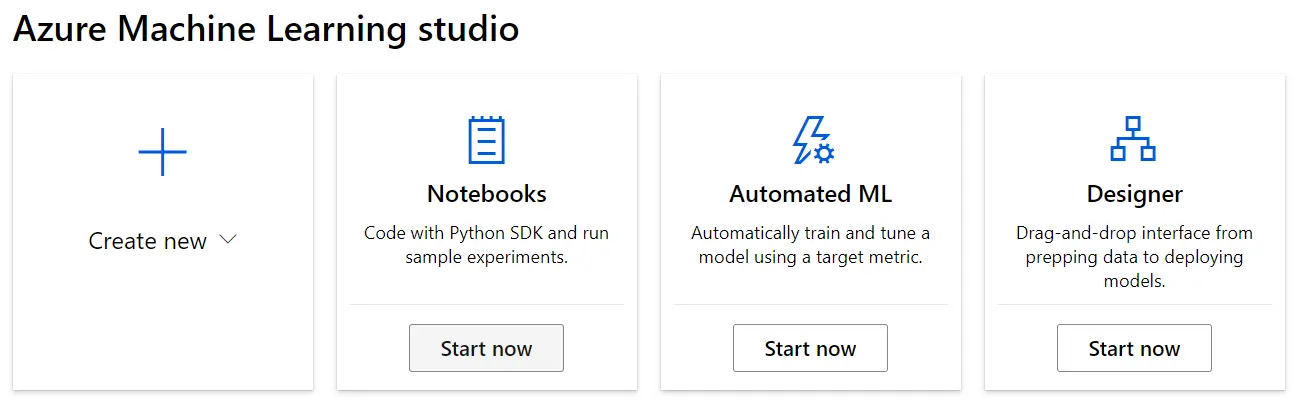
In the Azure Machine Learning Studio connected to the workspace you just created, select “Start now” under notebooks. When first using a notebook you may be required to choose a compute instance. For the purposes of this article it isn’t important (since the Dask work happens on the Dask instances not on the compute one), but depending on the task you want to do you may need a large instance.
Once inside, connect to the terminal

At this point we need to install the correct Python version (3.8) as well as several packages used for distributed computing. Then we need to connect the Python 3.8 kernel so that the notebook knows it’s there:
# (1) Install Python 3.8 and supplemental software
sudo apt update
sudo apt install software-properties-common
sudo add-apt-repository ppa:deadsnakes/ppa
sudo apt update
sudo apt-get -y install python3.8
sudo apt-get -y install python3.8-distutils
sudo apt-get -y install python3.8-apt

# (2) Install pip
curl https://bootstrap.pypa.io/get-pip.py -o get-pip.py
python3.8 get-pip.py

# (3) Use pip to install required Python libraries for Dask, AzureML, and Saturn Cloud
python3.8 -m pip install pandas==1.2.3 dask==2.30.0 distributed==2.30.1 saturn-client dask-saturn==0.2.2 ipykernel azureml cryptograph==2.5

# (4) connect Python 3.8 to the Notebook
ipython kernel install --name python3.8 --user
In order this (1) installs Python 3.8 as well as supplemental software that is needed for some of the Python packages we’re using. (2) installs pip for Python 3.8 (3) installs the Python packages we need (for Dask, Saturn Cloud, and Azure ML), and (4) then registers the Python 3.8 kernel.
At this point you can create a new notebook by right clicking you username in the file directory and choosing create new file. Once you make the new notebook set the kernel as python3.8 and you will be ready to use Dask from Saturn Cloud.

Creating a Saturn Cloud resource
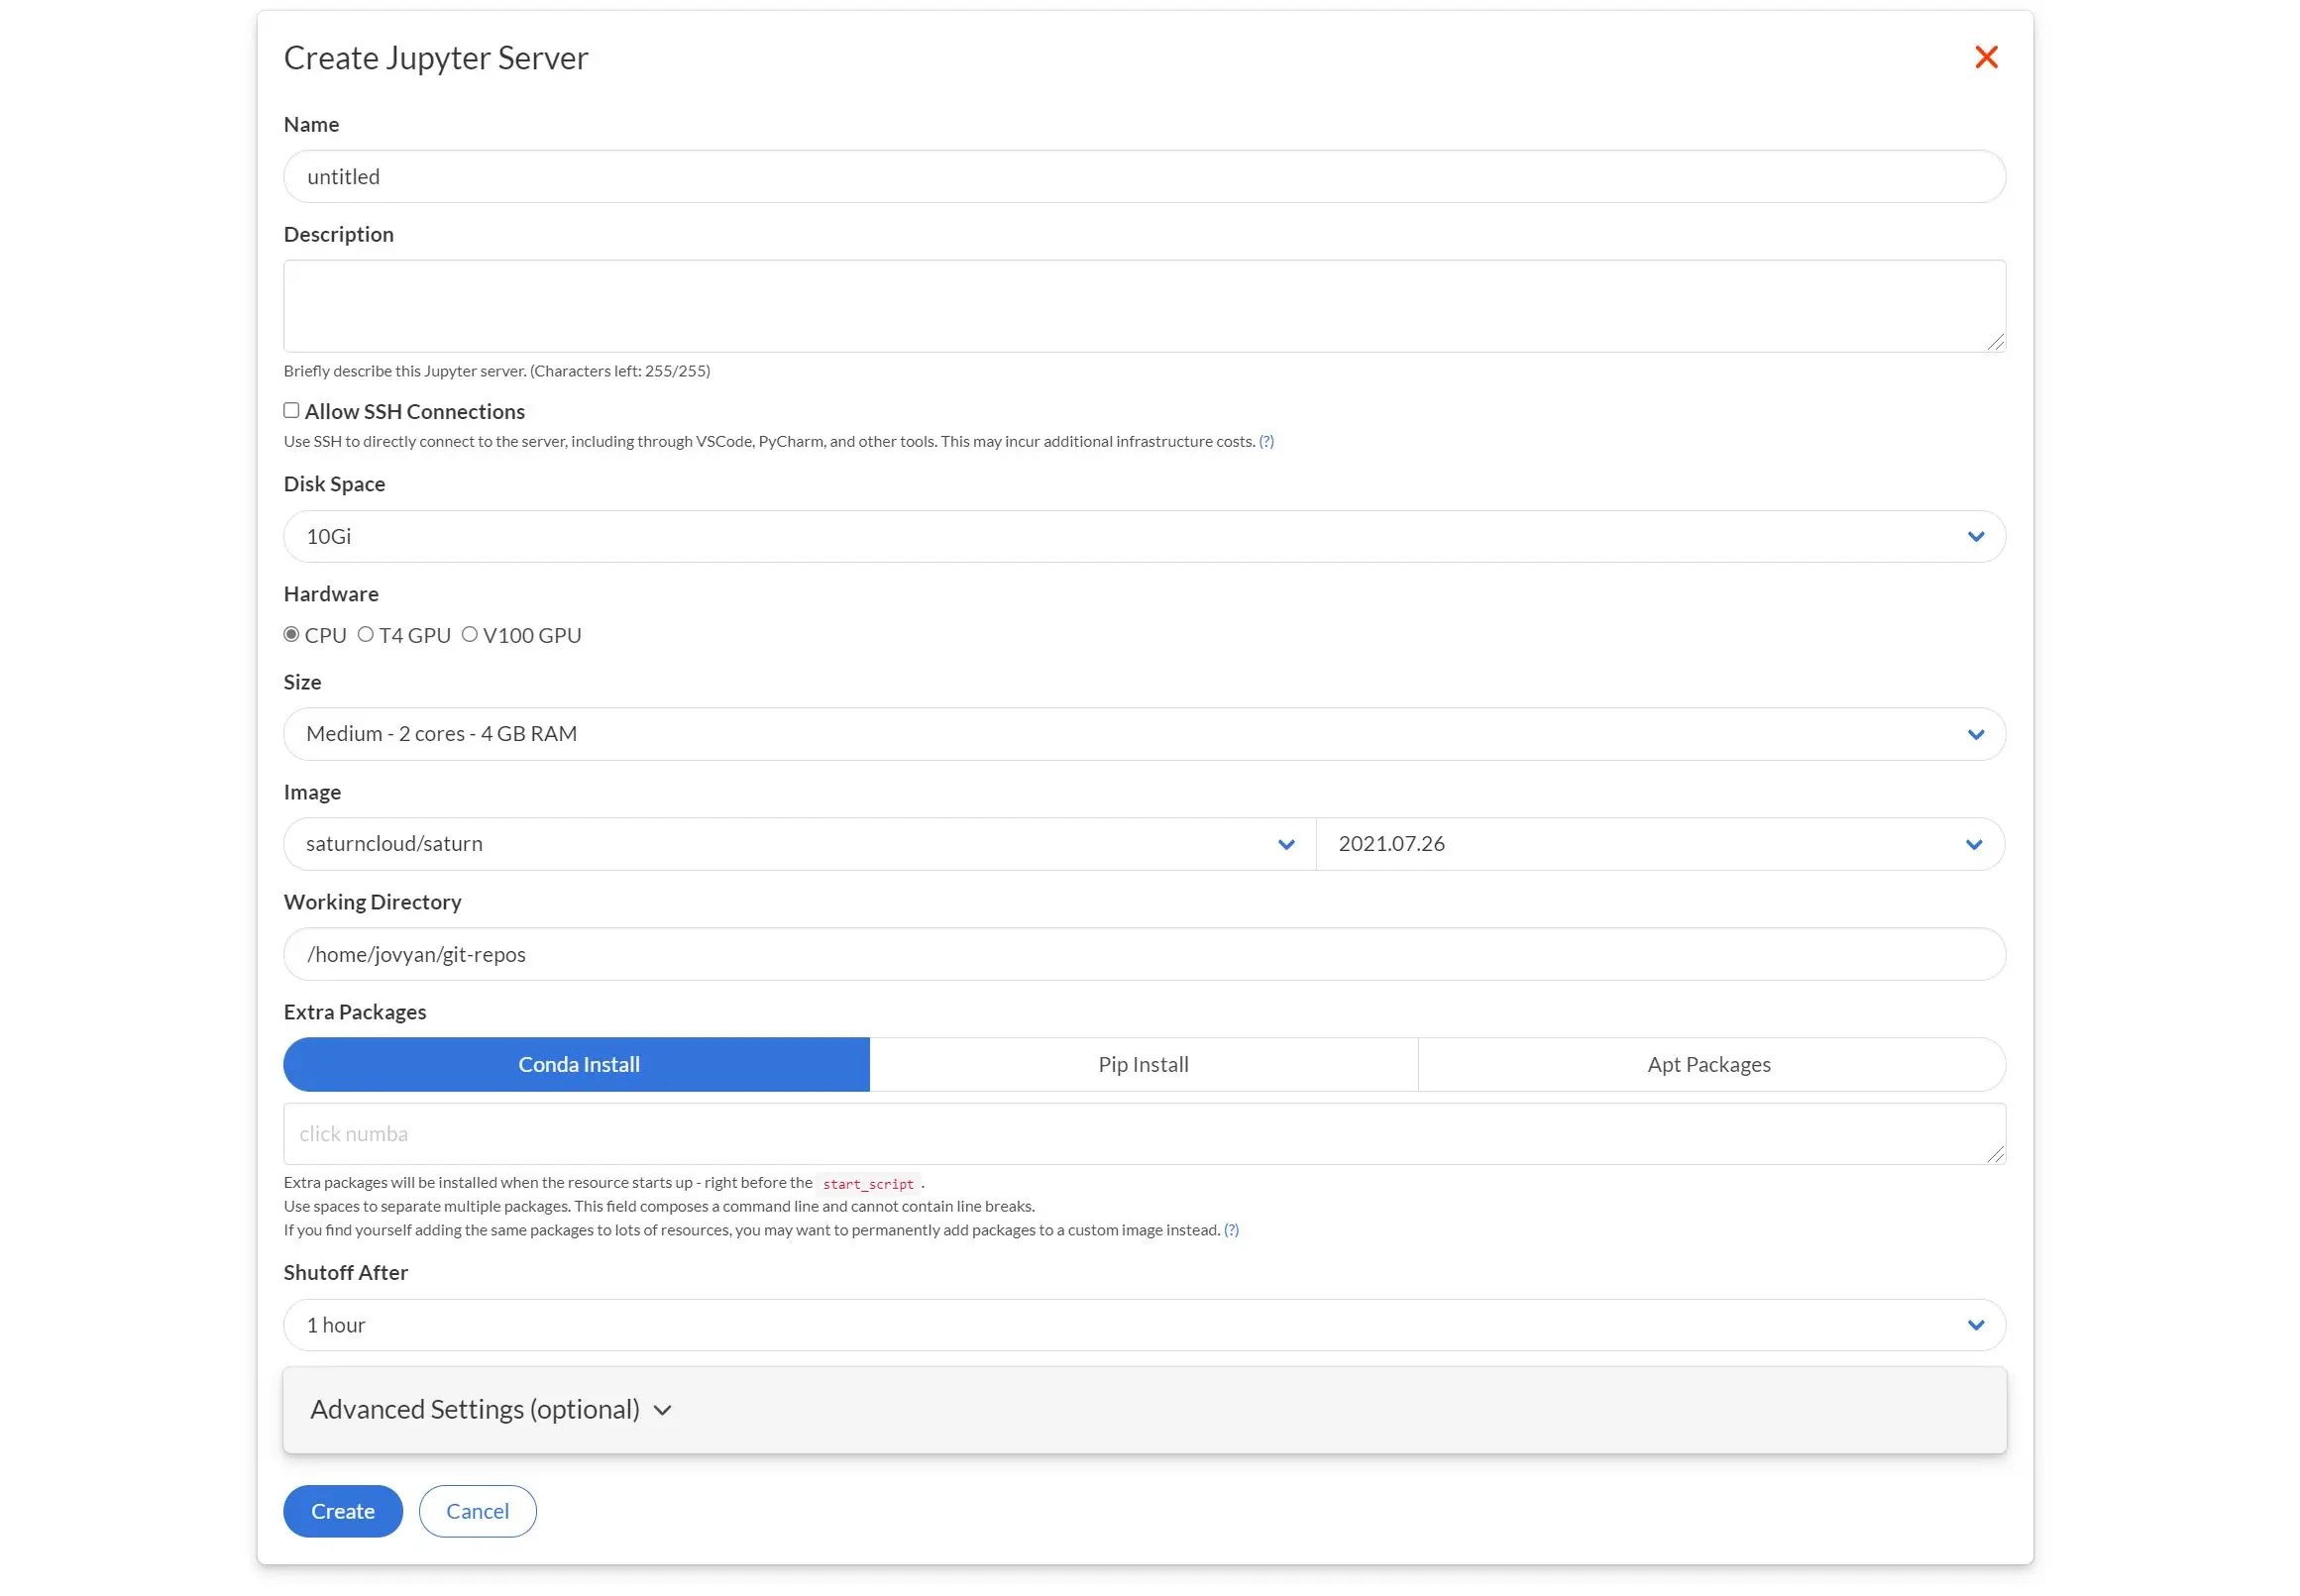
If you don’t have a Saturn Cloud account, go to saturncloud.io and click “Start For Free” on the upper right corner. It’ll ask you to create a login. Otherwise, log into Saturn Cloud. Once you have done so, you’ll be brought to the Saturn Cloud resources page. Click “New Jupyter Server”

Given the resource a name (ex: “external-connect-demo”), but you can leave all other settings as their defaults. In the future you may want to set a specific image or instance size which you can do from the resource page. Then click “Create”
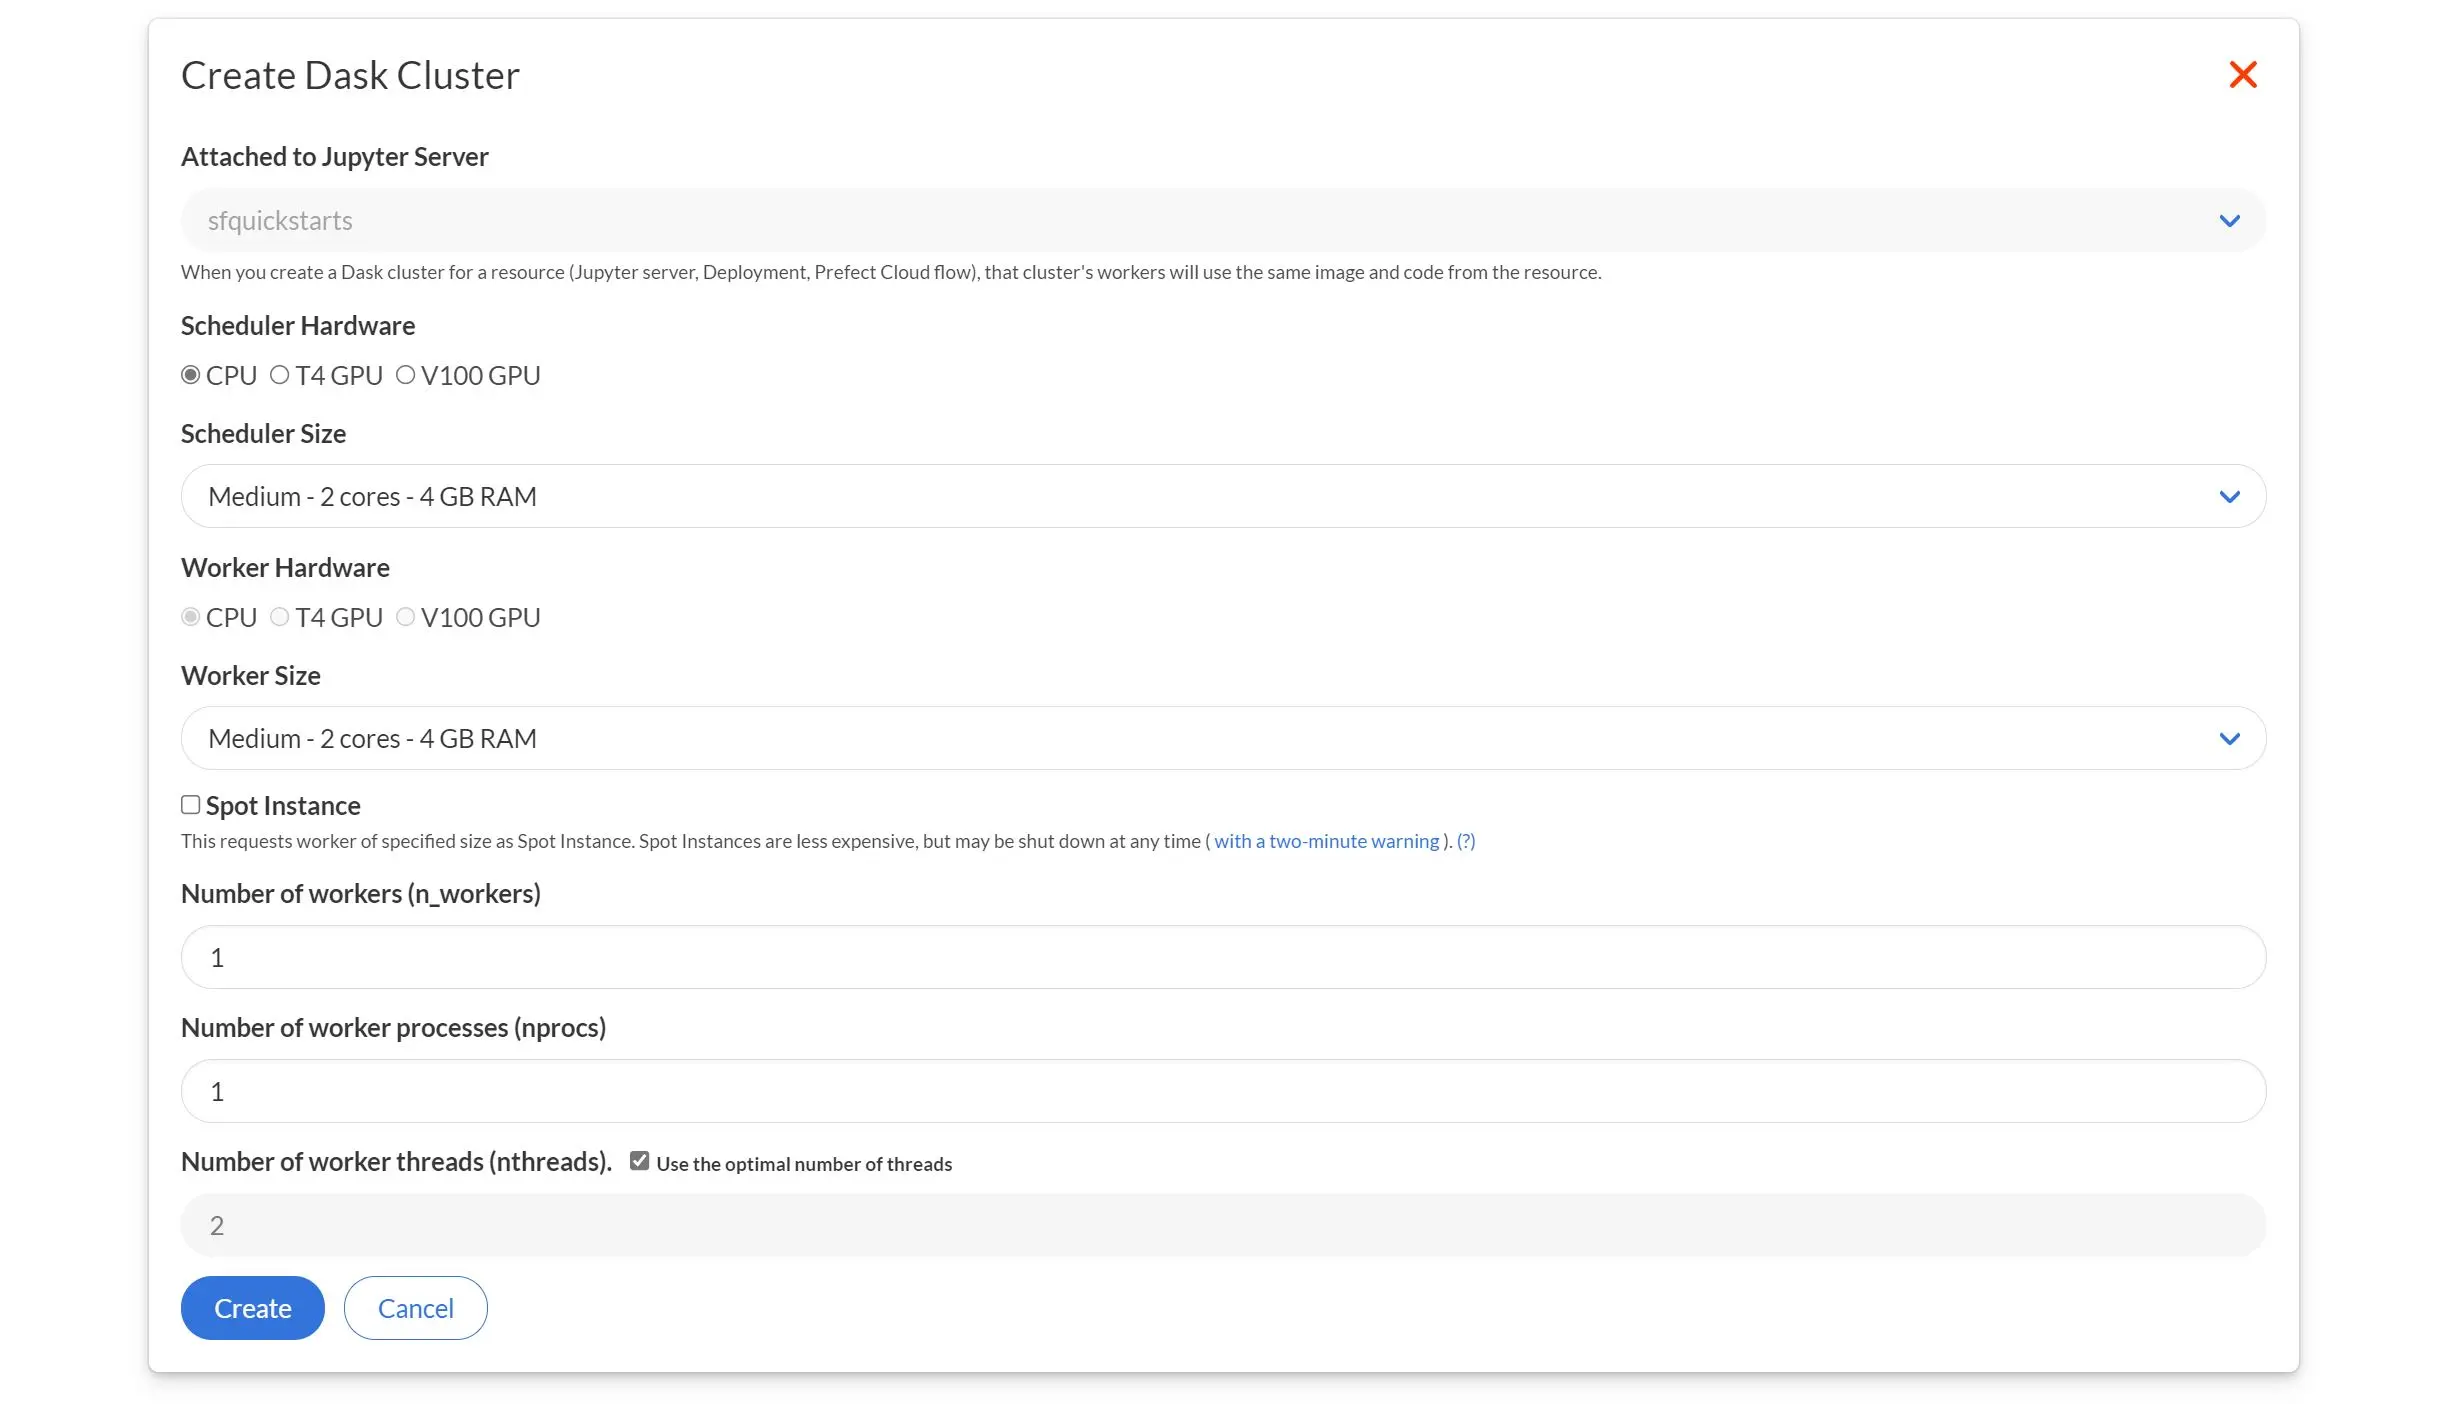
After the resource is created you’ll be brought the page for it. Next, we need to add a Dask cluster to this resource. Press the New Dask Cluster button, which will pop up a dialog for setting the Dask cluster. Choose the size each worker, the number of workers, and other options for the Dask cluster (see Create a Dask Cluster for details on those), then click Create.
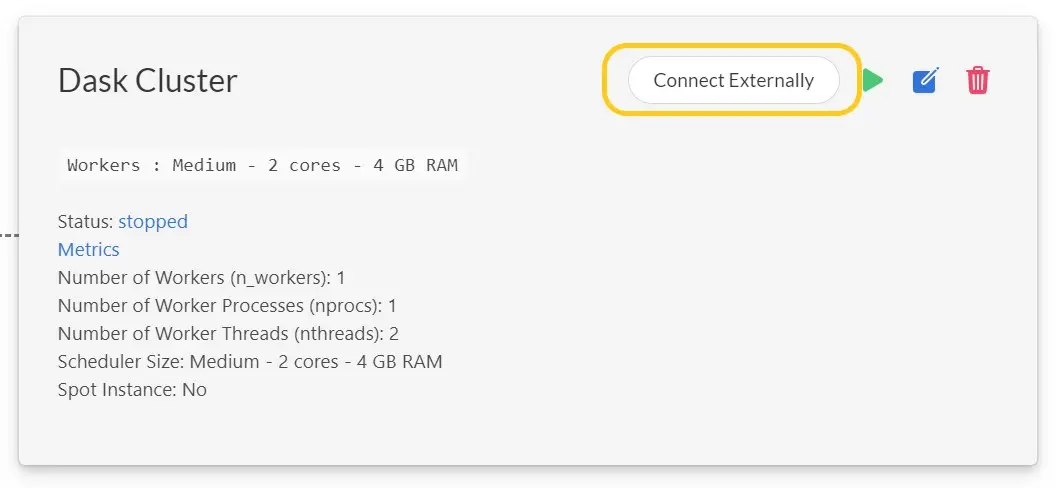
Once the Dask cluster is created you’ll see it has a Connect Externally button, which provides instructions for making the external connection.
First, ensure that the client connecting to the Dask cluster has the appropriate libraries, in particular the version of dask-saturn shown by the UI. You’ll also want to include dask and distributed, ideally with the same version as that in the cluster.
Next, set the SATURN_BASE_URL and SATURN_TOKEN environmental variables in the client machine to the values show in the dialog which let the system know which particular Saturn Cloud Dask cluster to connect to. For guidance on how to set environment variables, see our [environment variable documentation](https://saturncloud.io/docs/using-saturn-cloud/environment-variables/.
Finally, from within the client machine you can then connect to the Dask cluster from Python:
from dask_saturn import SaturnCluster
from dask.distributed import Client

cluster = SaturnCluster()
client = Client(cluster)
client
Run the chunk, and soon you’ll see lines like this:
#> INFO:dask-saturn:Starting cluster. Status: pending
This tells you that your cluster is starting up! Eventually you’ll see something like:
#> INFO:dask-saturn:{'tcp://10.0.23.16:43141': {'status': 'OK'}}
Which is informing you that your cluster is up and ready to use. Now you can interact with it just the same way you would from a Saturn Cloud Jupyter server. If you need help with that, please check out some of our tutorials, such as Training a Model with Scikit-learn and Dask, or the dask-saturn API.
And with that you’re now ready to use Dask from Azure! You can use Dask commands from your Azure notebook to have the Saturn Cloud cluster do computations for you. You can also monitor the cluster performance and schedule jobs and deployments from the Saturn Cloud app. Check out our getting started documentation for more guides, and consider whether our Saturn Hosted Free, Saturn Hosted Pro, or Enterprise plan is best for you!
You can also connect to Dask from SageMaker, Google Colab, or anywhere else outside of Saturn Cloud.
