This article was published when data science tooling like Dask and R was a primary focus for Saturn Cloud. Today, Saturn Cloud is the enterprise AI platform for any GPU infrastructure.
Introduction
As a data scientist, have you ever struggled with reproducing the results of your experiments and projects? Whether it’s due to differences in library versions or system configurations, the challenges of reproducibility can be a frustrating and time-consuming obstacle.
Imagine a scenario where you’ve developed your code in a Python 3.6 environment, but the production server is configured with Python 3.10. As the open-source world is constantly evolving, there may be functions that have been deprecated in newer versions of libraries. This can cause issues not only with your code breaking but also with your machine learning and deep learning models not performing as expected. And the worst part, these errors may go unnoticed and cause downstream problems.
But what if there was a solution that could alleviate these challenges and save you time and money in the long run? Enter Docker.
![]()
Figure 1: Docker Logo [Source: docker.com]
In this blog, we’ll dive into the fundamentals of Docker and explore how it can be used to streamline your workflows, improve reproducibility, and make your life as a data scientist a little bit easier.
What is Docker?
Docker is a powerful tool that allows us to containerize our applications, ensuring a consistent and reliable environment for development and deployment. By packaging and running our applications in a loosely isolated environment, Docker eliminates the possibility of differences between our development and production environments.
Some of the terms we should be familiar with -
Docker Container — A Docker Container is a standard unit of software that packages code and all its dependencies so that the application runs without any hiccups across multiple environments.
Docker Image — Docker images are the blueprint for creating containers. They are the recipe that defines the environment, libraries, and dependencies that a container needs to run. Once created, these images are immutable, meaning that all containers created from an image will be identical, ensuring consistency and predictability across different environments.
Dockerfile — A Dockerfile is a script that contains a series of instructions for building a Docker Image. It tells Docker how to set up the environment, install dependencies, and configure the application, allowing you to automate the process of creating a consistent and predictable image.
For data scientists, there are two broad use cases of Docker -
Run Only — A local IDE can be used for editing code and then a run executed inside a Docker Container.
End-to-End Platform — Both development and execution happen on the container itself.
Getting Started
Our very first Dockerfile [version 1.0.0]
Let’s say we want to install Python 3.9 with two of its libraries — pandas and numpy. This is how we are going to do it.
First, let’s create a requirements.txt file having the following text — numpy pandas
The Dockerfile has to specify which Python version to use, and how to install the two libraries. In this case, we choose to iteratively install using the requirements.txt file. The Dockerfile would then look like this —
FROM python:3.9
COPY requirements.txt /tmp
RUN pip install -r /tmp/requirements.txt
So what’s happening here?
The FROM statement instructs to fetch the Python 3.9 image from DockerHub
The requirements.txt file is copied from our local directory to the /tmp directory using the COPY statement
Then we execute a bash command for installing via pip using the RUN statement
To create an image, we would have to build it using the command —
docker build . -t docker-for-ds:1.0.0
where docker-for-ds is the image name and 1.0.0 is the version identifier. When running the command, the output should look something like this —
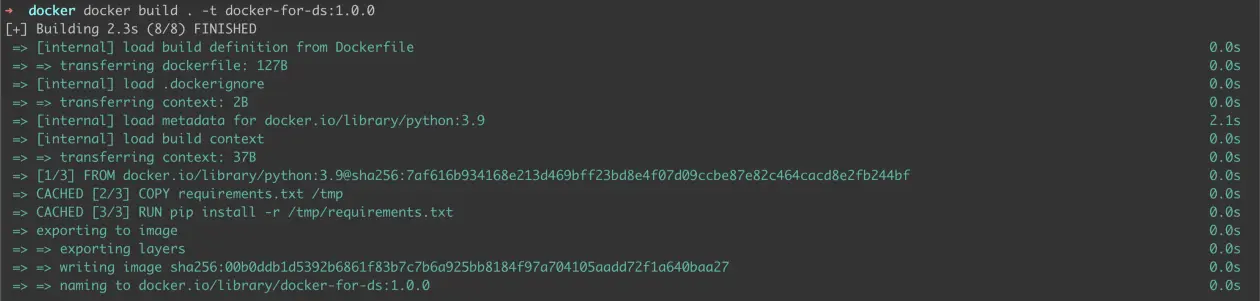
Figure 2: Building 1.0.0 image
To check the list of images that we have created, we can run the following command —
docker image list

Figure 3: List of images
Remember we had installed two libraries? We are going to check if they were actually installed. To run a command on the Docker image, we are going to use the following —
docker run <DOCKER-IMAGE-NAME>:<VERSION> <BASH-COMMAND>

Figure 4: Checking installed Python version and list of packages installed using pip
We successfully checked that the Python version installed is actually 3.9 as described in the Dockerfile and that pandas and numpy have been installed using pip.
Updating our Dockerfile [version 1.0.1]
Making changes to a Docker image is super easy. A Dockerfile need not be static and can be version controlled. Say we are to make the following changes —
- Adding a runnable Python script called test.py
- Creating a directory called documents and populating it with a non-empty text file called file.txt
FROM python:3.9
COPY requirements.txt /tmp
RUN cp test.py /tmp/

RUN pip install -r /tmp/requirements.txt
RUN mkdir documents
RUN touch documents/file.txt
RUN echo 'Hello World' >> documents/file.txt
We are going to use the following Python script —
import numpy as np
print("Running a simple Python Script")
list = [i for i in range(10)]
print(list, type(list), type(np.array(list)))
Voila! We have all the necessary components to update our Docker image to version 1.0.1. Let’s build it.
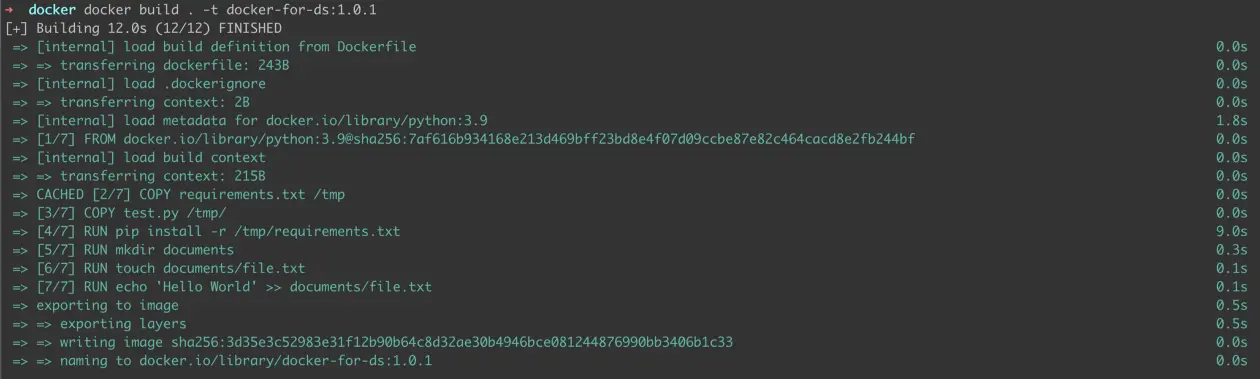
Figure 5: Building 1.0.1 image
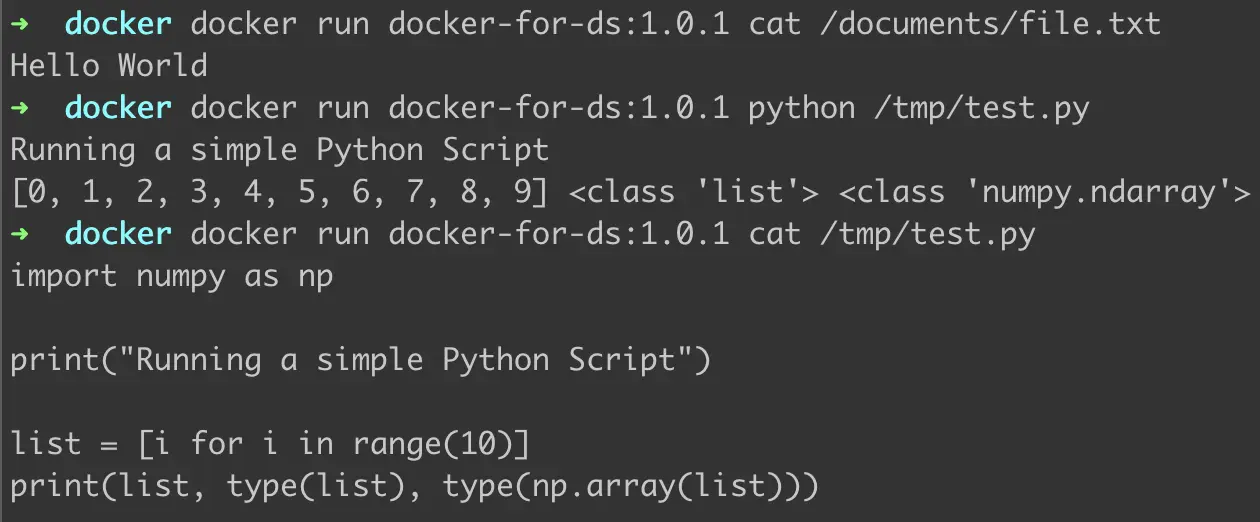
Figure 6: Verifying updations to Dockerfile
We run the commands as demonstrated in Figure 6. As we can see —
- The directory and file inside it were created and the text “Hello World” was successfully added to the file.
- The test.py ran with no errors and produced the expected output. Numpy was imported correctly inside test.py and as directed in the script was able to change the type of string to NumPy array.
- The code inside test.py is as displayed.
Accessing data from external sources
Say you already have a data folder in your local machine that you’d like to use. This is where volumes and mounting come into the picture.
This is what the local data folder looks like -
data
|- iris.data
|- file.txt
To access this we have to first mount it to our docker-for-ds version 1.0.0 container. We will also check the contents using the ls command on the tmp directory inside the docker container.
docker run -it -v $(pwd)/data:/tmp/data docker-for-ds:1.0.0 ls /tmp

Figure 7: mounting local data folder [part 1]
On running the above command we see that a data directory is visible along with the already present requriements.txt file that was copied as per the Dockerfile. Does the data directory have the 2 files which were present locally?

Figure 8: mounting local data folder [part 2]
Yes! We are able to access the data files now.
Also, it is worth noting that this mount is not read-only. In other words, any changes we make to the data directory on the Docker container would also sync with the local data directory. To demonstrate this, we are going to remove file.txt from Docker and then check its effect on our local directory.

*Figure 9: Making changes to the mounted data directory *
As we can see, after running the docker command, the local data folder has no file.txt.
Managing Docker Images
We have made 3 versions for docker-for-ds. Let’s see if the list contains all three.
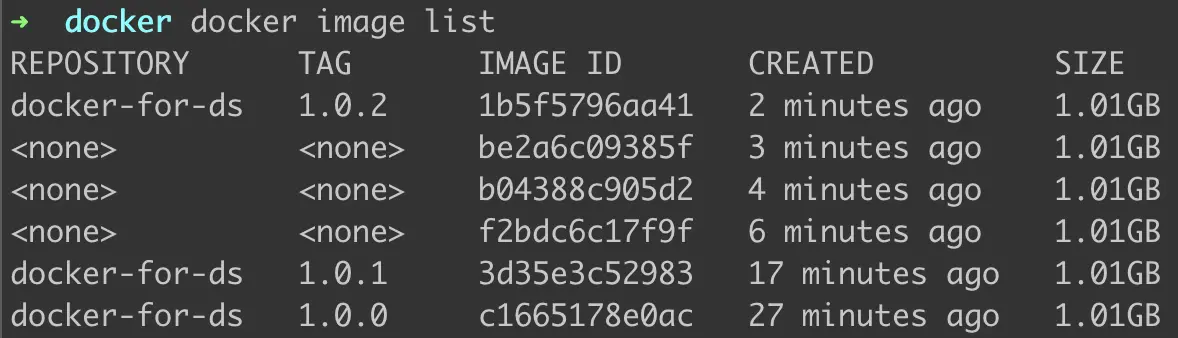
Figure 10: Yes, it does.
Please note —
- Creating new versions doesn’t overwrite the old versions and can still be accessed separately
- If the Name and Tag when building already exists, it would overwrite the image with the same identifier combination.
To stop and remove containers from the list, we use the command -
docker image rm -f <IMAGE-ID>
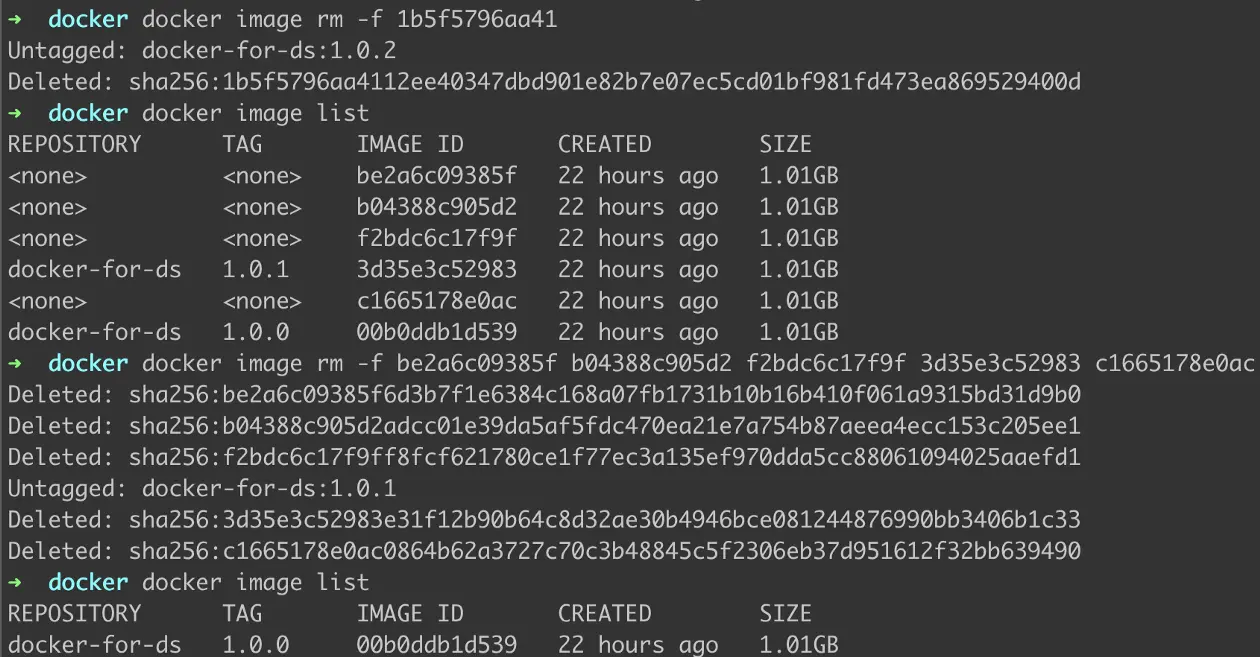
Figure 11: Removing Containers
As demonstrated in Figure 10, we can either remove multiple containers using their IMAGE ID.
Conclusion
This blog was a quick introduction to how as Data Scientists we can work with Docker. Hope this was helpful in motivating you to dive deeper into what Docker has to offer.
Additional Resources:
[How to Build Custom Docker Images For AWS SageMaker](https://saturncloud.io/blog/how-to-build-custom-docker-images-for-aws-sagemaker/)
[List: How to Set Up JupyterHub on AWS](https://saturncloud.io/blog/how-to-setup-jupyterhub-on-aws/)
How to Set up JupyterHub Authentication with Azure Active Directory(AD)


