This article was published when data science tooling like Dask and R was a primary focus for Saturn Cloud. Today, Saturn Cloud is the enterprise AI platform for any GPU infrastructure.
Saturn Cloud provides customizable, ready-to-use cloud environments
for collaborative data teams.
Try Saturn Cloud and join thousands of users moving to the cloud without having to switch tools.
Introduction
Imagine a data science team at a large beverage company that is working on a new project that involves machine maintenance prediction. The team includes researchers, data analysts, and machine learning engineers who are collaborating on a large dataset of logs from a machine.
The team will need a secure, cloud-based platform where they can store, organize, retrieve and collaborate on a dataset, while also keeping track of versions and access control.
In this scenario, Box could be an ideal solution for the data science team. They could create a shared folder on Box where they could store the dataset and associated code, allowing team members to access and work on the files from anywhere. The team could set up data versioning and access controls on the folder to ensure that all changes are tracked and that only authorized team members can access the data.
Box supports integration with a wide range of tools and platforms, including Jupyter notebooks and RStudio, which would allow the team to work with their preferred tools. Using Box cloud allows data science teams to collaborate effectively, securely, and efficiently on their machine maintenance prediction project.
Additionally, It also has a Python SDK that allows developers to interact with the Box API, which enables them to perform various operations on their files and folders programmatically. Integrating Box with JupyterHub using the Box Python SDK can provide a powerful combination of cloud storage and data science tools. In this article, we will explore how to integrate Box with JupyterHub using the Box Python SDK.
Requirements
Here’s what you’ll need in order to proceed:
Step 1: Set up a Box Application
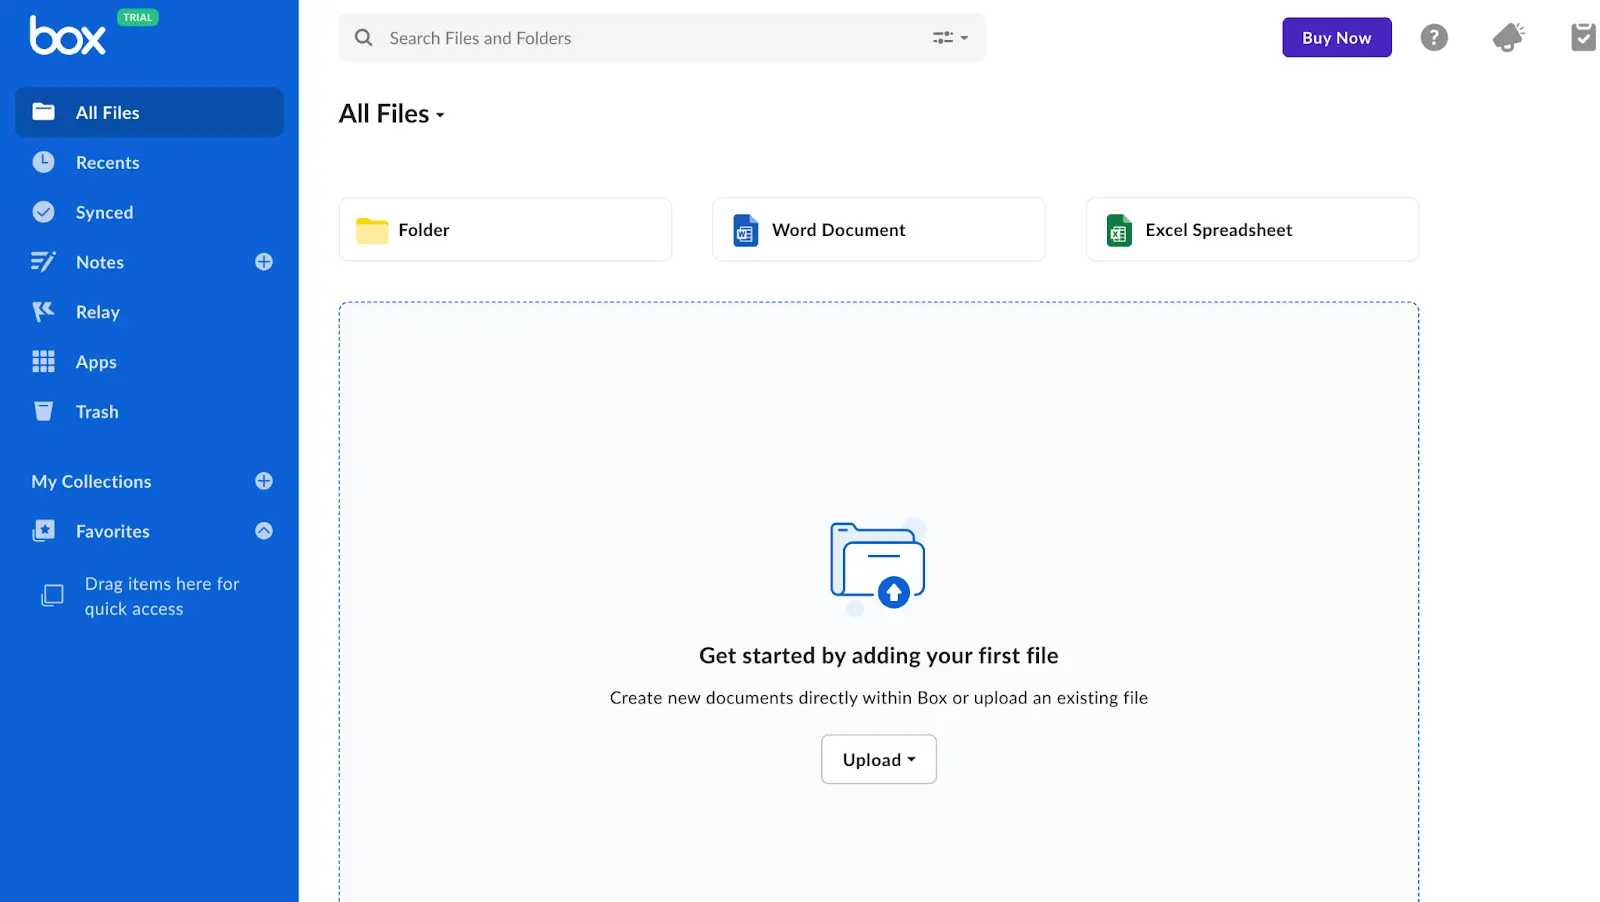
- Log in to your Box account and you can access your developer account by clicking on the Dev Console button. Alternatively, you may sign up for a developer account or navigate to your dev console here.
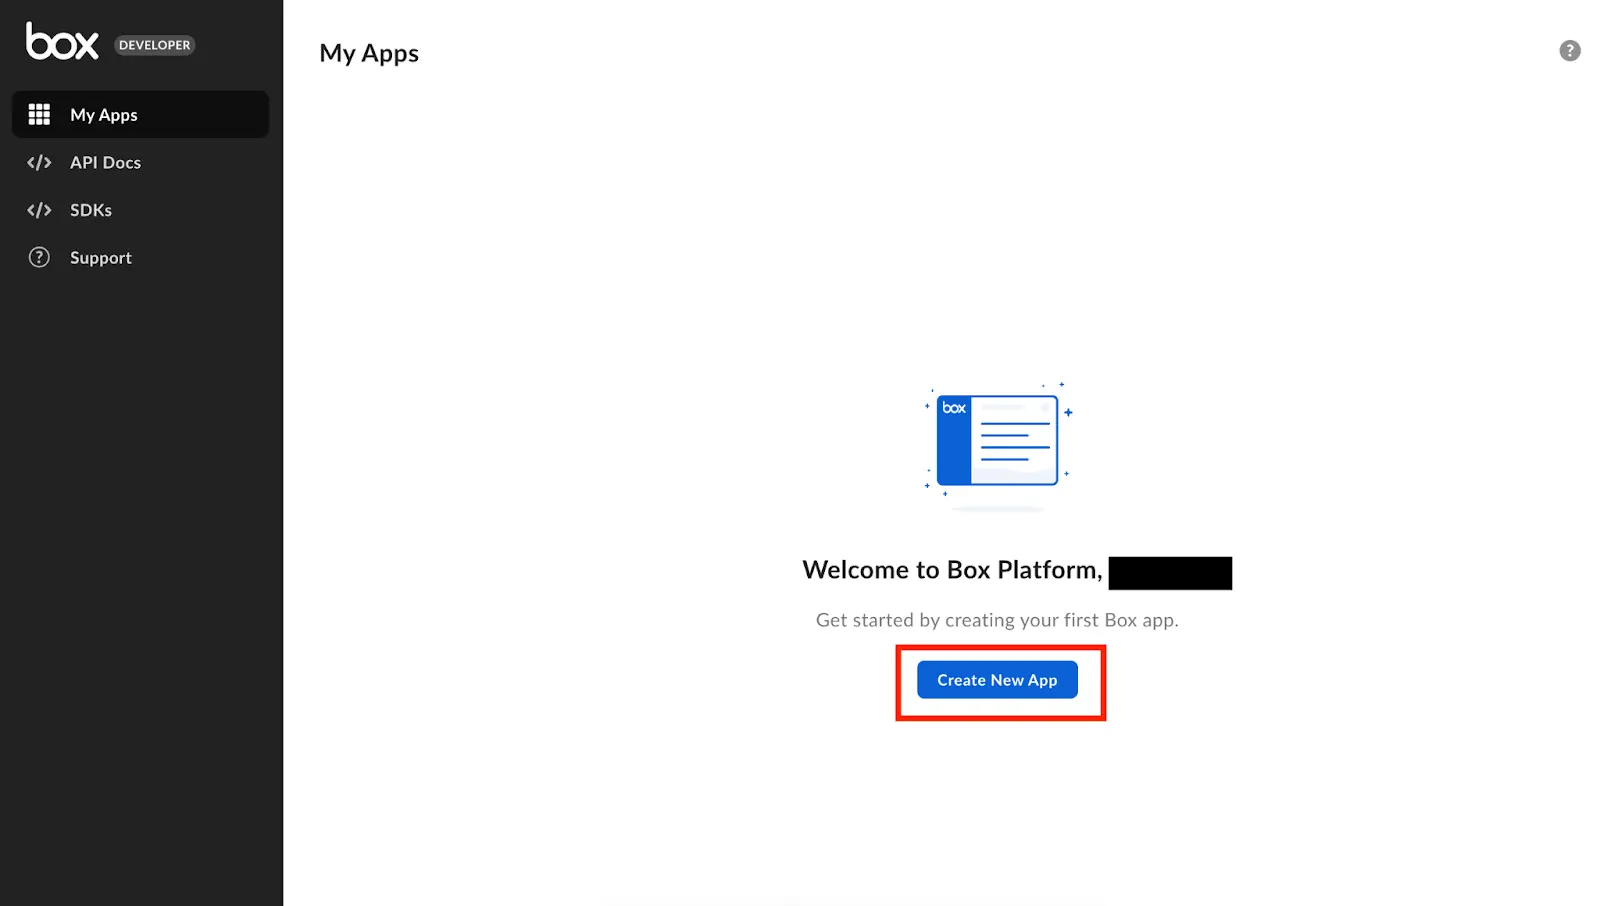
- On the Box developer console, navigate to My Apps and click Create New App.
- Select Custom App and then select an appropriate Authentication Method. We will be going with the third option which is Server Authentication (Client Credentials Grant), enter a name for the application and click on Create App.
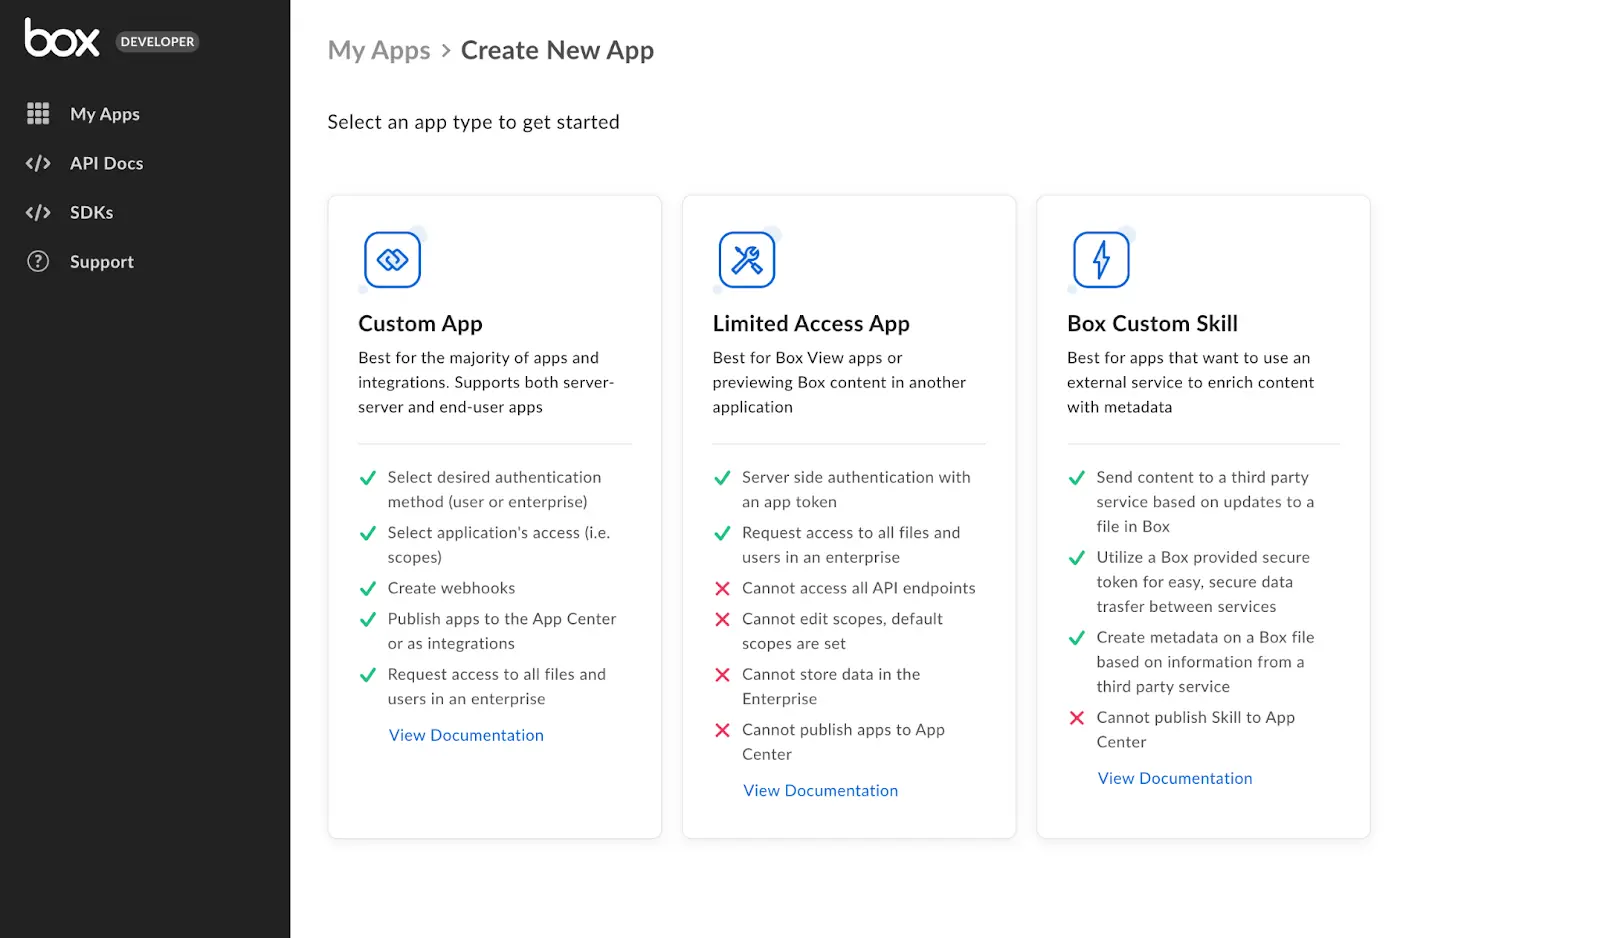
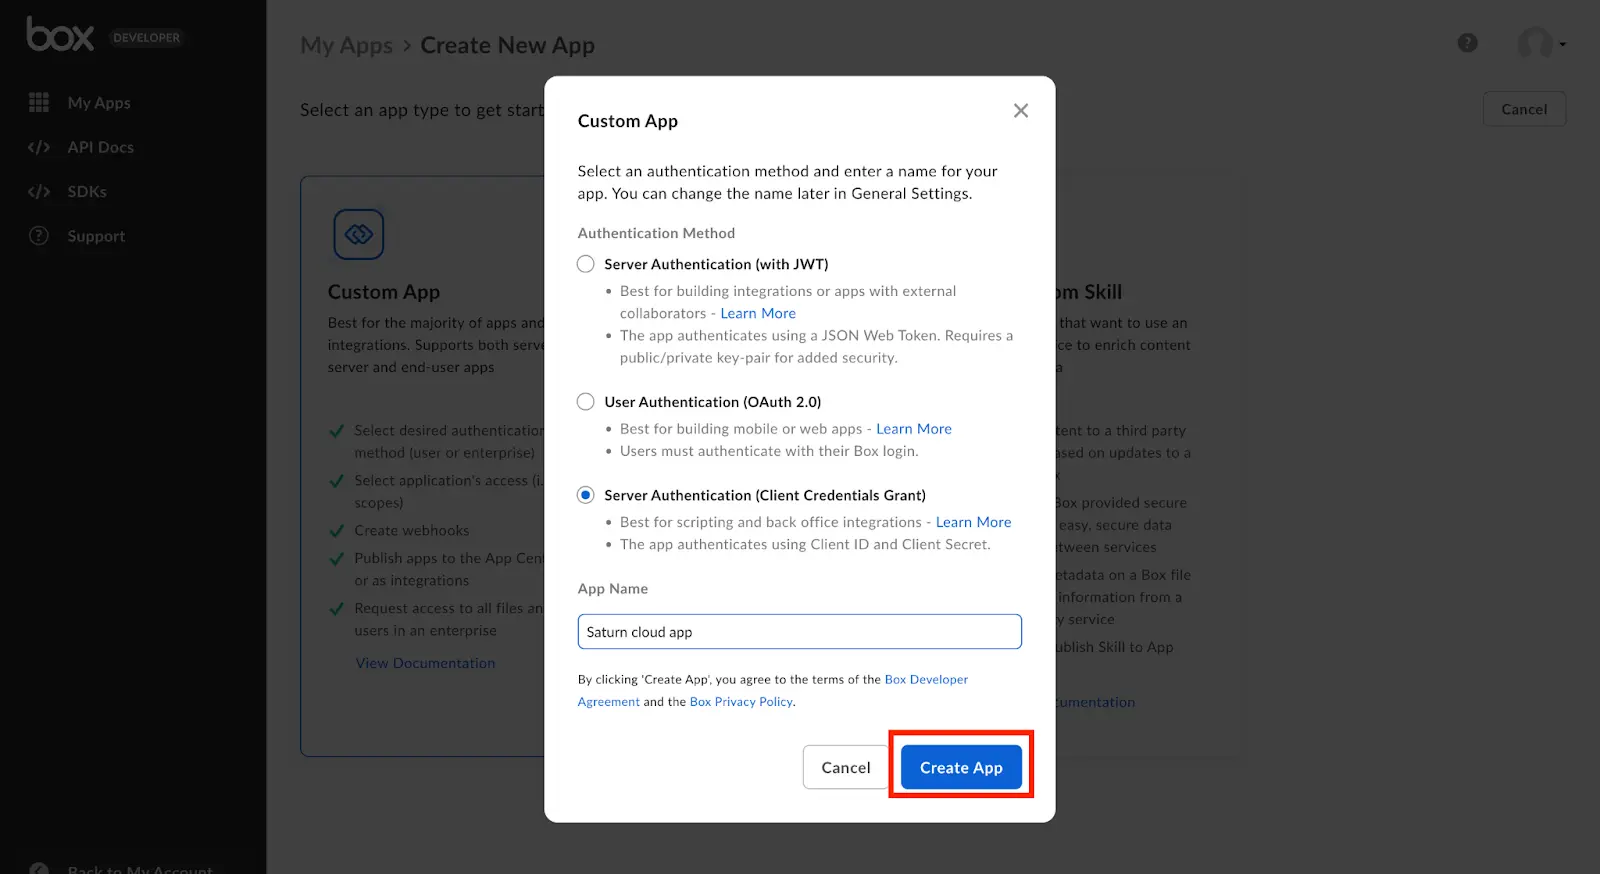
NOTE: There are different ways of authenticating with Box including.
Server Authentication(Client credential grant)— The client ID and client secret of the application are used to validate identity.
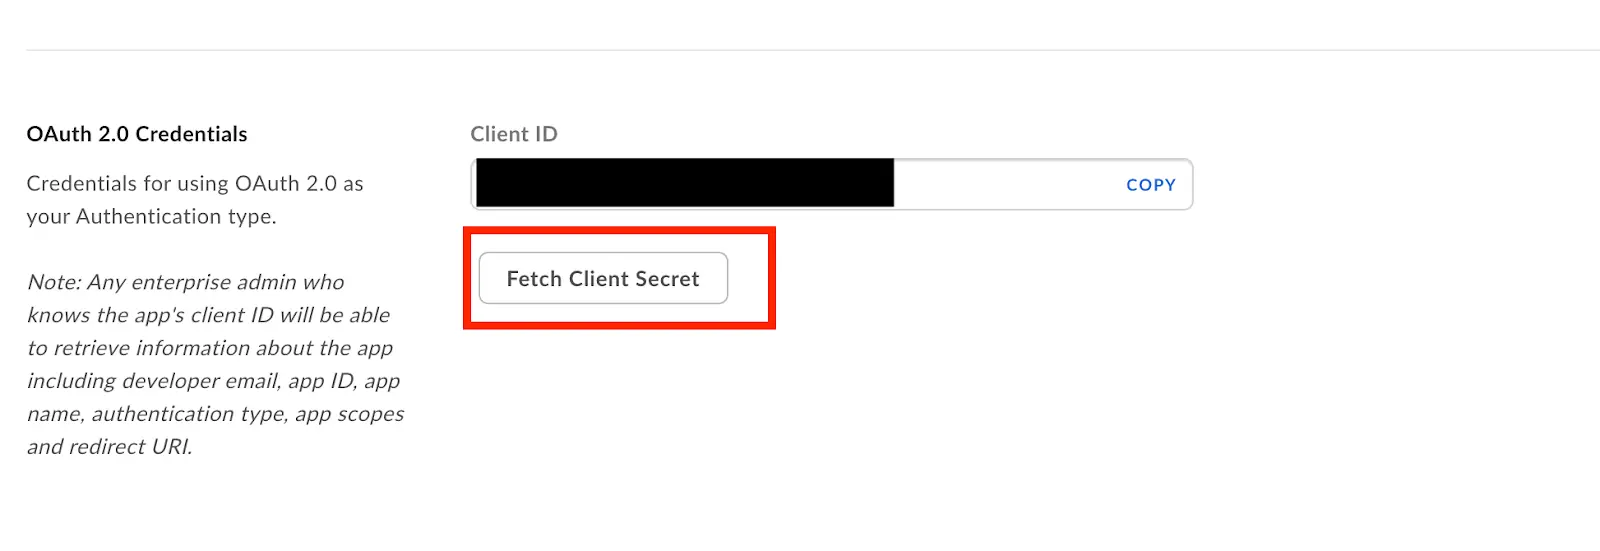
You will be taken to the Configuration tab where there are different sections.
In the OAuth 2.0 Credentials Section take note of your Client ID and click on Fetch Client Secret. Copy this Client ID and Client Secret and paste them in a safe place for later use.
From the General Settings, also copy the Enterprise ID (Box Subject ID).
You will be required to enable two-factor authentication on your box account for viewing and copying the application’s client secret.
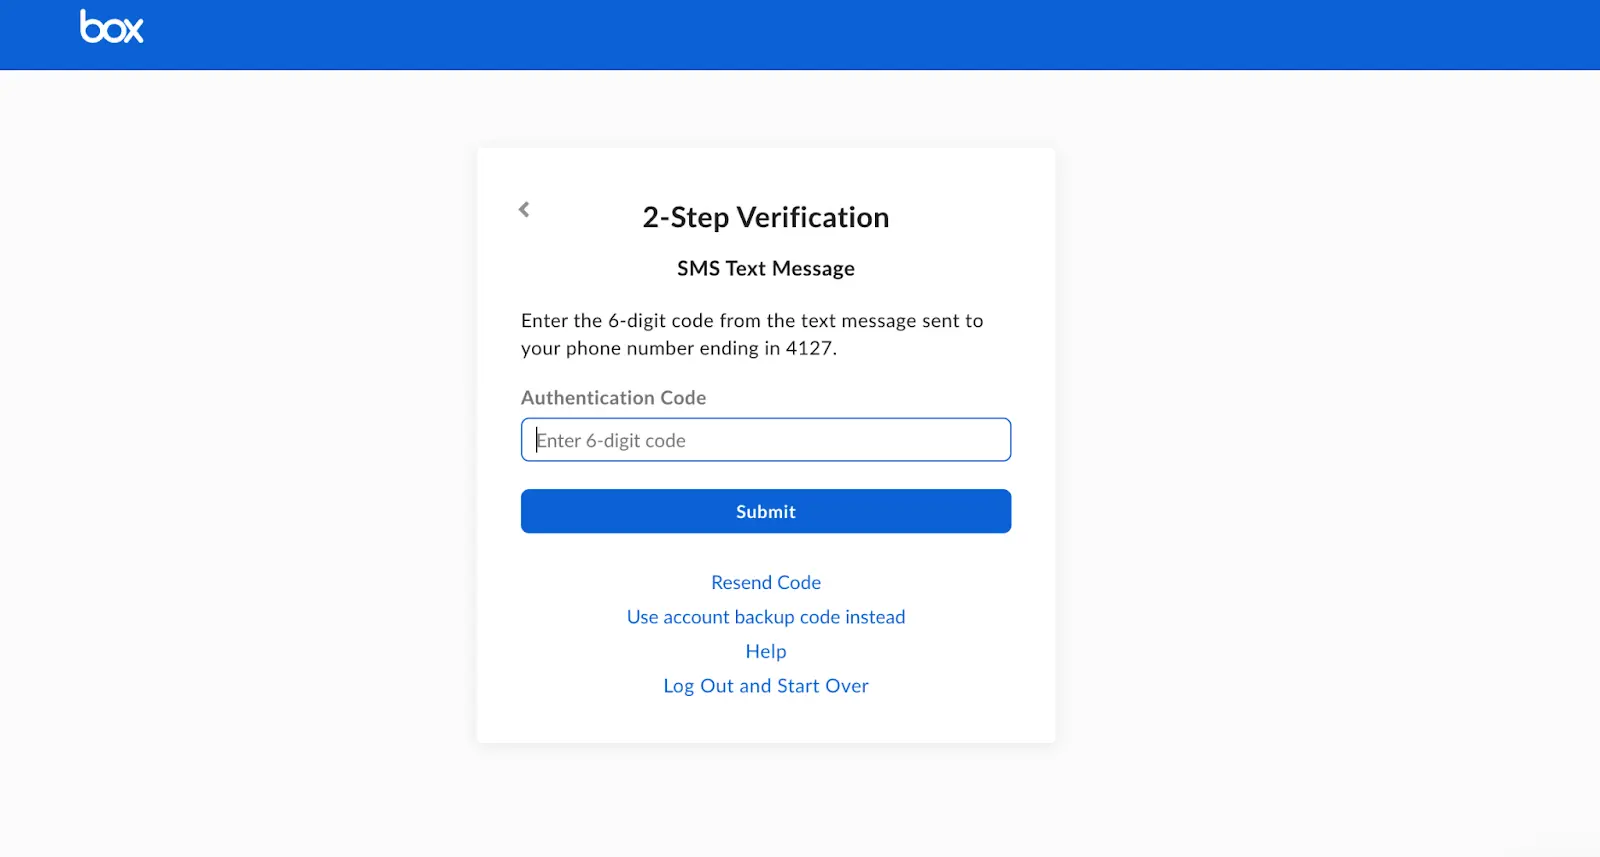
To enable it, go to Account Settings > Account > Click on the Set up button in the 2-step Verification section > Select the means of Verification you want (Authenticator App, SMS, Email) and click Next
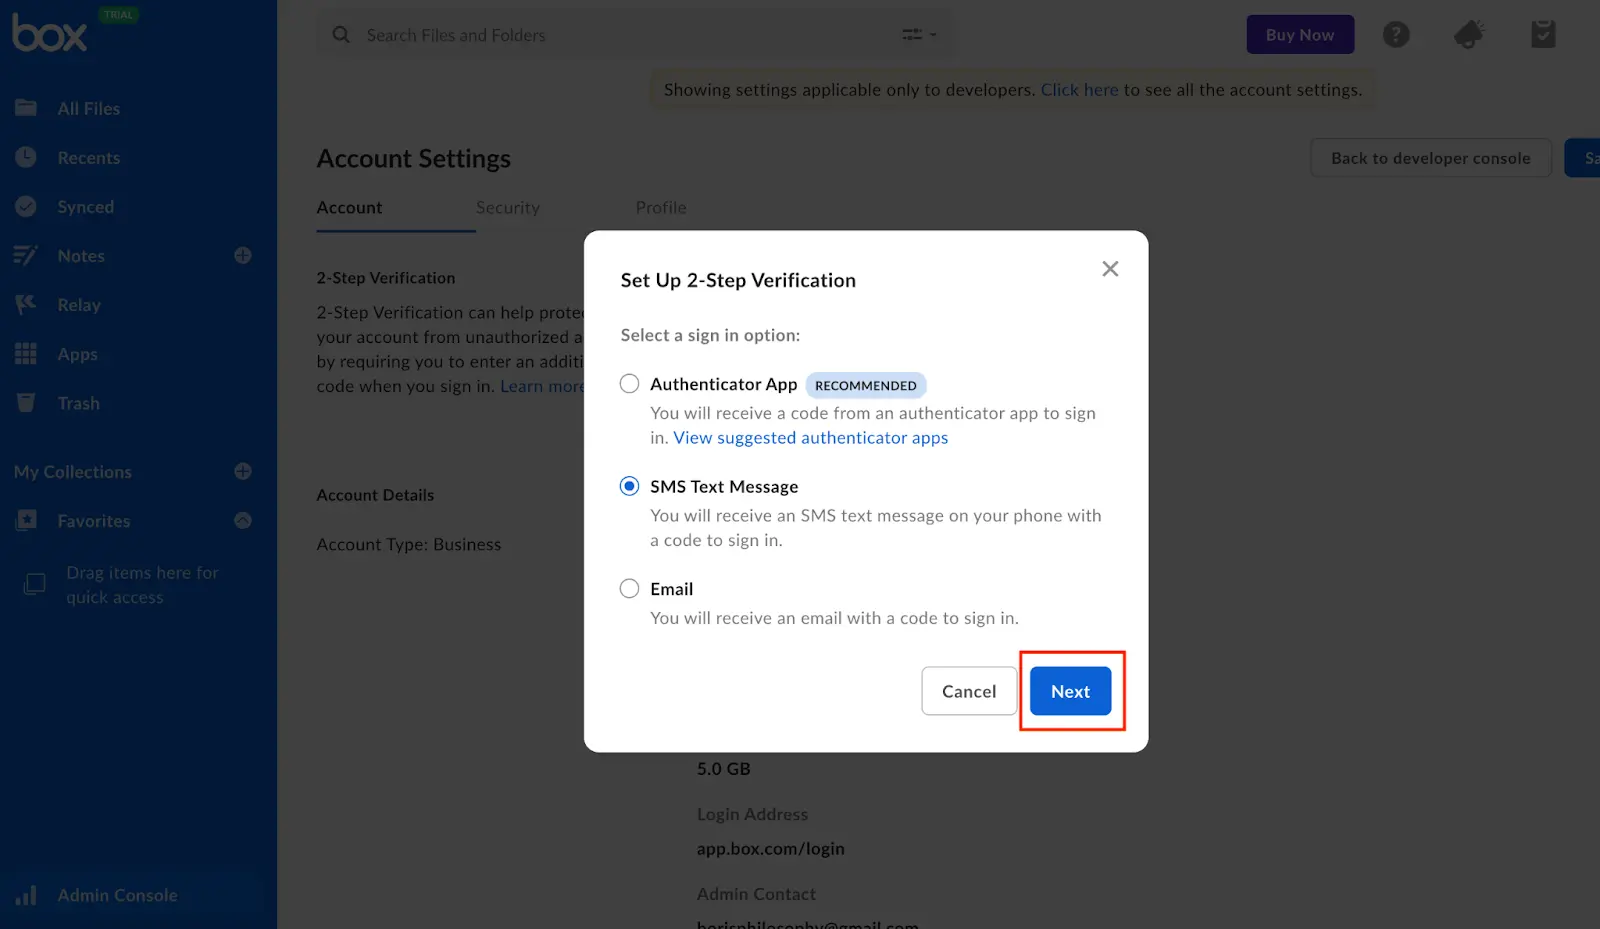
After enabling the 2FA, click on the Fetch client Secret button again and put in the authentication code when you are redirected to a new page.
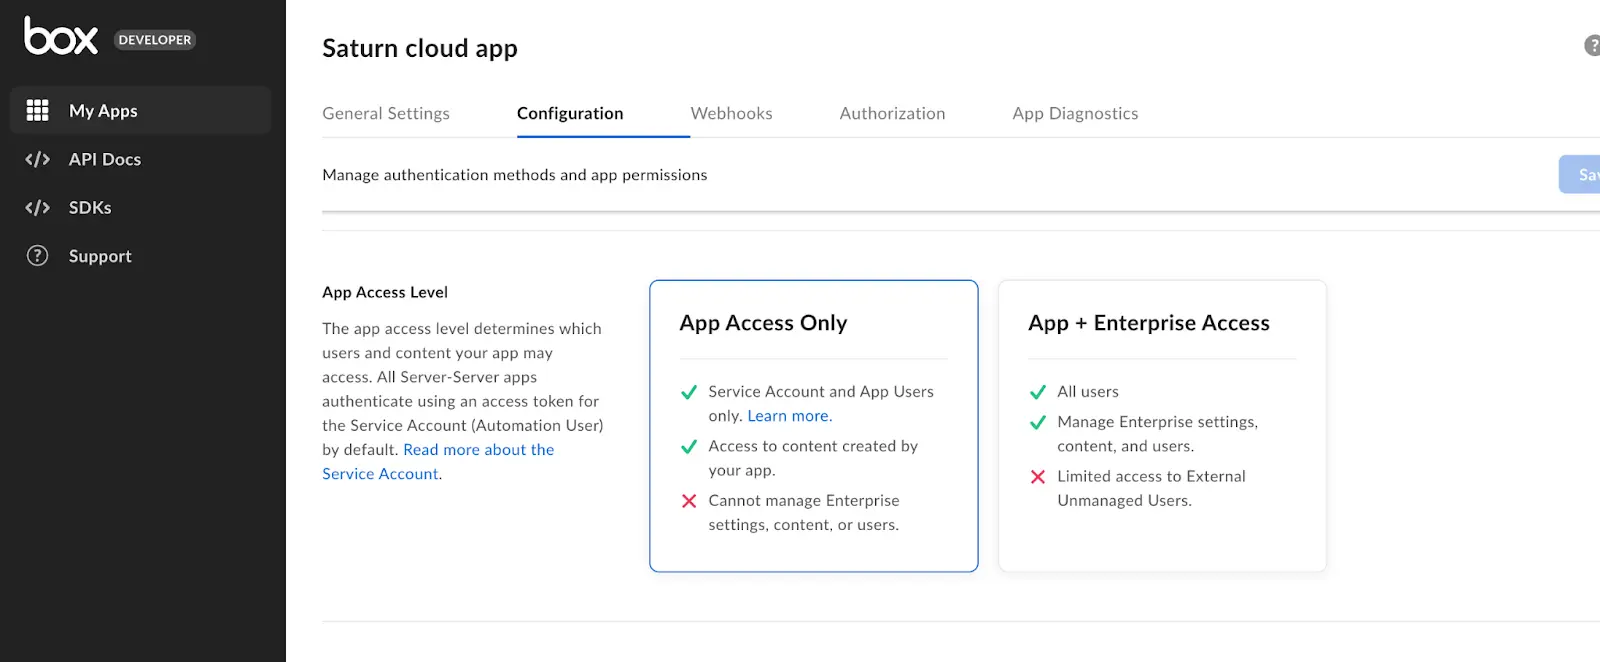
- In the next section, you will have to select the App Access Level, we will be going with App Access Only
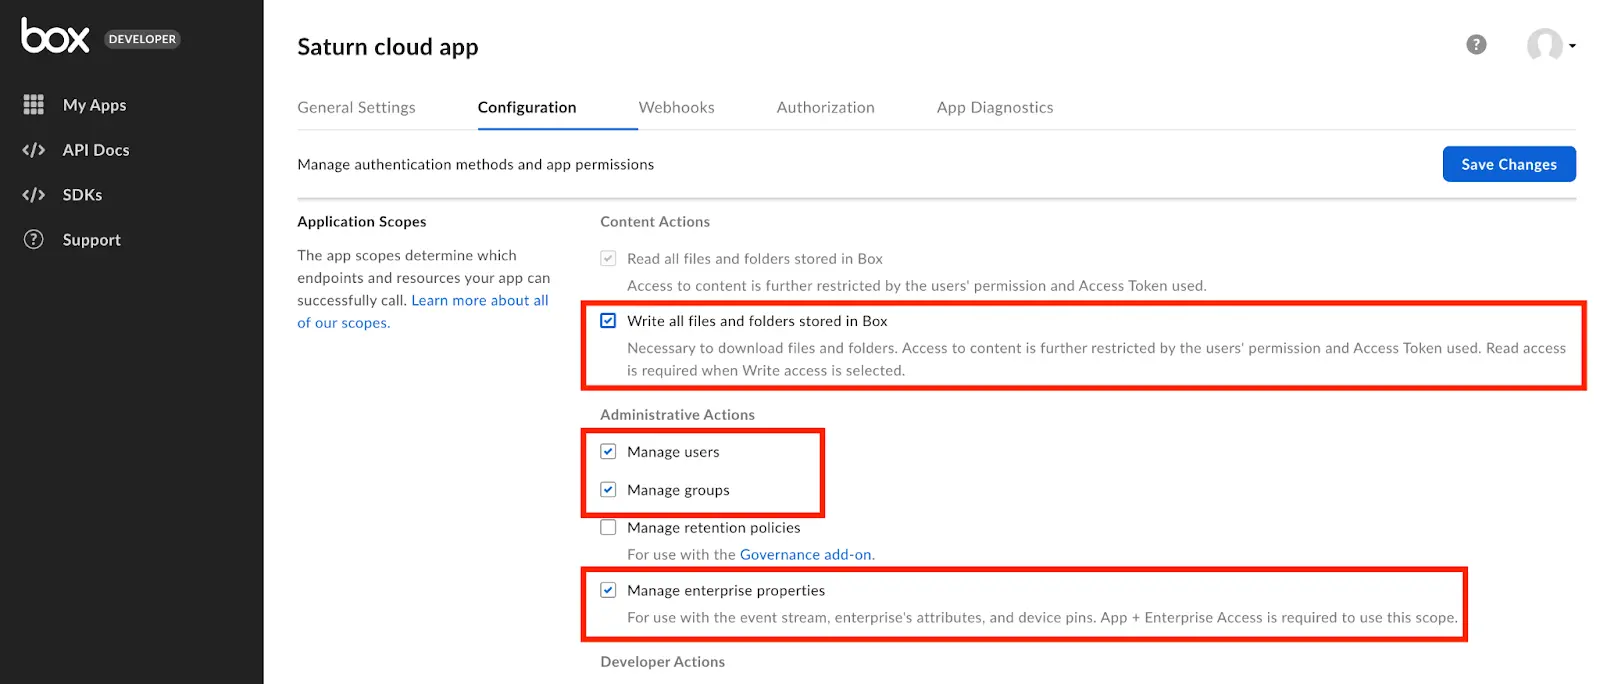
- Application Scopes -An application’s scopes determine which endpoints and resources an application can successfully call. Depending on the granted scopes, an application’s Service Account may have the ability to perform Admin actions.
Please make sure you have enabled Write All files and folders stored in Box and any other permissions that may be needed by the application.
Leave the options in the Advanced Features and CORS Domains as default and click on Save Changes.
- Next, the App needs to be submitted to be authorized by the Admin. Go to the Authorization tab and click on Review and Submit, provide an app description, and then click Submit. An authorization email will be sent to the Box admin for approval.

Step 2: Authorize the Application
The Application will have to be verified by the Admin on the Admin Console before it can be used.
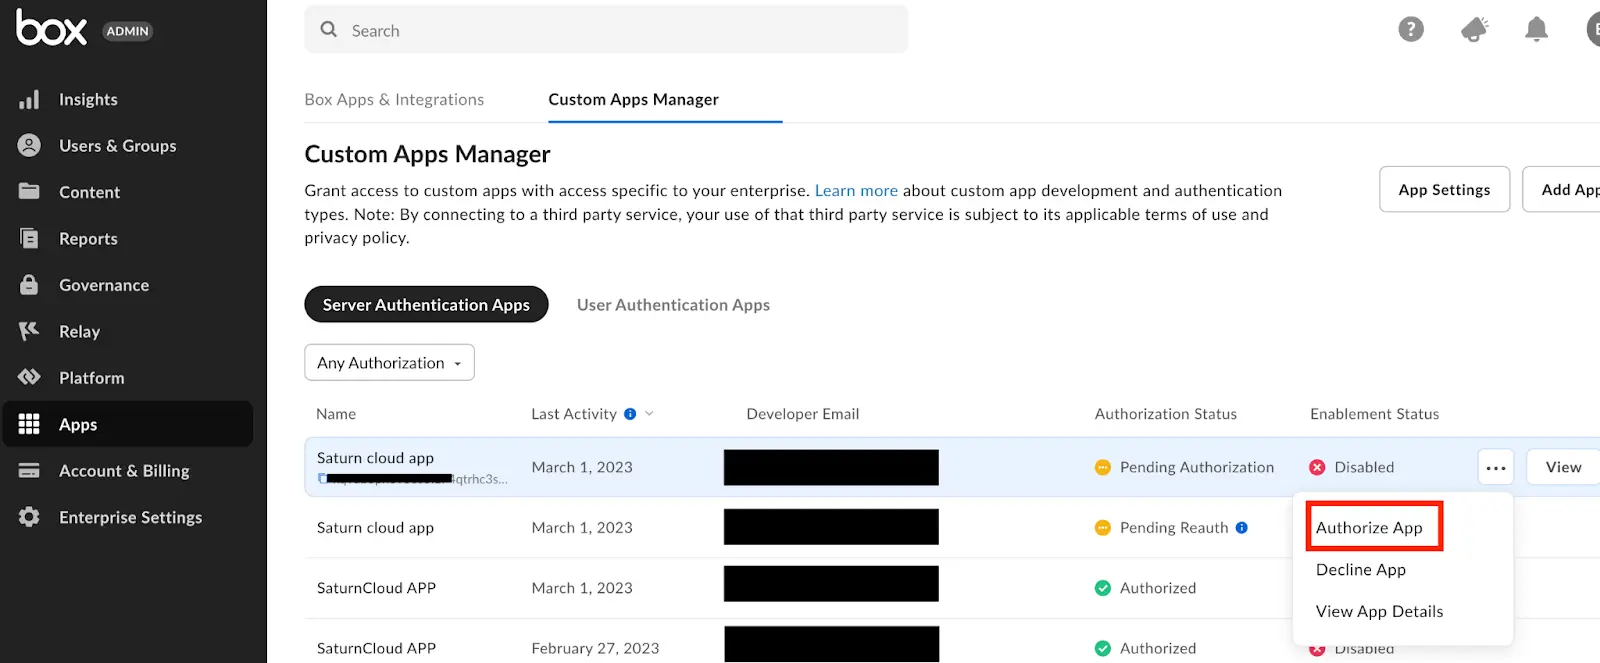
From the authorization email, click the Review App Details link, which will redirect you to the Custom Apps Manager tab, click on the tree button menu beside it, and Authorize App.
Or on the Admin Console go to Apps > Custom Apps Manager > Authorize App.
Now we have authorized our app, we can go ahead to access our box content from Jupyterhub.
Note: You will need to Reauthorize the application each time changes are made in order to see the effects.
Step 3: Setting up Jupyterhub on Kubernetes
First, we have to set up JupyterHub on AWS EKS.
Follow the link below and skip to the Kubernetes section:
Setting up JupyterHub on AWS | Saturn Cloud Blog
We will have to store the Client secret as Kubernetes secret, you can also decide to store the Client ID and Enterprise ID as secrets too. Run the following commands on your terminal to create the Kubernetes secret.
$ kubectl create secret generic box_client_secret --from-literal=client_secret=<YOUR_CLIENT_SECRET_HERE>
Replace YOUR_CLIENT_SECRET_HERE with the actual value of your client secret.
The --from-literal option tells kubectl to create a secret with the specified key and value. In this case, the key is client_secret and the value is your actual client secret.
Open your Jupyterhub configuration file
$ sudo nano <your yaml configuration file>
Make the changes to your configuration file under singleuser key in your Jupyterhub configuration file
Singleuser:
     extraEnv:{}

# substitute the code above with the code below
singleuser:
extraEnv:
  BOX_CLIENT_SECRET:
    valueFrom:
      secretKeyRef:
        name: <secret name e.g box_client_secret>
        key: <secret key e.g client_secret>
Note: When a notebook is created for each user, the environment variable will be accessible to the users.
You can use the command below to forward the service port so that you can access the Jupyterhub application on your browser with the address localhost:8080
$ kubectl --namespace=default port-forward service/proxy-public 8080:http
Step 4: Authenticate with Box using the Client Credentials Grant
Now that we have created a Box application we can authenticate with Box using the client credentials grant.
- Install the Box Python SDK. You can install it using pip by running the following command:
$ pip install boxsdk
- Import two classes from the Boxsdk module — Client and CCGAuth
from boxsdk import CCGAuth, Client
import os
- In the code below, we create a new
CCGAuthobject and pass in our client ID, client secret, and enterprise ID. We then create a newClientobject and pass in theCCGAuthobject as a parameter.
# Retrieve the CLIENT SECRET from the environment variable
CLIENT_SECRET = os.environ.get('BOX_CLIENT_SECRET')

auth = CCGAuth(
 client_id="<YOUR_CLIENT ID>",
 client_secret= CLIENT_SECRET,
 enterprise_id="<ENTERPRISE ID>"
)

client = Client(auth)
- Create a Subfolder
# get the name of the root folder
root_folder = client.root_folder().get()
print(root_folder['name'])

# List the items in the root folder
items = client.root_folder.get_items()
for item in items:
   print(f'{item.type.capitalize()} {item.id} is named "{item.name}"')

# Create the subfolder
subfolder = client.root_folder.create_subfolder('Saturn Cloud')
print(f'Created subfolder with ID {subfolder.id}')
- Upload files to the folder
def upload_file_to_box(folder_id = str, filename = str):
 folder = client.folder(folder_id=folder_id)
 items = folder.get_items()
 for item in items:
     if item.name == filename:
         updated_file = client.file(item.id).update_contents(item.name)
         print (f'File {updated_file.name} has been updated')
         return
 uploaded_file = folder.upload(filename)
 print (f'File {uploaded_file.name} has been uploaded')

upload_file_to_box(folder_id=<folder_id>, filename=<filepath/filename>)
The function above upload_file_to_box that takes two arguments:
folder_id: The ID of the Box folder where the file will be uploaded.filename: The name of the file to be uploaded.
Inside the function, the Box folder with the given folder_id is obtained using the client.folder method,. Then, a list of all items (files and subfolders) in the folder is obtained using the folder.get_items() method.
The function then validates if there is already a file in the folder with the same name as the filename argument. If such a file exists, it updates the contents of the file with the contents of the local file specified by filename using the client.file(item.id).update_contents(item.name) method, and then prints a message showing that the file has been updated.
If no file exists with the same name as the filename argument, the function uploads the file to the folder using the folder.upload(filename) method, and then prints a message showing that the file has been uploaded.
- Download files from the folder
A file can be retrieved in two ways: by returning the entire contents of the file as bytes or by providing an output stream to which the contents of the file will be written.
The first method is shown below
file_id = '11111'
file_content = client.file(file_id).content()
The sample code for the second method is shown below
def download_file_from_folder(query =str, item_type= str, extension=list, filename= str, download_path='./', overwrite=True):

   # Search for files in Box that match the given search criteria
   items = client.search().query(query=query, type=item_type, limit=100, file_extensions=extension)
   # Iterate over search results and find the file to download
   found = False
   for item in items:
       if item.name == filename:
           found = True
           # Check if file already exists locally
           local_path = os.path.join(download_path, item.name)
           if os.path.exists(local_path) and not overwrite:
               print(f'The file {item.name} already exists locally. Use a different filename or set overwrite=True to overwrite it.')
               return
           # Download the file and save it locally
           with open(local_path, 'wb') as open_file:
               client.file(item.id).download_to(open_file)
           print(f'The file {item.name} was successfully downloaded to {local_path}.')
           return
   # If file not found, raise an error or print a message
   if not found:
       print(f'No file found in Box matching the search criteria (query={query}, item_type={item_type}, extension={extension}, filename={filename}).')


download_file_from_folder('saturn','file',['py'], 'saturn.py')
The function above takes five input parameters:
query: The search query to use when searching for files in Box.
item_type: The type of items to search for (e.g., “file”, “folder”, “web_link”, etc.).
extension: a list of file extensions to filter the search results by (e.g., [“py”, “csv”]).
filename: The name of the file to download.
download_path: The path where the file should be downloaded to.
The function uses the client.search().query() method from the Box API to search for files in Box that match the specified search pattern. It passes in the query, item_type, and extension parameters to the search method, and limits the search results to the first 100 items.
The function then iterates over the search results to validate if the file that matches the filename.
If the file is found, the function validate if the file already exists locally at the specified download_path. If the file exists and overwrite parameter is set to False, the function prints a message indicating that the file already exists and exits the function. Otherwise, if overwrite is set to True or the file does not exist locally, the function proceeds to download the file.
To download the file, the function opens a new file at the specified download_path with the same name as the file being downloaded. It then uses the client.file().download_to() method to download the file from Box and save it to the local file.
Once the download is complete, the function prints a message showing that the file was downloaded successfully.
If no file is found in Box that matches the specified filename, the function prints a message showing that no file was found.
Step 5: Service Account Collaboration
A Service Account provides developers with a programmatic authentication mechanism for server-side integrations with Box. In other words, an application can authenticate to Box as the service, which is represented by a Service Account user. A Service Account can then be used to create other application-specific users, called App Users.
Box has two major kinds of users in an account, the managed user (Box cloud), and the service account user.
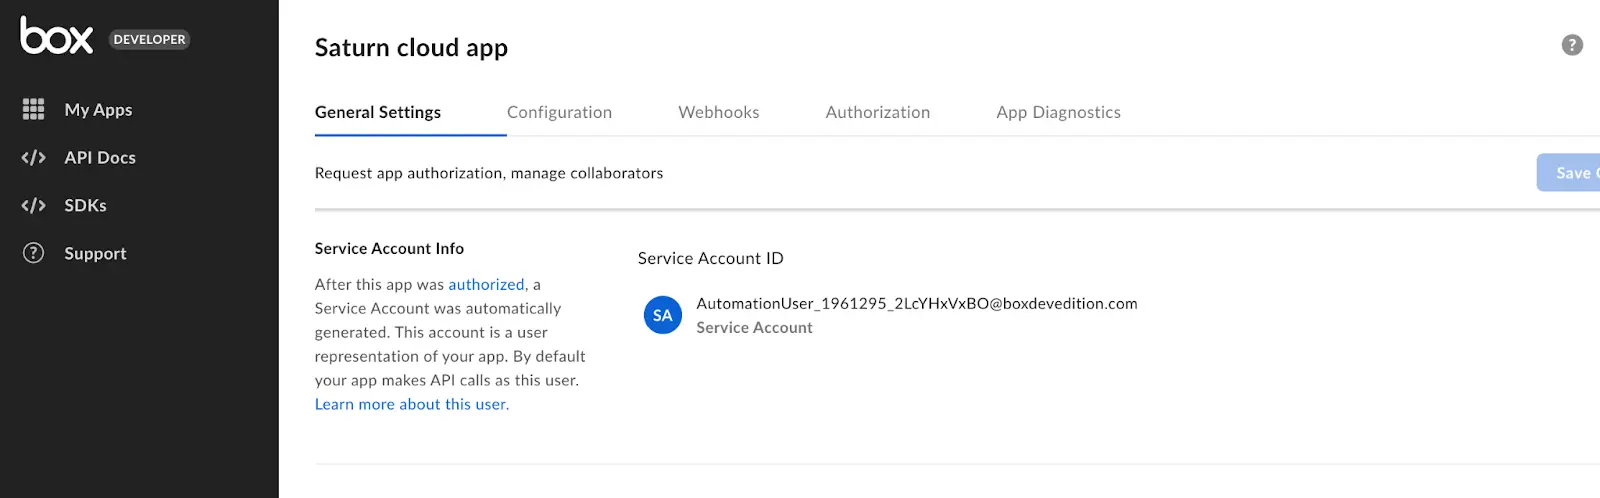
authorize your application[step 2], a unique Box Service Account is automatically generated and by default this account is allocated 10GB of storage. You can find the Service Account Details in the General Settings tab, under Service Account info in the Developer Console.
It is very important to note that because a Service Account represents an application as a user within the enterprise, it has its own folder tree and content ownership capabilities. By default, this folder tree is empty because the Service Account does not initially own or collaborate on content. This is similar to when you first land on your All Files page in a newly provisioned Box account. The service account uses credentials(Client ID and Client Secret) to communicate with the Box API to retrieve and store data.
In other words, the Service Account user is different from the Managed User and data stored in the service account is not accessible to the managed user by default but, through collaboration, the managed user can get access to the file and folders stored in the service account and vice versa.
A collaborator is an individual who has been invited to a file or folder, and so in order to access the folders in the service account as the user account or vice versa you will have to either add the service account as a collaborator in the user account’s folder/file or add the user account as a collaborator in the service account’s folder/file.
Here are two ways to do the collaborations
Collaborate the Service Account onto the content it needs access to in the user account.
Go to the Developer console > General Settings tab, under the Service Account info section, copy the email of the service Account, it has a pattern similar to this AutomationUser_AppServiceID_RandomString@boxdevedition.com
Go back to the Standard Box console, select the desired folder, you would like to add the service Account as a collaborator to, click on Invite people under Sharing and paste in the email, then click Add.
Collaborate the User Account onto the content it needs access to in the Service Account.
We can do this using the Box python SDK. Here we will add the user account as a collaborator to the Folder we created with the service account.
#Collaborate your personal account into the new subfolder
#and give your personal account co-owner permissions on the folder

from boxsdk.object.collaboration import CollaborationRole

user = client.user(user_id='USER_ID>')
collaboration = client.folder(folder_id='<FOLDER_ID>').collaborate(user, CollaborationRole.CO_OWNER)

collaborator = collaboration.accessible_by
item = collaboration.item
has_accepted = 'has' if collaboration.status == 'accepted' else 'has not'
print(f'{collaborator.name} {has_accepted} accepted the collaboration to folder "{item.name}"')
user_id can be gotten from the Dev Console. Navigate to the application we created on the console, and check under the General Settings tab.
Here we are adding a collaboration on the folder we created earlier by calling .collaborate(accessible_by, role)
Pass the User or Group to collaborate the item with as the accessible_by parameter.
The role parameter determines what permissions the collaborator will have on the folder, here we are giving our personal account CO-OWNER permissions.
In this article, we explored how to use the client credentials grant to authenticate with Box, create a new folder, upload a file, and download a file from Box using the Box Python SDK and JupyterHub. By integrating Box with JupyterHub, we can take advantage of the powerful data science tools provided by JupyterHub while also leveraging the cloud storage capabilities provided by Box.
Saturn Cloud provides customizable, ready-to-use cloud environments
for collaborative data teams.
Try Saturn Cloud and join thousands of users moving to the cloud without having to switch tools.
Additional Resources:
You may also be interested in:
- How to Set up Snowflake on JupyterHub
- 8 Popular Alternatives to JupyterHub 2023
- Setting up Jupyterhub on AWS
- Setting Up JupyterHub Securely
- Setting up JupyterHub with Single Sign-on (SSO) on AWS
- Using JupyterHub with a Private Container Registry
- How to Set up JupyterHub Authentication with Okta
- Setting up HTTPS and SSL for JupyterHub
- How to Setup Jupyter Notebooks on EC2
- How to Set Up JupyterHub on AWS
- How to Set up JupyterHub Authentication with Azure Active Directory(AD)
- How to Set up JupyterHub on Azure
- Using JupyterHub with a Private Container Registry
- Install Jupyterhub in a VPN with AWS
- Dealing with Long Running Jupyter Notebooks
- How to Authenticate With BigQuery From JupyterHub


