This article was published when data science tooling like Dask and R was a primary focus for Saturn Cloud. Today, Saturn Cloud is the enterprise AI platform for any GPU infrastructure.
Saturn Cloud provides customizable, ready-to-use cloud environments
for collaborative data teams.
Try Saturn Cloud and join thousands of users moving to the cloud without having to switch tools.
Table of content
- BigQuery
- Service Account
- Create a BigQuery account and a service account
- Connect Bigquery with Jupyterhub using Python Client SDK
- Conclusion
Introduction
If you’re working with a lot of data, it can be challenging to manage and make sense of all of it. That’s where BigQuery comes in. BigQuery is a popular Google cloud service that is used mostly for large data operations (store, retrieve and analyse).
In this article, we’ll walk through how to authorize and authenticate BigQuery in Jupyterhub hosted on Kubernetes. Also, we’ll demonstrate how to use Kubernetes Secrets to keep your BigQuery information secure in your Kubernetes. By the end of this article, you’ll have an understanding of how to setup BigQuery in your team’s JupyterHub environment, Secrets, and how to setup JupyterHub on Kubernetes.
BigQuery:
BigQuery is a serverless google cloud data warehouse solution that allows you to store, analyse, manipulate, organize and retrieve large-scale or large volume data. BigQuery supports all sizes of data (specifically tabular data) and enables you to analyze terabytes of data within seconds. Additionally, it has built-in machine learning, geospatial charts and other auxiliary components to help you analyse and understand your data better.
BigQuery supports SQL-like queries and it’s also accessible via client SDK (Python, go, java,node.js, php, ruby), Rest API, command line tool, and Web UI.
Imagine you have 800 million rows of sales transactions from a retail store and you intend to understand the sales data and gain insight into the user/customer buying habit. Let’s say you want to use Python for a challenge like this. With Python, you have to utilize a scaling service or infrastructure to run your analysis and return a result in seconds, however, with BigQuery, you can easily query your dataset and get results to questions like in seconds:
- What are the top-selling products?
- What are the average sales per month or per transaction?
- What is the customer/user average spending habit per month?
BigQuery allows you to concentrate on understanding and analysing your data to ensure you make relevant decisions with ease.
How data is stored in BigQuery
As a data scientist or data engineer, one of your objectives is to leverage a product or tools that enables fast queries and analysis. When you store your data on BigQuery, it segments it into tables and splits the data into a smaller format called capacitor, which is a highly compressed and optimized columnar format that allows fast querying of large datasets. Additionally, the data is then stored on Google’s highly available and reliable infrastructure.
Before we move on to how to set up and retrieve data from BigQuery, let’s talk about BigQuery Authentication.
To use BigQuery, you need to first authenticate your identity and authorize the client environment to retrieve data from BigQuery using your Service account.
Let’s talk about using Service accounts to authenticate BigQuery clients.
Service Accounts
Service accounts are an integral component of Google Cloud Platform (GCP) services, including BigQuery. Service accounts provide a way to authorize access to GCP services programmatically, without the need for user intervention.
Service accounts are used by applications, and scripts to access GCP resources on behalf of a specific user or organization. For instance, you have to use a service account to allow a web application to access BigQuery data, or to allow a script running on a VM to interact with other GCP services.
Service accounts are associated with a set of configuration variables or keys such as private keys, client id, token URI, an authorization certificate, etc
Using a service account with BigQuery provides several benefits
Improved security: Service accounts provide a way to control access to BigQuery data programmatically, without requiring user intervention. This can help reduce the risk of unauthorized access to sensitive data.
Scalability: Service accounts can be used to automate data analysis tasks, making it easy to scale your data analysis process as needed.
Improved collaboration: Service accounts can be used to share access to BigQuery data with multiple users, without having to share login credentials.
Imagine you have a web application that needs to obtain data from BigQuery to display on a dashboard. You could use a service account to handle the authentication and authorization process, rather than having to log in to the application using Google accounts.
Connect BigQuery with JupyterHub using BigQuery Python Client SDK:
Follow the steps below to connect, authorize and extract data from BigQuery with Jupyterhub hosted on Kubernetes.
Requirements:
Step 1: Create a service account
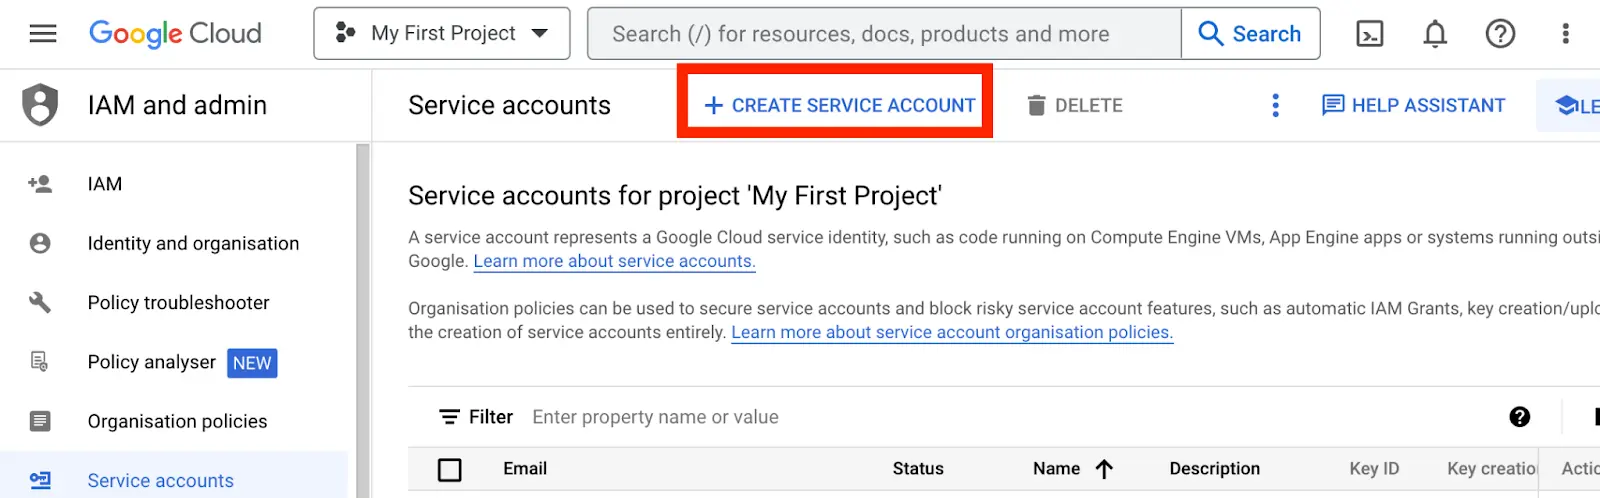
- Navigate to your Google cloud console, Be sure that you have an appropriate Google Cloud Project created. Navigate to IAM and Admin » Service Accounts.
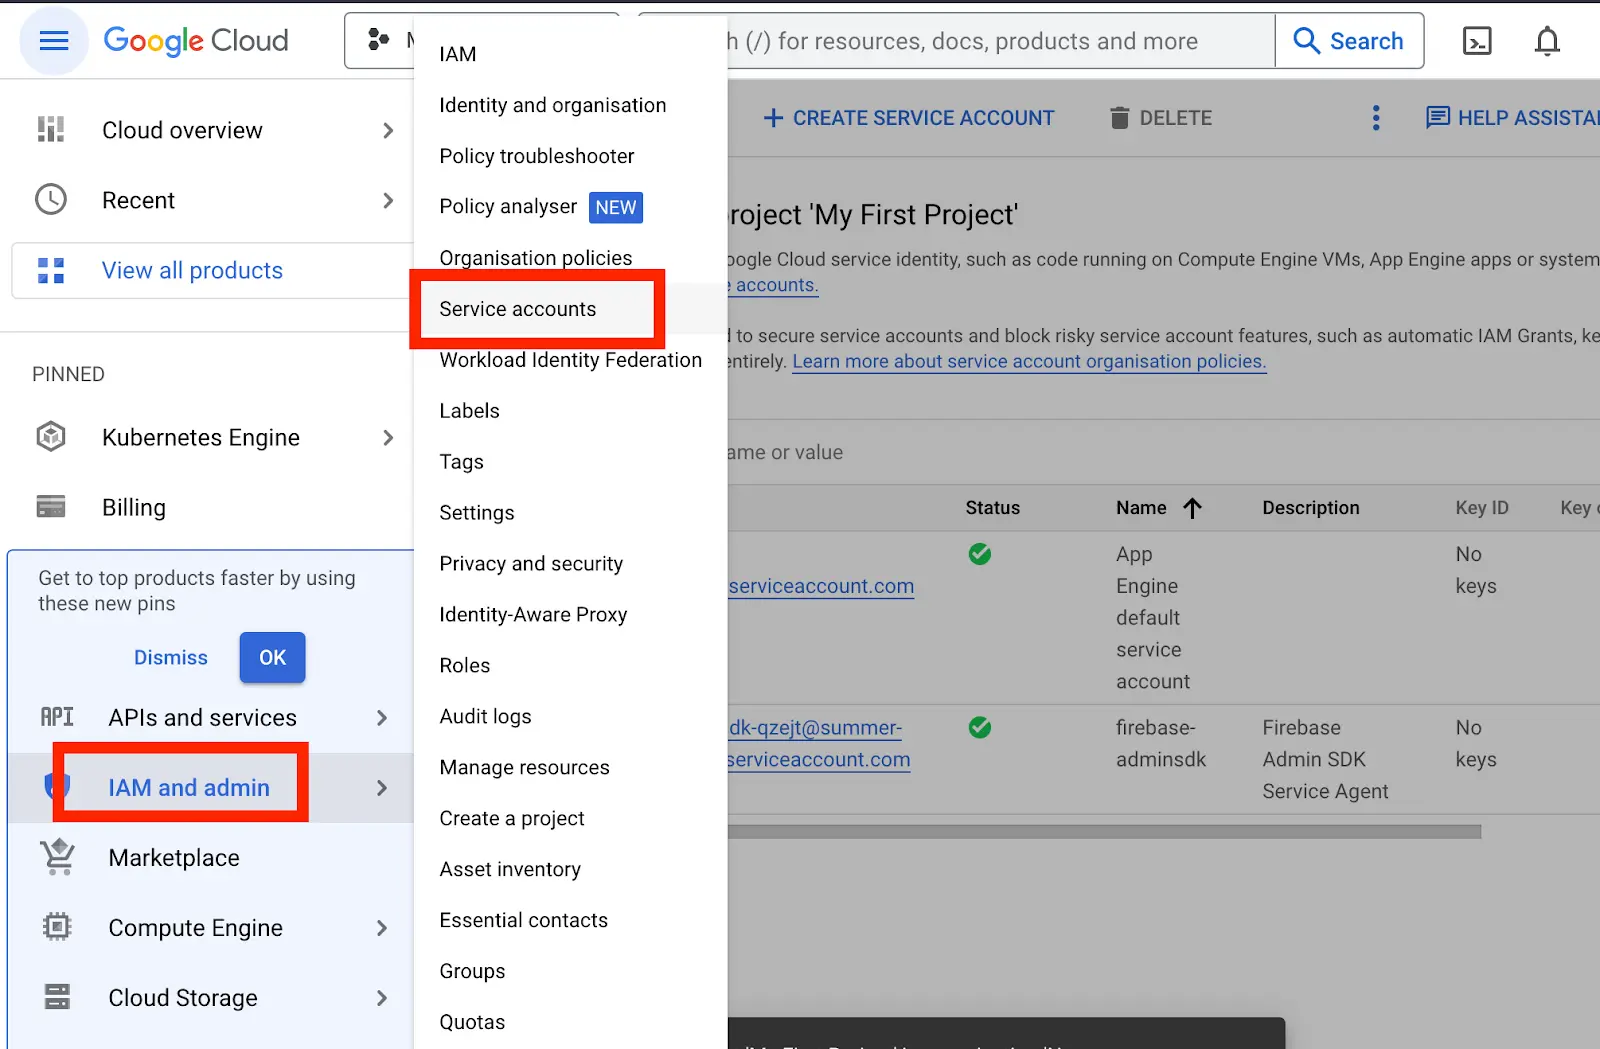
At the top, click on Create Service Account
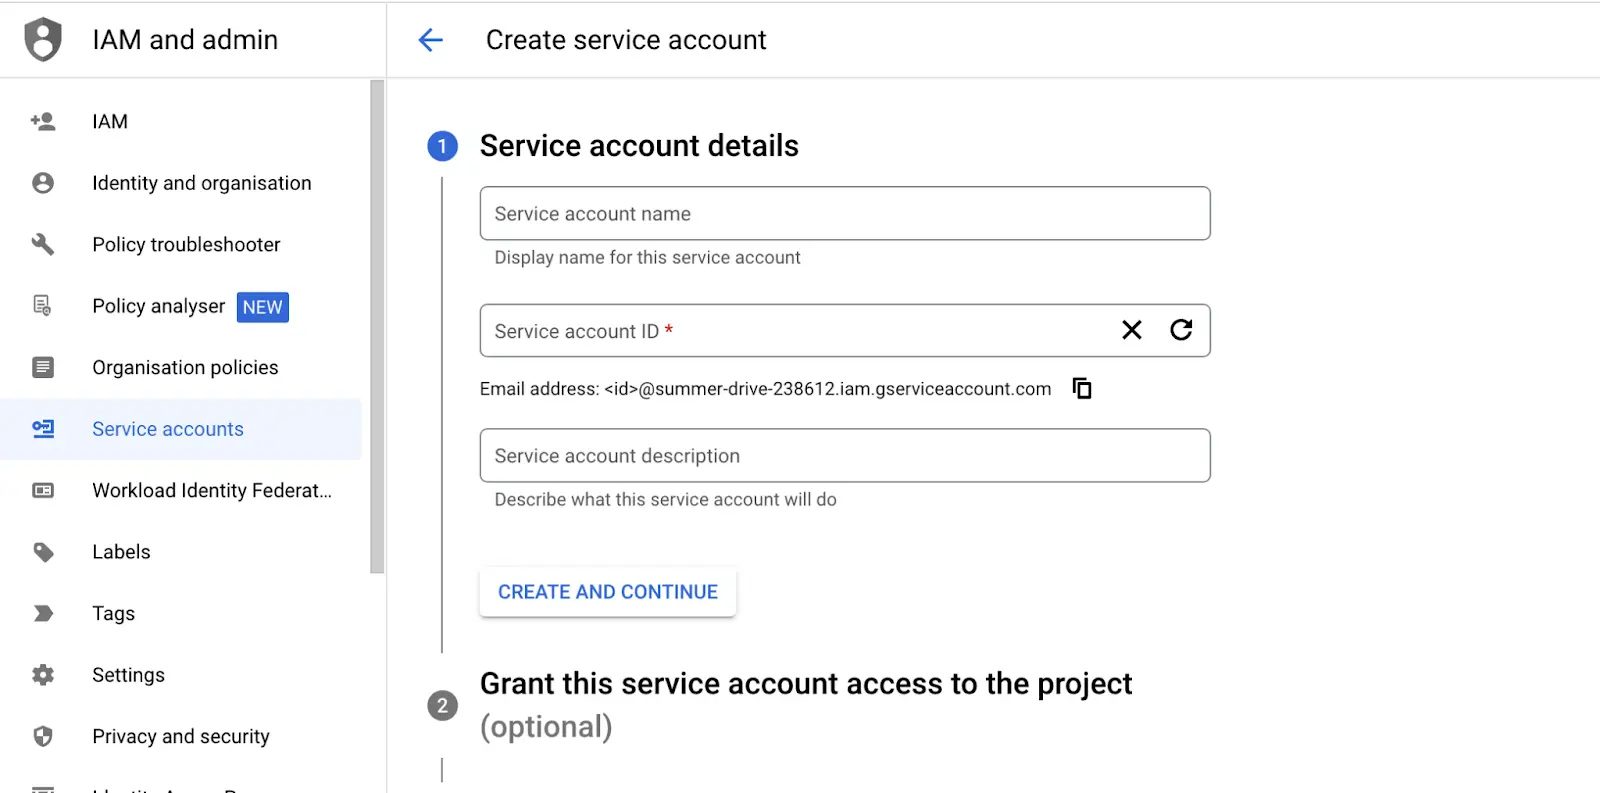
- Input your preferred Service Account name (e.g “Saturn-ServiceAccount”)
You can also add extra information in the Service Account description field to give more details on the purpose of the account. Click on “Create and Continue”
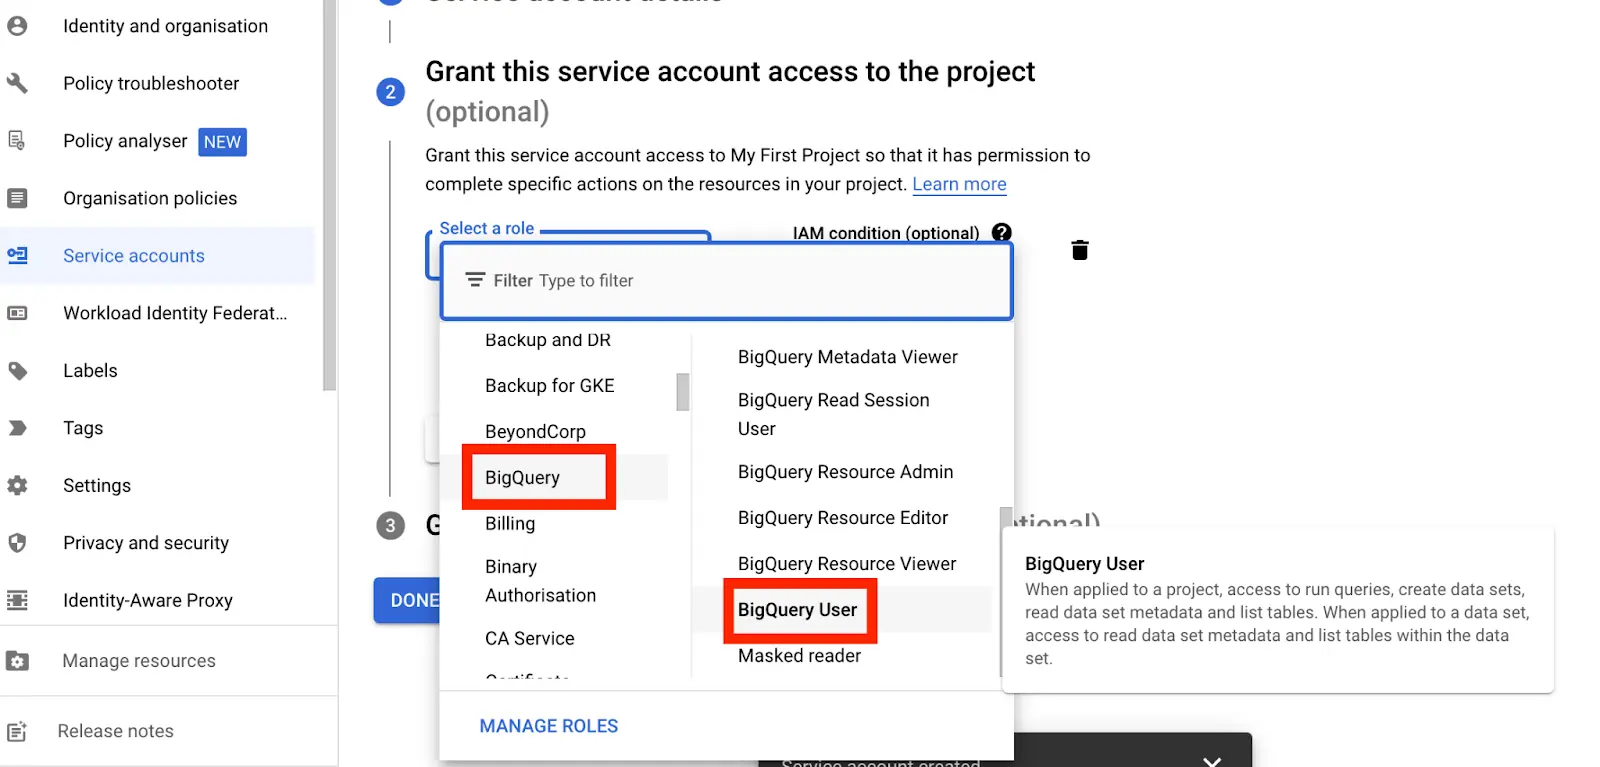
- Select a role to assign to the account. Different roles have different permissions set for different cloud products.
Search for BigQuery and assign the BigQuery User role and click on Continue.
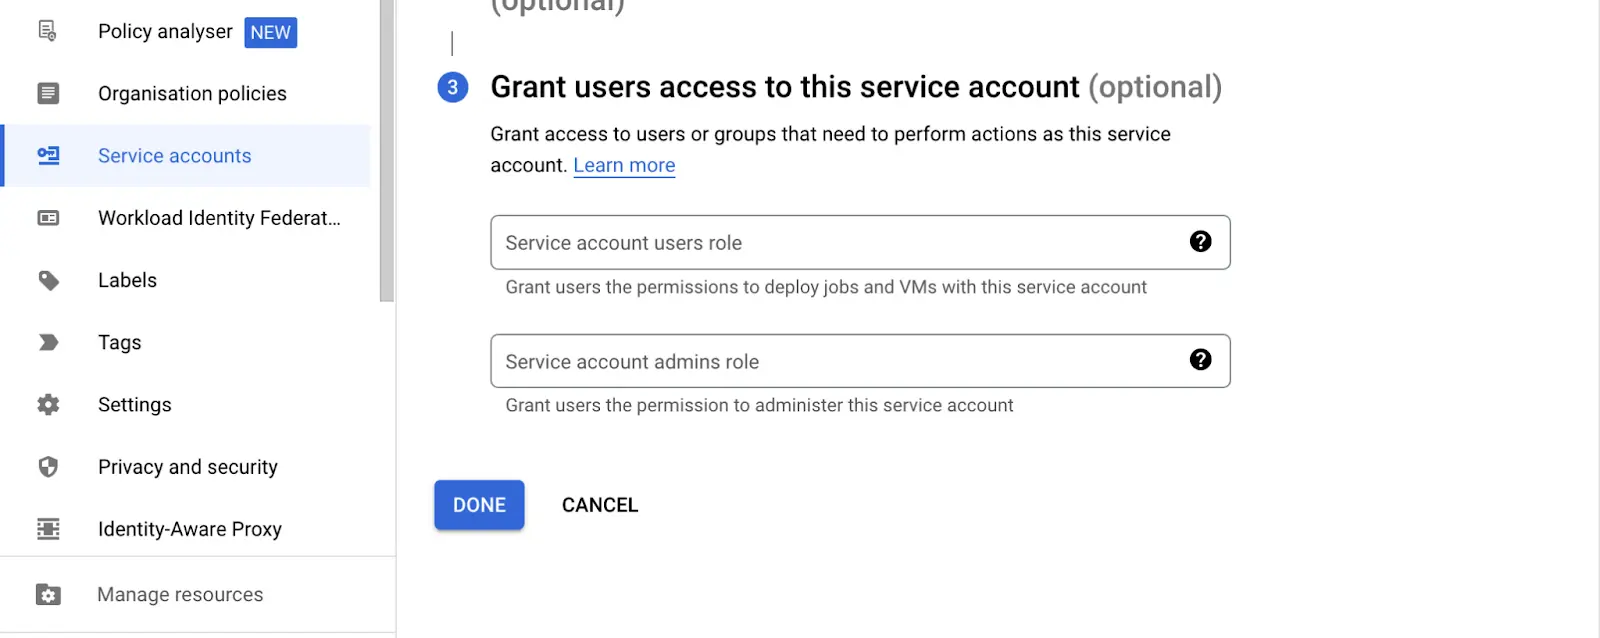
- If you want to allow other users within your network to share the Service Account privileges, You can add the user’s email address or the group name to grant the same set of permissions.
But for now, we will leave it blank and click Done.
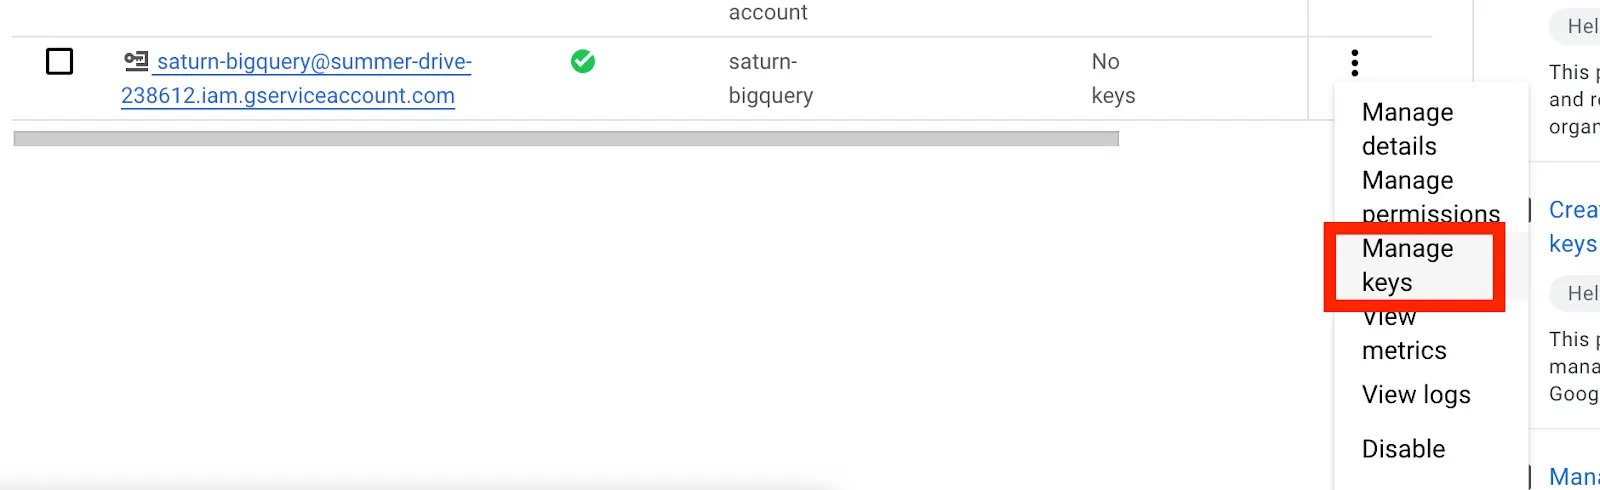
The service account we have created wouldn’t be assigned a key.
To use a service account from outside of Google Cloud, such as on other platforms or on-premises, in our case in Jupyterhub, we must first establish the identity of the service account. Public/private key pairs provide a secure way of accomplishing this goal. When we create a service account key, the public portion is stored on Google Cloud, while the private portion is available only to us. For more information about public/private key pairs, see Service account keys.
- To create the new key, under the Actions column, click on Manage Keys » Add Key » Create new key

For the key type , pick JSON and the JSON client file will be downloaded to your computer. This client file contains information such as the project_id, private_key, token_uri etc.
Step 3: Deploy JupyterHub on AWS EKS
First, we do have to set up JupyterHub on AWS EKS
Follow the link below and skip to the Kubernetes section
https://saturncloud.io/blog/jupyterhub_aws/
Note: Be sure to run the next step commands in the same terminal where you set up your Kubernetes.
Step 4: Store your service account credentials using Kubernetes Secrets and configure your Kubernetes yaml file to obtain the secret on every pod
Before we begin, we have to understand what secrets on Kubernetes do, then we will proceed with storing our service account credentials on Kubernetes Secrets so every pod or jupyterHub user can access the data in BigQuery.
Secrets:
Kubernetes secrets is a secured and encrypted method of storing sensitive data such as passwords, tokens, configuration files or ssh key, and this information can be used in a pod without exposing the data.
In Kubernetes, secrets are stored in etcd, which is a database that stores configuration data for a cluster. While etcd does have some built-in security features, such as access controls and encryption, it may not be as secure as using specialized tools for storing sensitive information, such as hardware security modules (HSMs) or key management systems (KMS).
Here are some of the benefits of using Secrets:
Configuration management: When you store credentials in Secrets, you can ensure that all instances of an application or pods use the same credentials or configuration file, even if they are deployed across multiple nodes in the cluster. This helps to prevent misconfigurations and ensures consistency across various environments in your cluster.
Security: By storing configuration or sensitive data such as passwords and tokens using Kubernetes secrets, it provides an extra layer of security as compared to storing them in clear text. Secrets are stored securely in etcd and encrypted so that even if an unauthorized person gains access to your cluster or pod, they will not be able to access the secrets.
Collaboration: By storing configuration data in secrets, you make it easy for multiple teammates to work on the same application and utilize a central configuration.
Next, let’s store our service account credentials on secrets so we can access the credentials as an environment variable on every jupyterhub.
- Create a secret key name and upload your service account credentials json using the
-from-literalparameter. Ensure that your json credential is in the same Kubernetes directory
$ kubectl create secret generic bigqueryconfig --from-literal=secret.json
Alternatively, you can utilize the Kubectl configmap to store the credentials using the command below.
$ kubectl create configmap bigqueryconfig --from-file=secret.json
- Open your Jupyterhub configuration file
$ sudo nano <your yaml configuration file>

# e.g sudo nano /tmp/jupyterhub.yaml
- Make the changes to your configuration file under
singleuserkey in your jupyterhub configuration file
# before
Singleuser:

extraEnv:{}

# substitute the code above with the code below
singleuser:

extraEnv:

BIGQUERY-SA:
valueFrom:
secretKeyRef:
name: <secrets name e.g bigqueryconfig>
key: <secret file name e.g secret.json>

Note: When  a  notebook  is  created  for  each  user,  the  environment  variable  will  be  accessible  to  the  users.
- You can use the command below forward the service port so that you can access the Jupyterhub application on your browser with the address localhost:8080
$ kubectl --namespace=default port-forward service/proxy-public 8080:http
Step 5: Connect to BigQuery on JupyterHub
# Import the required libraries
!pip install pandas
!pip install google-cloud-bigquery

# Import the required modules
from google.cloud import bigquery
from google.oauth2 import service_account
import pandas as pd
import os
import json

# Retrieve the BIGQUERY environment variable
BIGQUERY = os.environ.get('BIGQUERY-SA')
print(BIGQUERY)

# Convert the BIGQUERY variable into a Python dictionary
BIGQUERY_DICT = json.loads(BIGQUERY)


# validate object type
print(type(BIGQUERY_DICT))

# Create a Credentials object using the BIGQUERY_DICT
credentials = service_account.Credentials.from_service_account_info(BIGQUERY_DICT)

# Get the project ID from the credentials object
gcp_project = credentials.project_id

# Set the dataset name
gcp_dataset = "bigquery-public-data"

# Instantiate a bigQuery client instance and pass in the credentials and project id
client = bigquery.Client(credentials=credentials, project=gcp_project)

# Define a sample query
query = """select source from bigquery-public-data.austin_311.311_service_requests LIMIT 100"""

# Define a function to run a query and return the results as a [Pandas](https://saturncloud.io/glossary/pandas) dataframe
def  bigquery_to_df(sql):
# Run the query using the BigQuery client
query = client.query(sql)
results = query.result()
print(results)

# Convert the results to a Pandas dataframe
return results.to_dataframe()

# Run the sample query and retrieve the results
df = bigquery_to_df(query)

# Print the first few rows of the results
print(df.head())
The code above uses the pandas and google-cloud-bigquery libraries to perform these tasks;
The code begins by installing the required libraries using the pip install command. The code then imports
google.cloud,google.oauth2,pandas, andosmodulesThe BIGQUERY environment variable is then obtained using the
os.environ.get()method. This variable is assumed to contain the JSON representation of a service account’s credentials. The contents of the BIGQUERY variable are then converted into a dictionary using thejson.loads()method.The
service_account.Credentials.from_service_account_info()method is then used to create a Credentials object from theBIGQUERY_DICTdictionary. This Credentials object is used to authenticate the connection to BigQuery.A
bigquery.Clientobject is then created and used to run a sample query against the"bigquery-public-data.austin_311.311_service_requests"dataset, which is one of the BigQuery public dataset. The results of the query are returned in the form of a Pandas dataframe and the first few rows of the dataframe are printed using thedf.head()method.The code defines a function
bigquery_to_df()which takes an SQL query as an argument, runs the query using theclient.query()method, and returns the results as a Pandas dataframe. This function makes it easier to obtain data from BigQuery and convert it into a Pandas dataframe.
Saturn Cloud provides customizable, ready-to-use cloud environments
for collaborative data teams.
Try Saturn Cloud and join thousands of users moving to the cloud without having to switch tools.
Resources:
You may also be interested in:


