
This article was published when data science tooling like Dask and R was a primary focus for Saturn Cloud. Today, Saturn Cloud is the enterprise AI platform for any GPU infrastructure.
Photo Credit: JJ YIng on Unsplash
Outline
Introduction
Clusters, Parallel & Distributed Computing
Dask + What makes Dask a unique parallel computing product
Different ways to set up the cluster and then use the command line in this tutorial
Requirements for setup (if any)
Setting up the cluster with Cloud VM
- Spin-Up the VMs
- Enable Communication between the VMs
- Port forward SSH into VM
- Install Dask and other dependencies on VMs
- Use Dask to spin up parallel computing within the cluster
Introduction
Complex and expensive computing tasks, like big data analytics, machine learning, and deep learning algorithms, require advanced techniques and resources to handle their computation efficiently. A computing cluster is an excellent option for handling these kinds of tasks. Parallel computing is one technique for improving computing cluster performance and efficiency.
This article will teach you how to set up a parallel distributed computing cluster using Dask.
What is Dask?
Dask is a flexible open-source parallel computing Python library for general purposes. It utilizes a scheduler-worker network for communication and task distribution. This network comprises a dynamic scheduler and worker. The dynamic task scheduler is the central point from which processes are managed and assigned to each running worker.
With this parallel computing feature, Dask enables multiple processors or computers to work on a job or task simultaneously. It does this by breaking these tasks into smaller pieces for multiple processors, devices, or nodes to work on concurrently. This cuts down on the time needed to finish the job.
A Dask cluster is needed to use the parallel computing feature. A Dask cluster can be scaled down to run parallel computations on single machines by leveraging their multi-core CPUs and streaming data efficiently from disk, or on a distributed cluster by leveraging multi-core CPUs across the nodes.
Distributed Computing Cluster
A distributed cluster is a type of computing cluster where a group of computers are connected via a network to work together and operate as a single system to perform computing tasks or jobs. This can be accomplished using a networked cluster of computers, servers, or even individual devices, such as laptops or mobile devices.
Distributed clusters are managed by specialised software responsible for distributing workloads across the devices, managing resources, and ensuring that the cluster runs efficiently and reliably. In this blog, Dask is the specialized software for managing the workload in parallel across the cluster.
What is a Dask Distributed Cluster?
A Dask distributed cluster is a parallel distributed computing cluster. It is a group of interconnected computers or servers that work in parallel to solve a computational problem or process a large dataset. The cluster typically comprises a head node (scheduler) that manages the entire system and multiple compute nodes (workers) that perform the actual computations.
The main goal of this cluster is to achieve high performance and scalability by distributing workloads across multiple processors or machines. As a result, the cluster can process large datasets or perform complex computations much faster than a single computer or server.
We will use the command line to set up a Dask cluster. However, there are various methods for doing this here.
Requirements:
Before we get started, make sure you have the following:
The AWS CLI is installed and configured with your login credentials.
The AWS user has IAM permissions to create EC2 instances
Setting up the Cluster
We will need some virtual machines (VMs) for our cluster. Amazon Web Services (AWS) will be our cloud platform for these VMs.
Follow the following steps to set up the cluster:
Step 1: Start by spinning up a couple of VMs on a cloud platform.
Create three VMs (Ec2 instances) at once. One of the VMs will be used as the dask scheduler, and the others as the dask workers for the cluster. Feel free to add as many workers as needed for a job or task.
- Use Ubuntu Linux as the instance OS
- Specify the number of instances as three (3)
- Launch instances
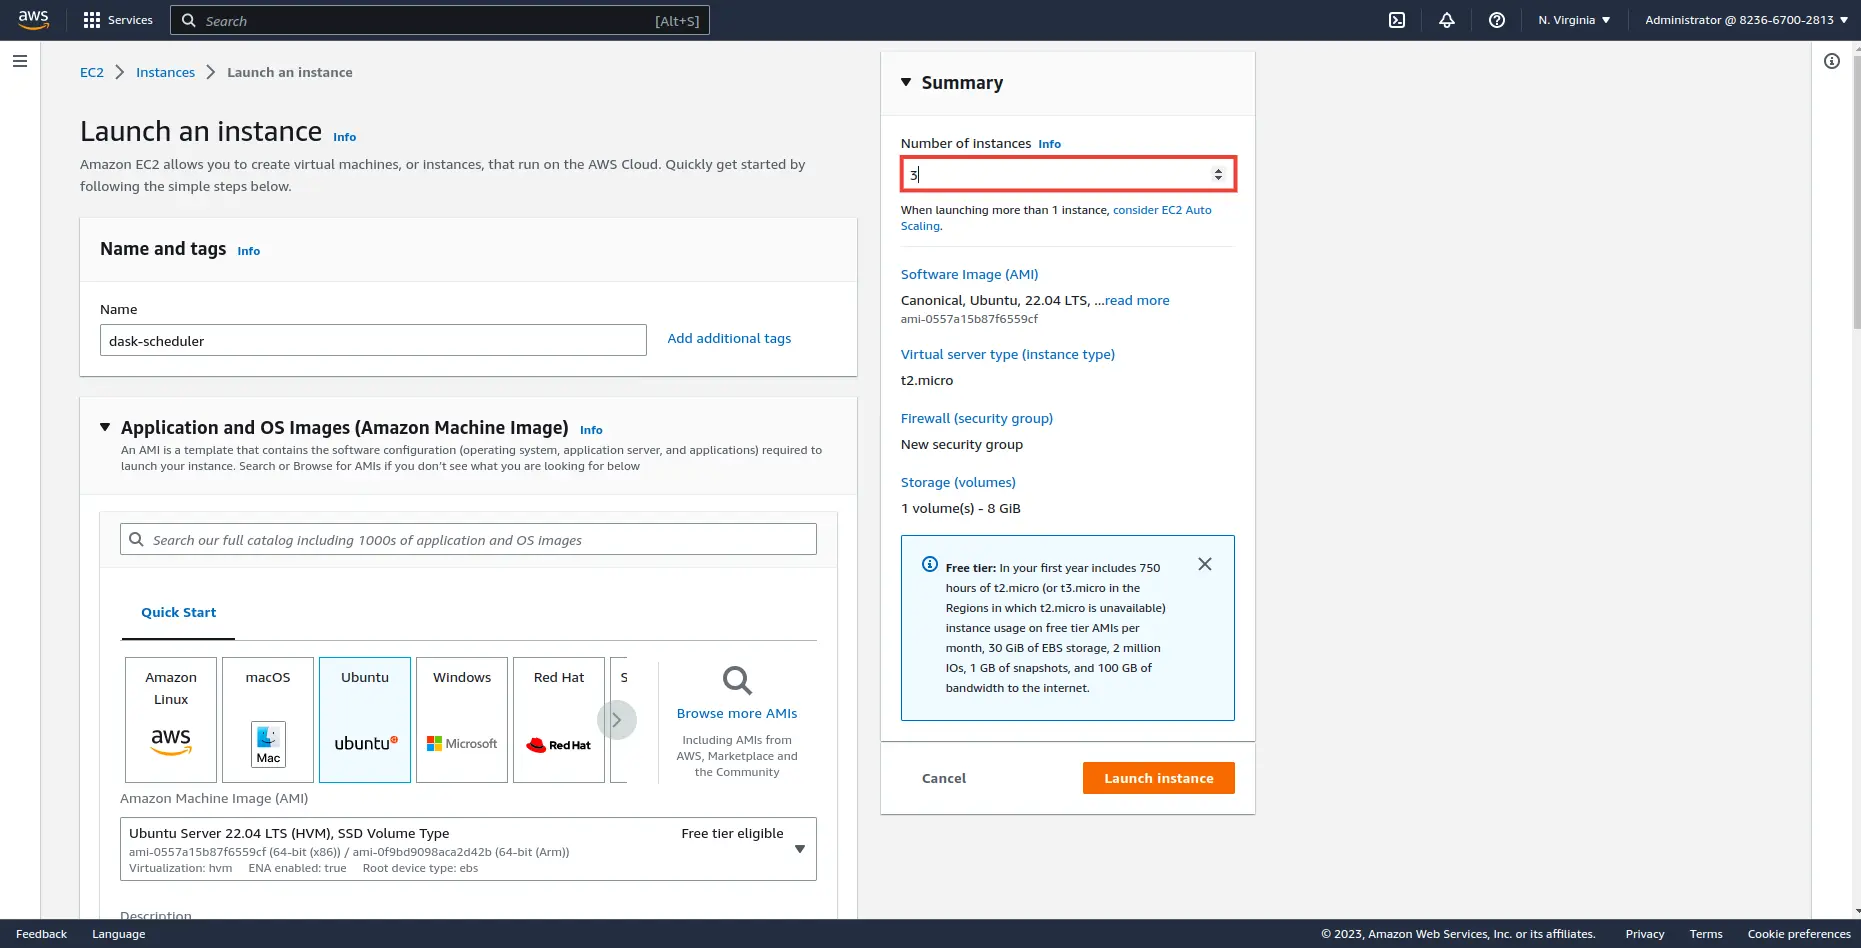
Rename two of the Ec2 instances to dask-worker1 and dask-worker2 and rename one as dask-scheduler

Step 2: Set firewall rules for the VMs to enable connection and communication.
Since the three instances were created together, they use the same security group. Simply being in the same security group doesn’t mean the instances can communicate among themselves. It just means they follow the same rules, but security group membership is also a source attribute on traffic that comes from instances that are part of the group. We will add some network configurations for their security group to enable communication and connection between them.
Go to the common security group and select “edit inbound rules."
In the security group, add a “Custom ICMP” or “All ICMP Traffic” rule, and use the security group’s identifier “sg-xxxxxxxx” as the source IP instead of an address or block. This rule enables echo requests (ping) between only the machines themselves.
ICMP firewall configuration videos
Then we also need to add two more TCP ports to the same security group. Dask uses ports 8786 and 8787 for its scheduler and dashboard servers, respectively, and random high ports in the range of 49152–65535 for worker and nanny communications. Set the port range for one of the TCP rules to “8786-8787” and the other to ”49152-65535”. Also, use the security group’s identifier “sg-xxxxxxxx” as the source IP
](/images/blog/edit-inbound-rules.webp “blog-image”)
Step 3: SSH into the VMs.
For the VM we have chosen as our “dask scheduler”, we will enable port forwarding on the dask’s default dashboard port (8787) from the local machine to the VM. This will enable access to the dask dashboard from the browser.
To ssh into the “dask scheduler” VM run this command in the terminal.
ssh -i “VMs-keypair.pem” ubuntu@”VM’s_Public IP address” -L 8787:”VM’s_Private IP address”:8787
And run this command to ssh into the “dask worker” VMs.
ssh -i “VMs-keypair.pem” ubuntu@”VMs_Public IP address”
Step 4: Ping the VMs
Using the private IP addresses for each VM, send pings between the VMs to ensure they see each other with this command.
ping <Target VMs_Private IP address>
If you get a response like the one below, then the ping was successful
    PING <Target VMs_Private IP address> (<Target VMs_Private IP address>) 56(84) bytes of data.

    64 bytes from <Target VMs_Private IP address>: icmp_seq=1 ttl=64 time=1.14 ms

    64 bytes from <Target VMs_Private IP address>: icmp_seq=2 ttl=64 time=0.452 ms

    64 bytes from <Target VMs_Private IP address>: icmp_seq=3 ttl=64 time=0.513 ms

    --- <Target VMs_Private IP address> ping statistics ---

    5 packets transmitted, 5 received, 0% packet loss, time 4057ms

    rtt min/avg/max/mdev = 0.452/0.629/1.136/0.254 ms
Step 5: Install Dask and all dependencies on the VMs
In order not to encounter any issues when using Dask, it is critical that dask and all its dependencies on each of the VMs have the same version. Install Dask and all dependencies on the VMs with the following command:
sudo apt update
sudo apt upgrade
sudo apt install python3-pip
sudo apt install python3-distributed
python3 -m pip install "dask[complete]"
After running the last command to install Dask, the Dask script gets installed to this path.
/home/ubuntu/.local/bin ,
Add the dask script’s path to PATH to enable the use of the “dask” command from any directory in our terminal.
export PATH="/home/ubuntu/.local/bin:$PATH"
source ~/.bashrc
Step 5: Start the scheduler and workers
Finally, it is time to create the Dask cluster.
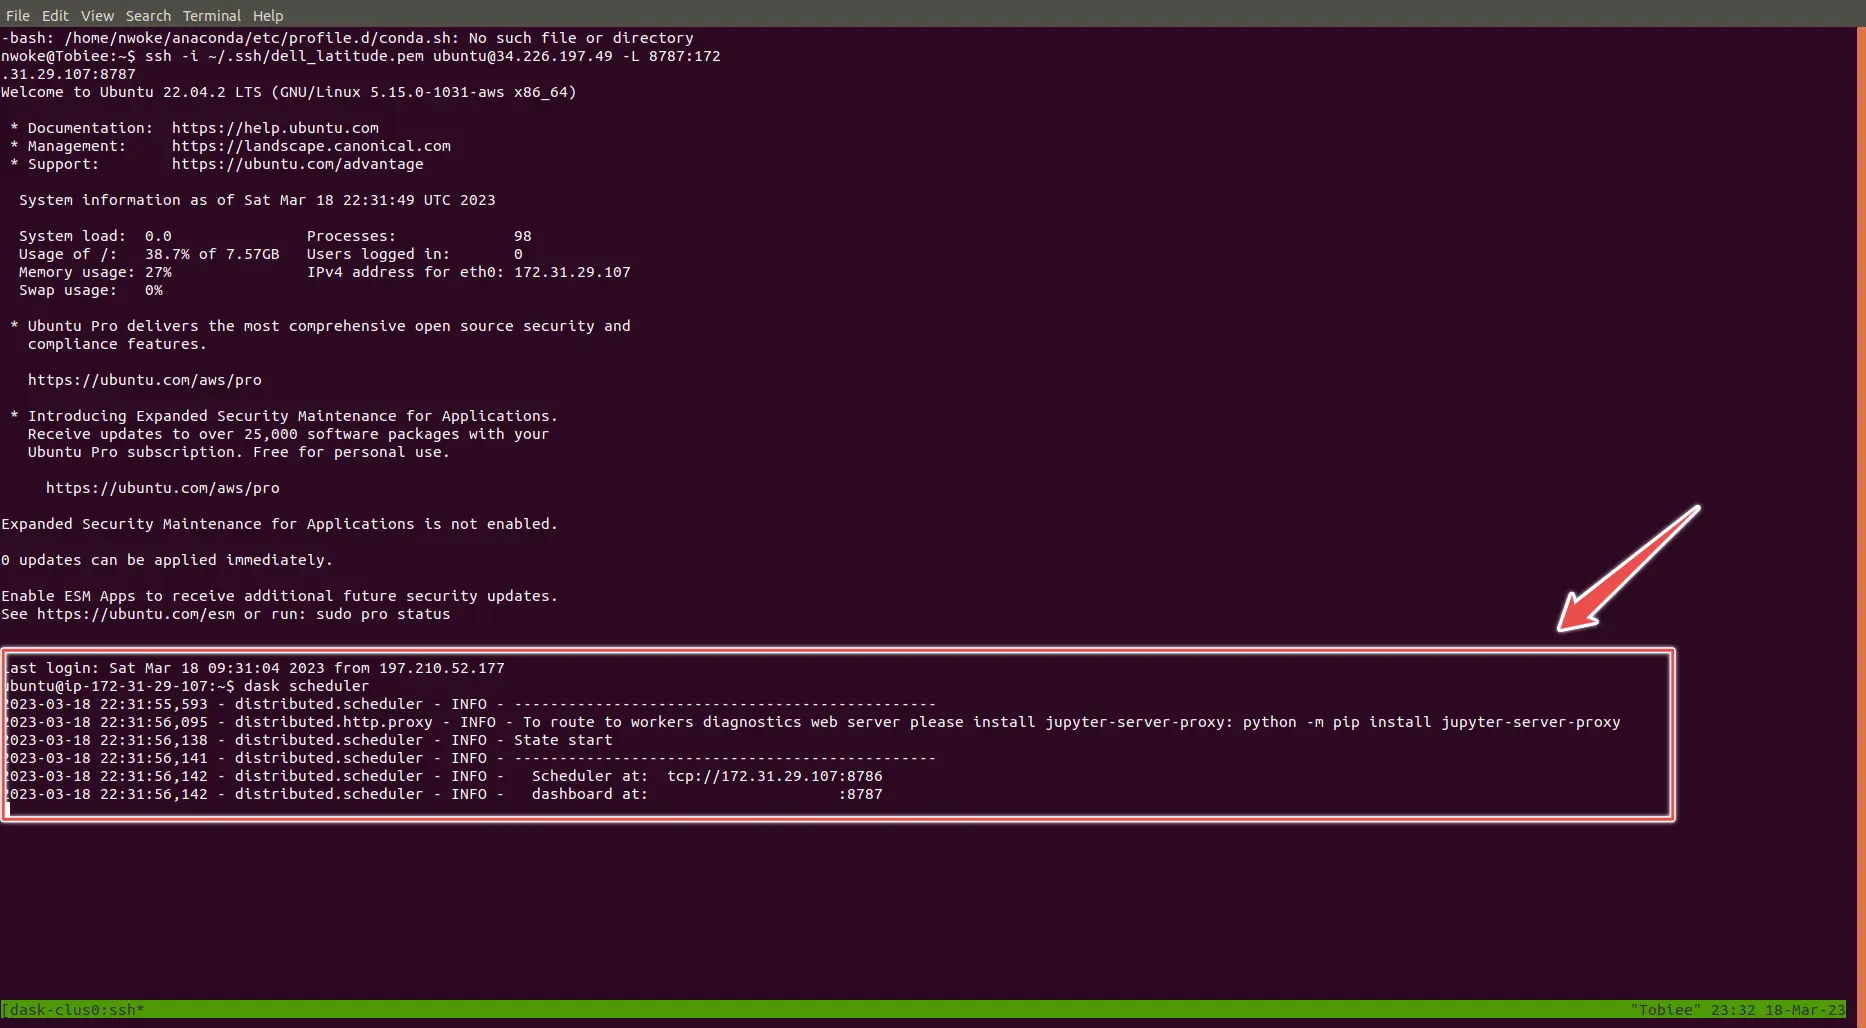
Start the dask scheduler on the dask-scheduler VM, with this command:
dask scheduler
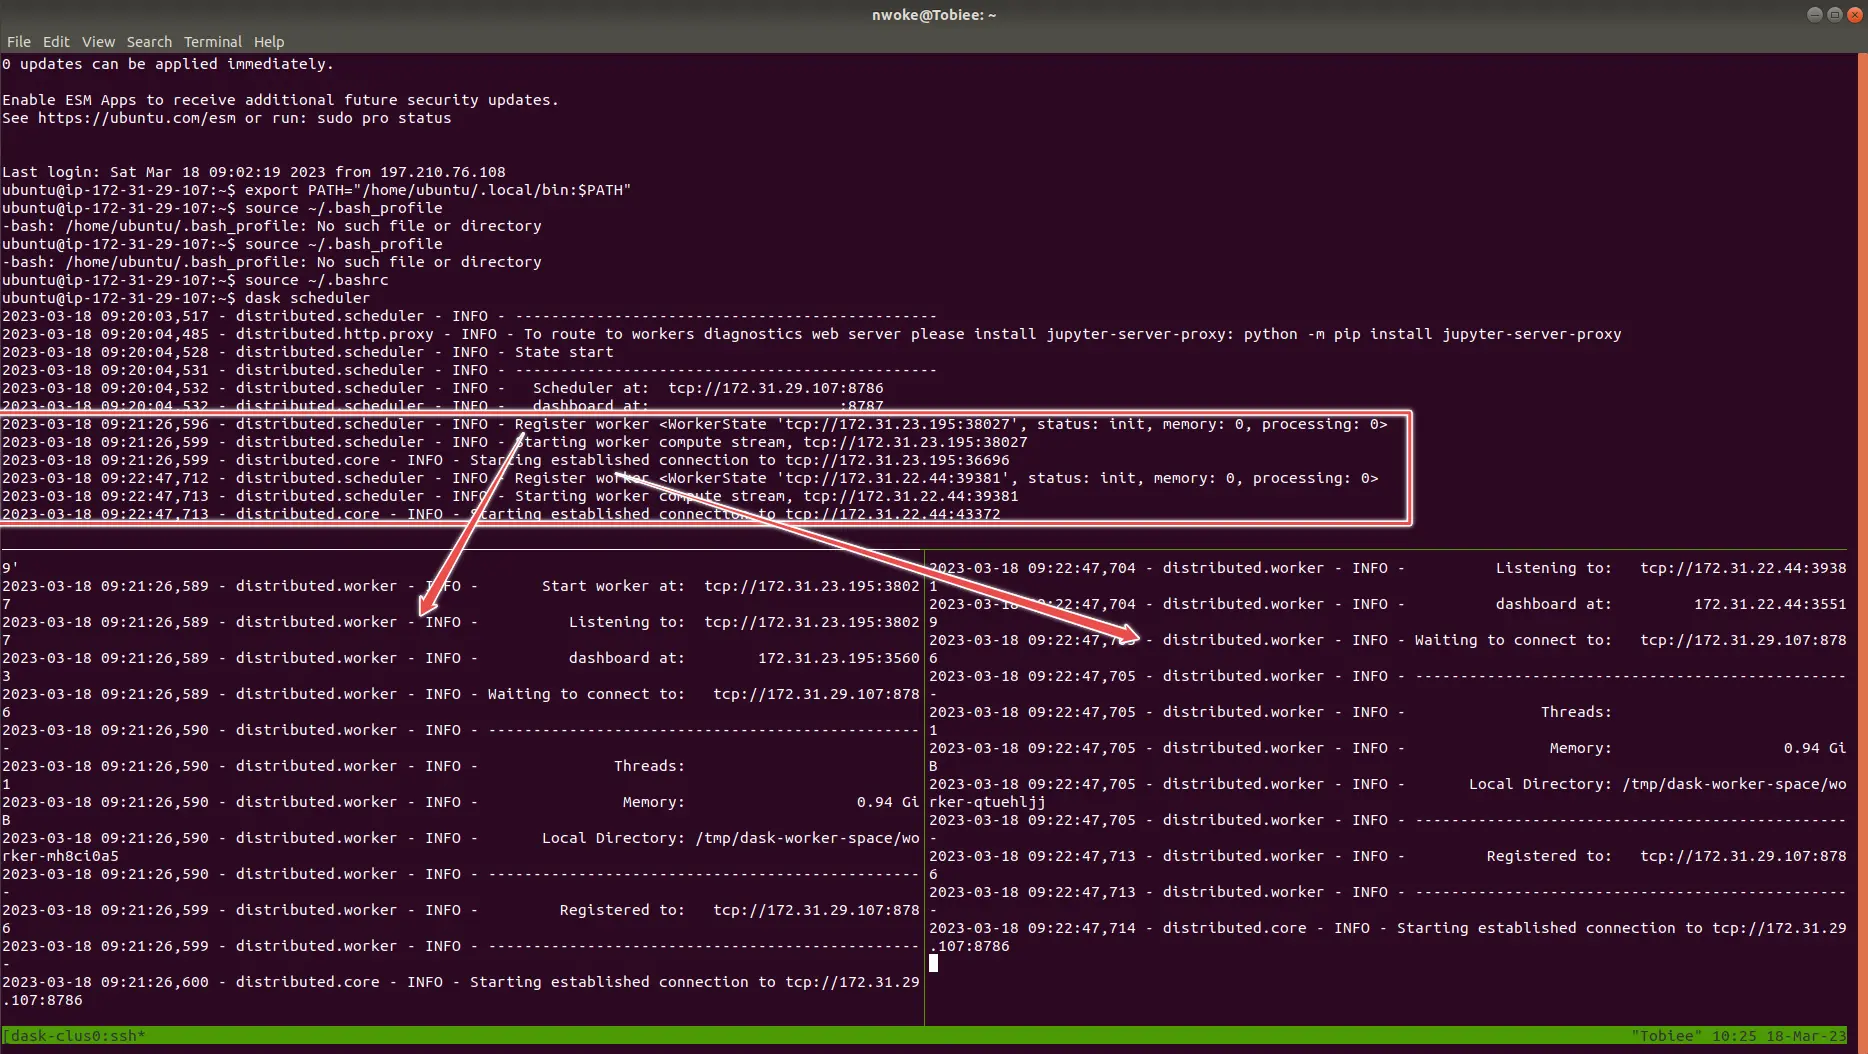
Then start workers on the dask-worker VMs and connect them to the dask scheduler on the dask-scheduler VM with this command.
[dask](https://saturncloud.io/glossary/dask) worker "dask-scheduler's VM Private IP address":8786
Congratulations! We have successfully set up a Dask cluster. Monitor computation activities from the dashboard. To view the dash dashboard for the cluster, go to your local browser and put in this URL
The dashboard should look like this. The status page shows the breakdown of the computational workloads and resources consumed by the task running on each worker.
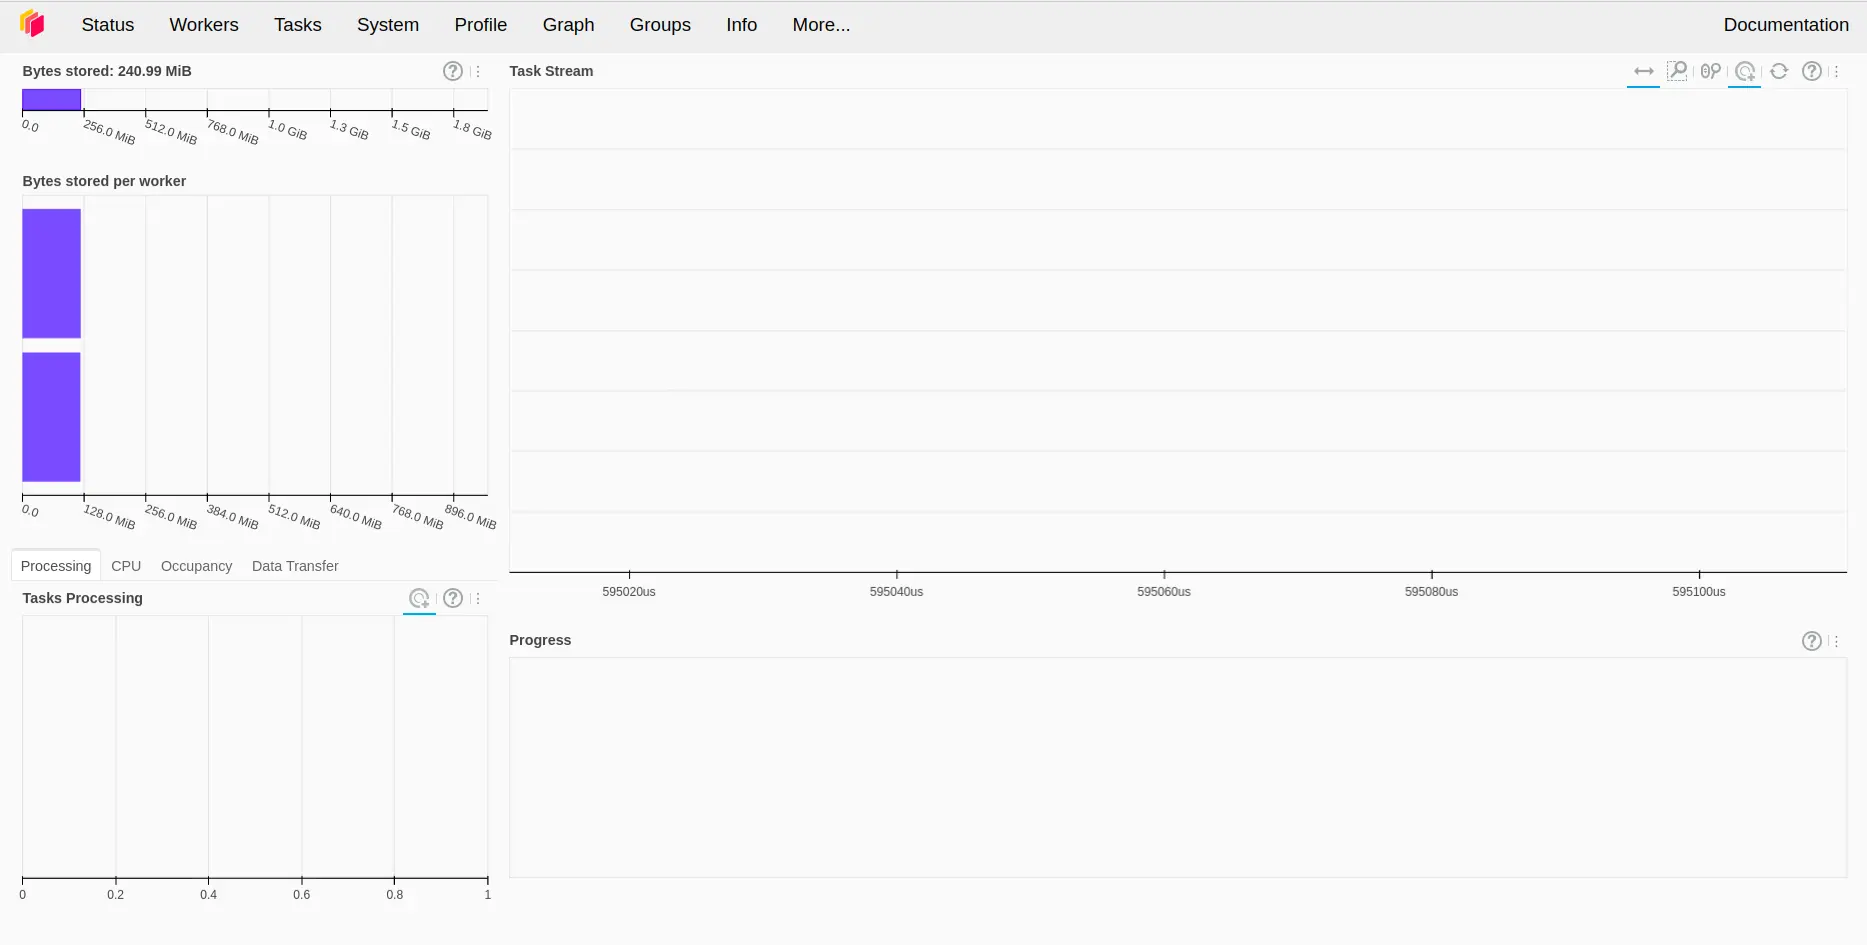
The workers' page shows all the workers' information in the cluster.
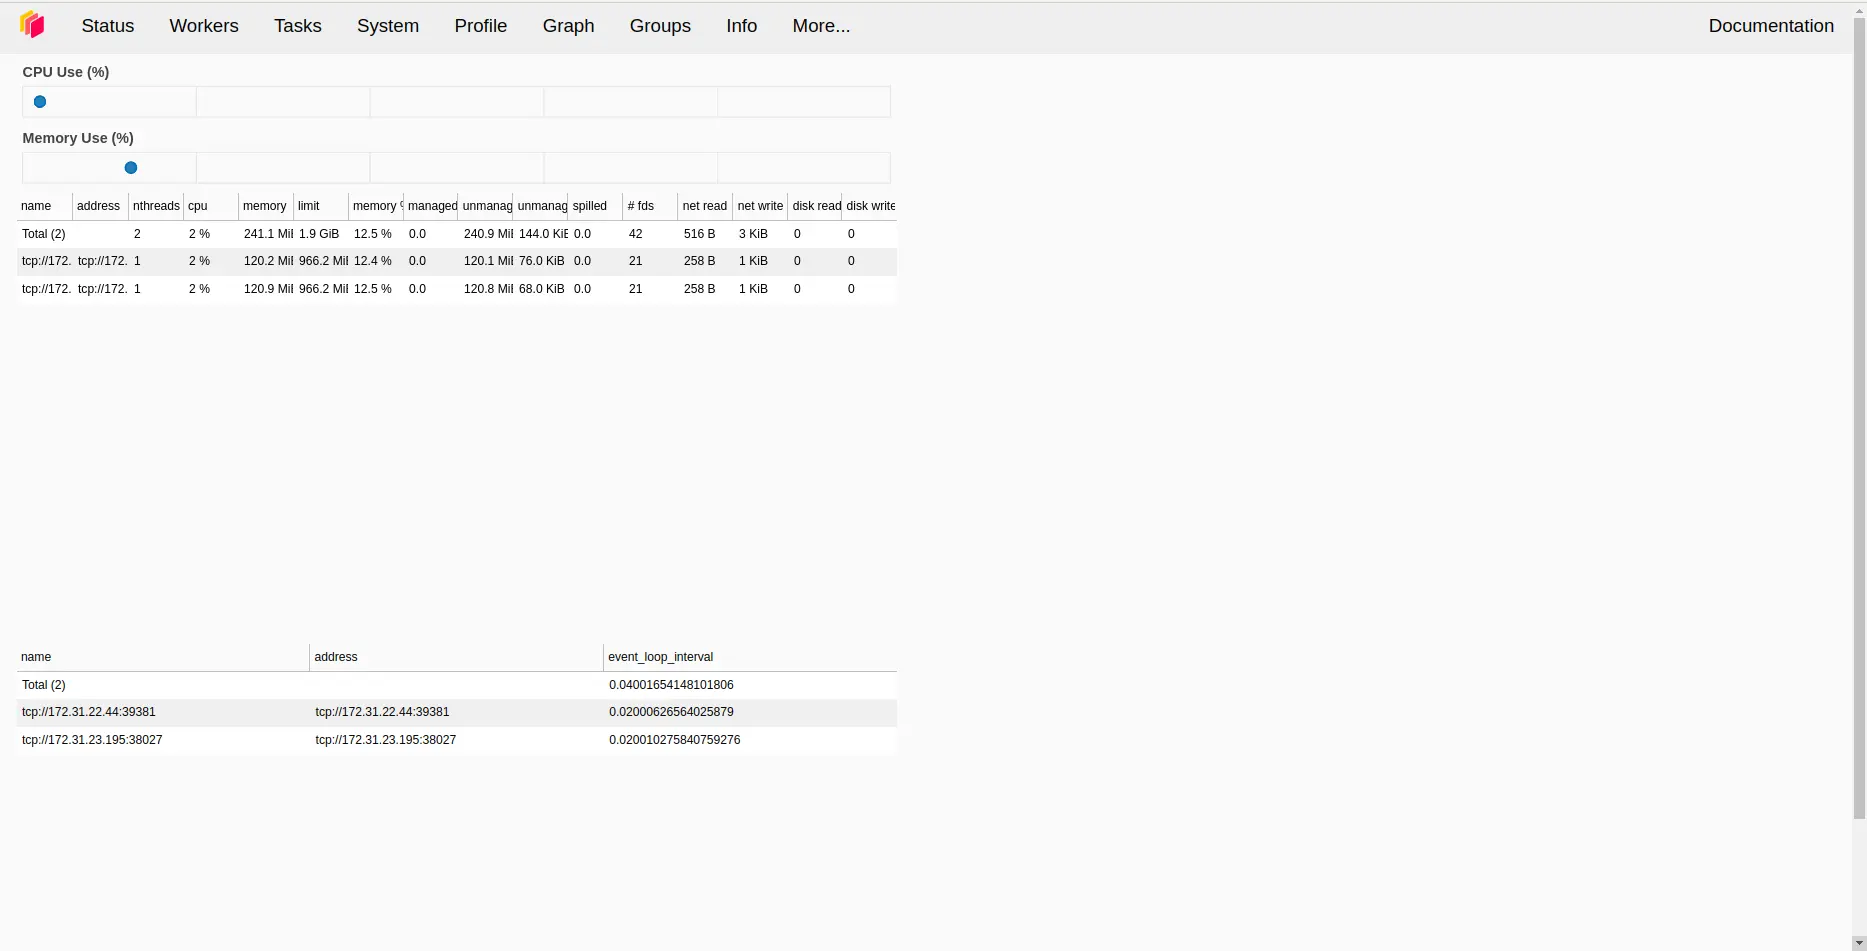
dashboard images
Get Started With Dask Right Away
Get going on a Dask cluster in seconds with Saturn Cloud. Saturn Cloud handles all the tooling infrastructure, security, and deployment headaches to get you up and running with Dask right away. If you’re an individual, team, or enterprise, there’s a plan that will work for you.


