
This article was published when data science tooling like Dask and R was a primary focus for Saturn Cloud. Today, Saturn Cloud is the enterprise AI platform for any GPU infrastructure.
Not long ago, Data Science developers used Integrated Development Environments (IDEs) such as JupyterLab or Spyder to write small-scale prototypes for gathering and cleaning data, as well as build and train their Machine Learning (ML) models, and switched to other IDEs like Sublime to write the automated script in a Python file, and then switched to the terminal again to run the Python file in a daemon process for large projects. For smaller projects, one can run the notebook in a local environment through Jupyter notebooks. After the model training process is complete, the developer needs to switch between Sublime and Terminal to write an API to expose the model endpoint, test the endpoint, and version control using Git and GitHub. Finally, we had to containerize our code using Docker and access a remote server via SSH to deploy our model via the command line. But things have significantly changed due to VS Code. All the things mentioned above can be achieved with a single IDE. Along with these perks, VS Code also helps the developer to write clean code, auto-complete and generate documentation and code, auto-import, debug the code in real-time, and offer other endless possibilities due to its extension marketplace.
In this article, we will discuss the three major benefits and features of VS Code: 1. Extensions (and how to install them) 2. Connection with remote servers (Google Colab) 3. Managing Python virtual environments
Extension
In the field of data science, errors can arise not only from the code itself but also from the datasets and models used. With the help of VS Code and its extensions, you can focus on the primary issue, such as models and datasets, rather than a minor mistake in the code itself, such as an indent, keywords, extending comments, bracket pairing, etc. Installing an extension in VS Code is very simple and can be done in 3 simple steps:
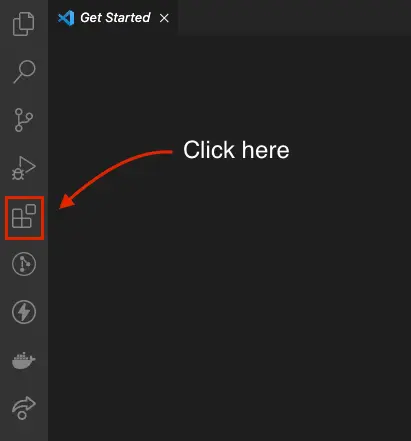
- By clicking the extension button located in the sidebar as shown below.
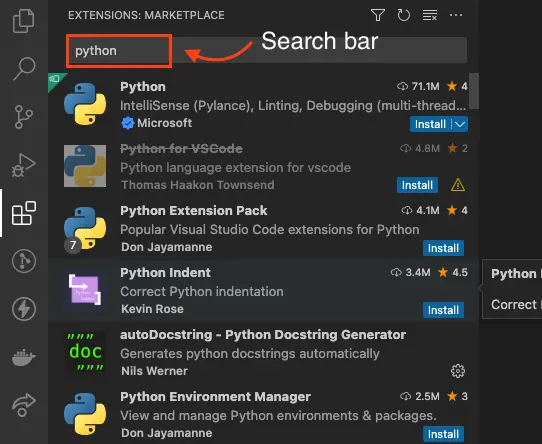
- After clicking the extension button, a wider sidebar will be displayed with search and extension listing functionalities. Search for your desired extension name or any related keywords like “Python”. It will filter extensions with desired input and show them in the listing panel like
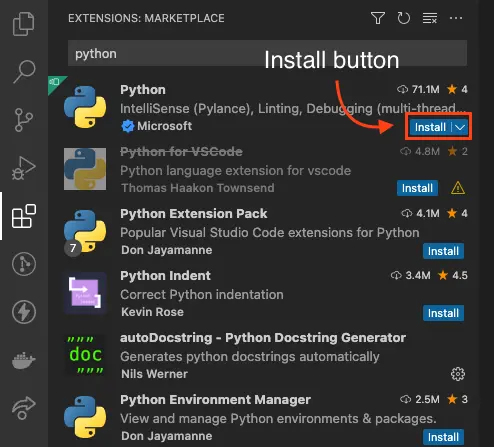
- If you see your desired extension in the listing panel, click the blue “Install” button of the respective extension, and it will be installed in your IDE.
Note: Reading the description and how to set up the section of extension is important since it may vary with different extensions.
Extensions are a powerful tool for data science developers, and using them can give you special abilities. Installing and using these extensions is a common practice among data science developers. Some of the most important extensions worthy of mention are as follows:
- Python Extension
- Pylance
- GitHub Copilot
- Jupyter and Jupyter Notebook Renderers
- GitLens
- Docker
- Python Indent
- Python Test Explorer
- Remote - SSH
- Live share
- Thunder Client
Pro tip: You can make a collection of your favorite extensions in VS Code and copy their “identifier” to install them all in one step via the command line.
code --install-extension <extension_identifier>
To find the extension identifier, go to the extension listing panel on the sidebar and click on the extension. The identifier can be found in the extension’s description.

Connecting Google Colab remotely with VS Code
To connect Google Colab with VS Code, follow these steps:
- Create a new notebook in Google Colab and run the following code:
from google.colab import drive
drive.mount("/content/drive")
Install colab_ssh on google colab
!pip install colab_ssh --upgrade --quiet
from colab_ssh import launch_ssh_cloudflared, init_git_cloudflared

github_repo = input("Enter your Github repository name: ")
github_username = input("Enter your Github username: ")
github_email_address = input("Enter your Github E-mail address: ")
github_access_token = input("Enter your Github access token: ")
ssh_password = input("Enter your password for SSH tunnel: ")

launch_ssh_cloudflared(ssh_password)
init_git_cloudflared(repository_url=github_repo + ".git",
    personal_token=github_access_token,
    branch="main",
    email=github_email_address,
    username=github_username)
In this code block, you will be prompted to provide the following information to secure your SSH connection to your GitHub repository:
- Repository name
- Username
- Access token
- Password
Please provide this information as prompted to continue.
- After running the code above, you will be able to see this output in your Google Colab notebook:
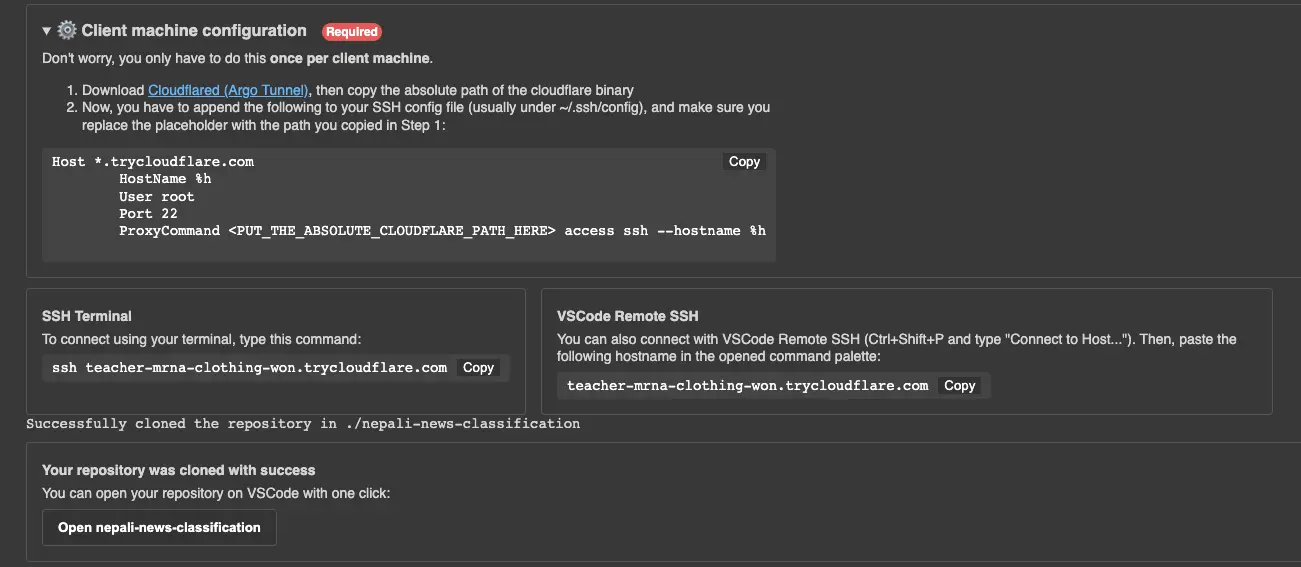
- As per the instructions in this output, download the Cloudflare binary file, untar it, and store the absolute path of the Cloudflare binary for later use.
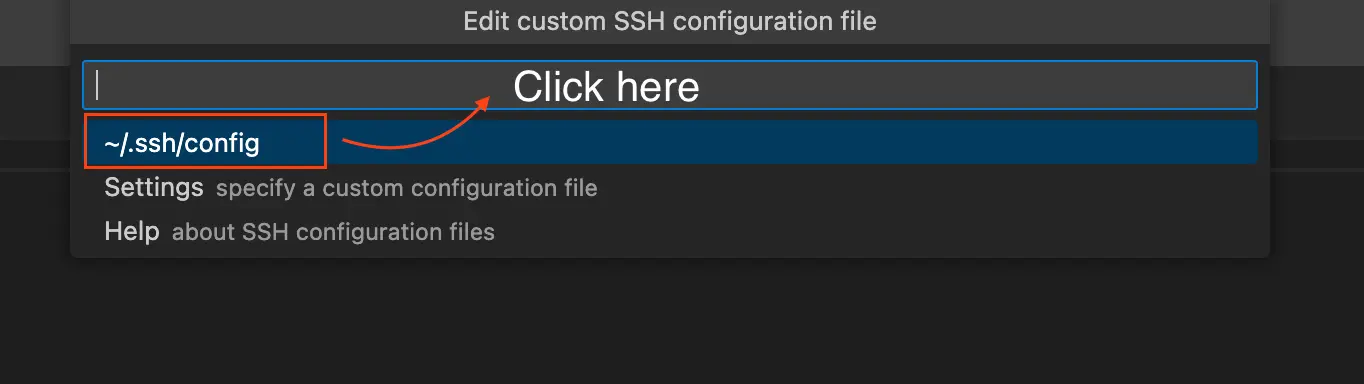
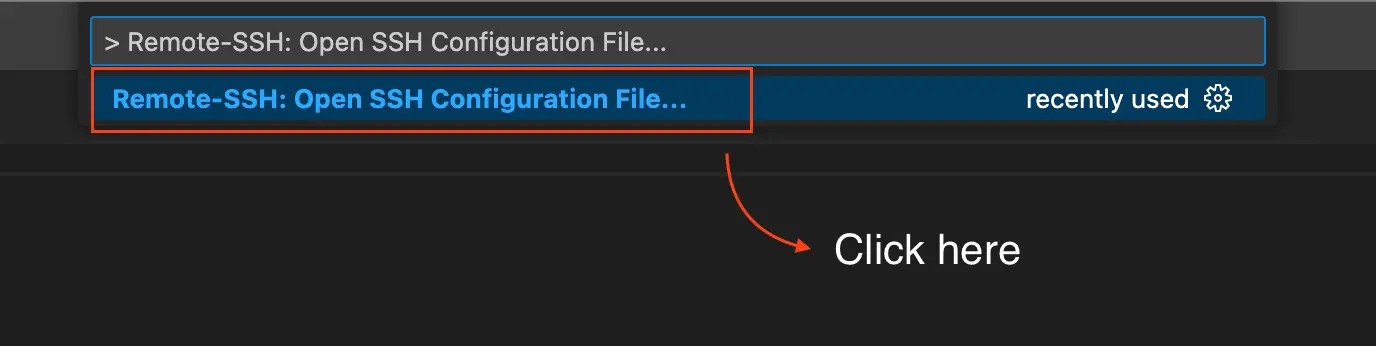
In Visual Studio Code, open the Command Palette by pressing Shift+Command+P (on Mac) or Shift+Ctrl+P (on Windows) and enter “>Remote-SSH: Open SSH Configuration File” and click on ~/.ssh/config to open the ssh configuration.
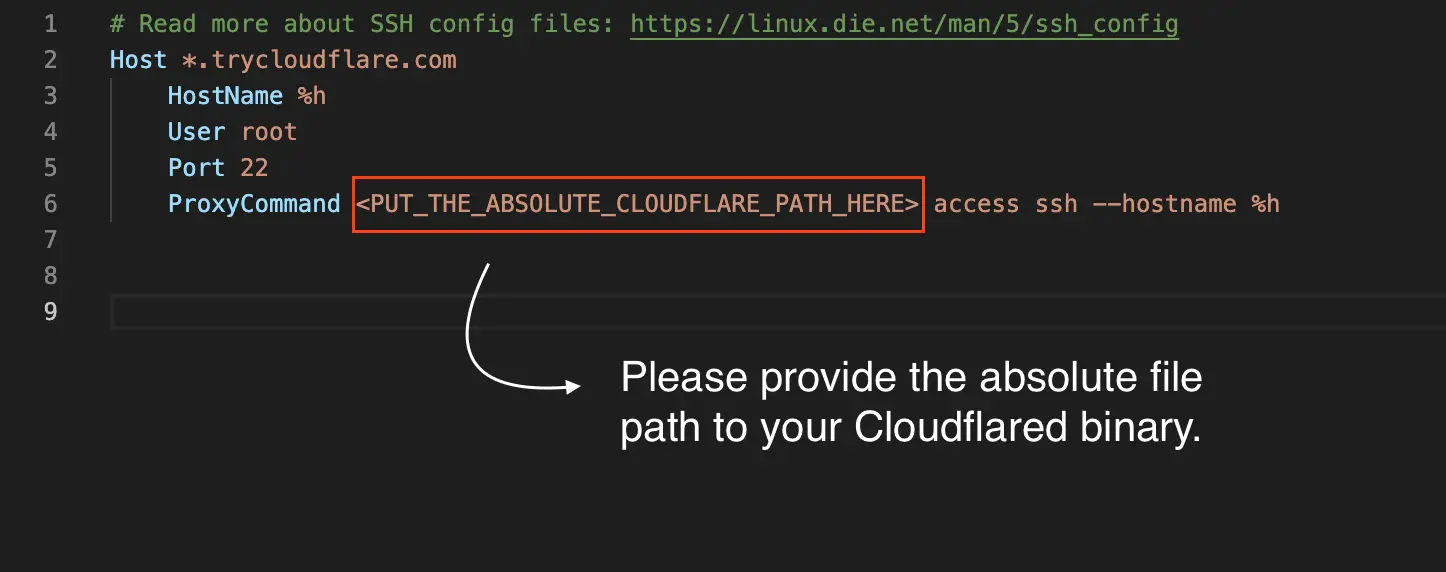
Then, copy the Host *.trycloudflare.com configuration block from Google Colab in your ~/.ssh/config file by altering the **<PUT_THE_ABSOLUTE_CLOUDFLARE_PATH_HERE>** with the absolute path of the Cloudflare binary you had stored before.
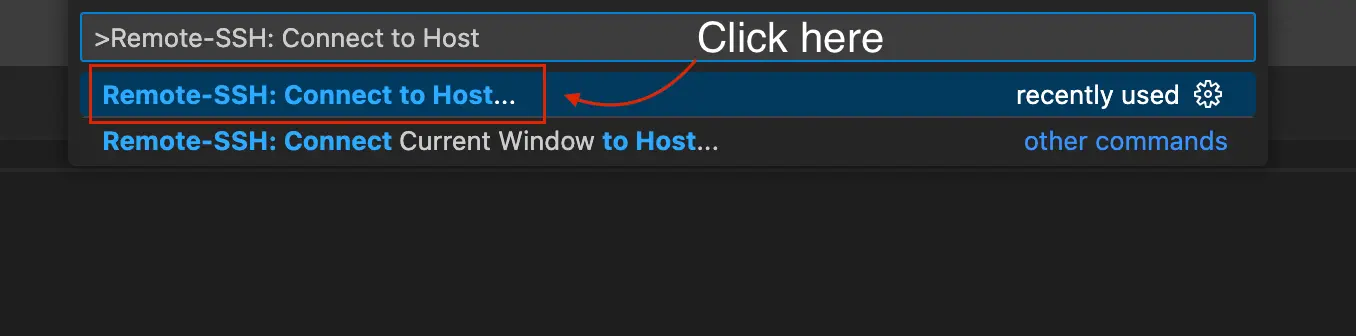
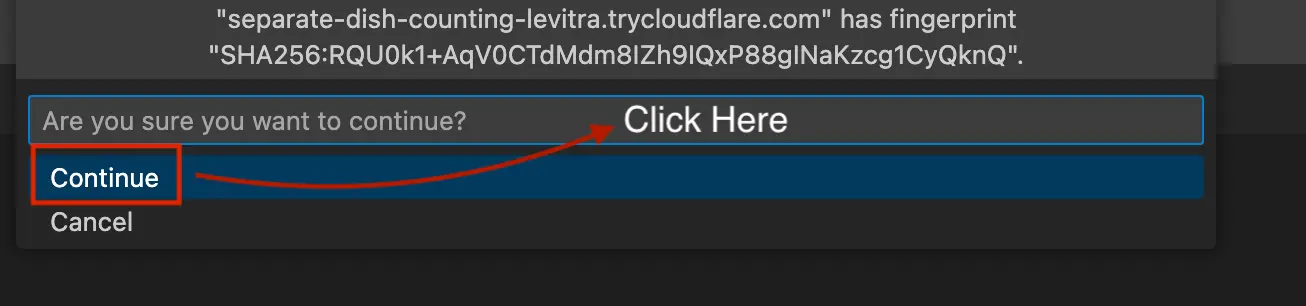
- In Visual Studio Code, open the Command Palette by pressing Shift+Command+P (on Mac) or Shift+Ctrl+P (on Windows) and enter “>Remote-SSH: Connect to Host" paste the VSCode Remote SSH, click “Continue” and enter the SSH password you had imputed in Google Colab prompt.


- Once the steps above have been completed, a new instance of the Visual Studio Code editor will open, connecting you to Google Colaboratory. In this environment, you will be able to create and work with IPython notebooks and scripts.
Setting up the Python Virtual Environment in VS Code
There are several steps you can take to set up a virtual environment in Visual Studio Code (VS Code):
Install the Python extension for VS Code, which provides support for debugging, linting, and other language-related features.
Open the terminal in VS Code and create a new virtual environment using the ‘virtualenv’ or ‘venv’ package. You can do this by running the following command:
python -m venv path_to_new_virtual_environment
- Activate the virtual environment by running the following command:
source path_to_new_virtual_environment/bin/activate
Install any necessary packages or modules in the virtual environment using pip or other package managers.
In VS Code, go to the “Command Palette” and select the “Python: Select Interpreter” option. This will allow you to choose the specific virtual environment as the interpreter for your project.
Finally, configure any necessary settings or preferences for the virtual environment in VS Code. This may include setting up debugging, linting, or other features.
Overall, setting up a virtual environment in VS Code involves installing the necessary extensions, creating and activating the virtual environment, and configuring any necessary settings or preferences. By following these steps, you can set up a virtual environment that is tailored to your specific project needs.
Additional Resources:
- An Intro to Data Science Platforms
- What are Data Science Platforms
- Most Data Science Platforms are a Bad Idea
- Top 10 Data Science Platforms And Their Customer Reviews 2022
- Saturn Cloud: An Alternative to SageMaker
- Configuring Sagemaker
- Top Computational Biology Platforms
- Top 10 ML Platforms
- What is Dask and how does it work?


