
As a software engineer, you may have encountered the need to use a specific library that is not available by default in Colab. Colab is a popular platform for running Jupyter notebooks in the cloud, and it provides a wide range of pre-installed libraries. However, some libraries may not be included. In this blog post, we will show you how to install a library permanently in Colab.
Understanding Colab
Colab is a free cloud-based service provided by Google that allows you to run Jupyter notebooks. It offers a wide range of pre-installed libraries, including NumPy, Pandas, Matplotlib, and TensorFlow. You can use Colab to run your code on Google’s servers, which means you don’t need to worry about hardware limitations and can run your code faster.
However, there may be cases where you need to install a library that is not included in Colab’s pre-installed libraries. In such cases, you can install the library using the !pip command.
Installing a Library in Colab
To install a library in Colab, you can use the following command:
!pip install <library-name>
Replace <library-name> with the name of the library you want to install. For example, if you want to install the numpy library, you can use the following command:
!pip install numpy
This will install the numpy library in your Colab environment.
However, there is a catch. When you close your Colab notebook or the runtime ends, the library you installed will be removed. This means that the next time you open your notebook, you will need to reinstall the library.
Installing a Library Permanently in Colab
First, mount the google drive by running:
from google.colab import drive
drive.mount("/content/drive")
Follow the instructions in the prompt window to complete the Google Drive setup. Subsequently, establish a virtual environment and save it to your mounted Google Drive. This ensures that when you open a new Colab Notebook in the future, you simply need to mount Google Drive, activate the virtual environment, and you can seamlessly utilize your installed packages. Make sure to install virtualenv before running the following code to create a virtual environment:
!virtualenv /content/drive/MyDrive/virtual_env

Now, let’s try installing a package. In this tutorial, we will install Pypdf, a library that allow us to work with pdf files using Python.
!source /content/drive/MyDrive/virtual_env/bin/activate; pip install Pypdf
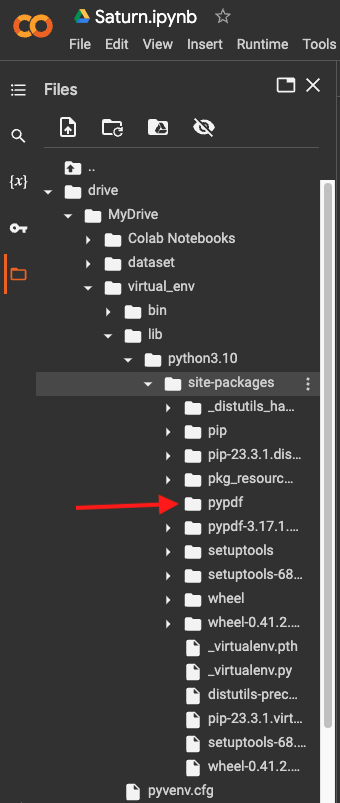
In the code snippet above, the command !source/content/drive/MyDrive/colab_env/bin/activate activates the virtual_env environment, while pip install Pypdf installs the Pypdf library within that activated environment. Now we can see that the pypdf package has been installed and located inside our virtual_env enviroment.
import sys
# add the path of the virtual environmentsite-packages to colab system path
sys.path.append("/content/drive/MyDrive/colab_env/lib/python3.8/site-packages")
Now you can use your package, let’s see an example:
from pypdf import PdfReader

reader = PdfReader("/content/Saturn.pdf")
number_of_pages = len(reader.pages)
print(number_of_pages)
Output:
12
Conclusion
Installing a library permanently in Colab is a simple process that involves using the !pip command and creating a virtual enviroment inside your Google Drive. By following the steps outlined in this blog post, you can ensure that the library you need is always available in your Colab notebook, save time when working with a new notebook by ensuring you have the necessary old libraries readily available.

