This article was published when data science tooling like Dask and R was a primary focus for Saturn Cloud. Today, Saturn Cloud is the enterprise AI platform for any GPU infrastructure.
Introduction
Three major components can define the machine learning (ML) lifecycle at an abstract level: data preparation, model building, and model deployment. However, even these three steps involve enormous collaboration across multiple teams. These teams can include data engineers, data scientists, machine learning engineers, and software engineers. Depending on the organization and the specific project, stakeholders may be involved, such as product managers, business analysts, and domain experts.
With different contributors specializing in specific areas of the pipeline, handoffs and transitions to each stage of the cycle might not be as streamlined as teams would wish. According to Algorithmia’s “2021 Enterprise Trends in ML”, 66% of companies take a month or more to develop a model, and 64% of companies take another month or more on top of that to deploy the model. The time required to deploy a model has increased year over year, especially as more variables are introduced into the ML workflow. Wouldn’t it be great if we had a tool to help streamline the ML lifecycle?
MLFlow
Fortunately, there is! Introducing MLFlow, an open-source platform for managing the end-to-end machine learning lifecycle. Created by Databricks, MLFlow is designed to help data scientists and engineers manage their ML projects more effectively by streamlining the building, deploying, and monitoring of machine learning models.
MLFlow provides a centralized platform for tracking and managing machine learning experiments, packaging code and dependencies, and deploying models to production. It also includes a variety of tools for visualizing and comparing performance metrics, managing and sharing datasets, and collaborating with other data scientists. MLFlow provides Python, R, Java, Scala, and REST APIs.
Some of the key features of MLflow that make it useful include:
Tracking: MLflow allows you to track and log experiments, including the code, data, and parameters used, as well as the results. This makes it easy to reproduce experiments and compare different runs. Data scientists can easily log and store all their experiment results in a central location, making it easy to compare and contrast different approaches to a problem. This helps to reduce the risk of losing track of important results and allows data scientists to make more informed decisions about which approach to use.
Model Management: MLflow makes it easy to manage and deploy models, including registering and packaging models for deployment.
Experimentation: MLflow provides a simple interface for running and comparing different experiments, which allows data scientists and engineers to iterate and improve their models quickly.
Integration: MLflow can be integrated with other machine learning libraries and frameworks, such as TensorFlow, Keras, and PyTorch, which makes it easy to use in existing workflows.
Platform Agnostic: MLflow is designed to work across multiple environments, including on-premises, cloud, and hybrid environments.

Getting Started with MLFlow
As mentioned before, MLFlow is platform agnostic, making it very robust to deploy on a system of your choice. Some options are your local machine, remote servers, and cloud platforms. MLFlow also comes in a Docker image, making it very easy to deploy the platform. It’s important to note that regardless of where you would like to deploy MLFlow, anyone with access to the deployed machine or server will be able to access experiments and compare results easily.
In this demo, we’ll focus on setting up an MLFlow server on your local machine, with Python as our language. The demo will focus mainly on providing an overview of the different options to host the server, pointing experiments toward this server for record-keeping, customizing experiment environments, and serving the model. To avoid extra steps to get a model working, we’ll utilize MLFlow’s GitHub repo of examples to run a simple logistic regression model in Scikit Learn.
Installation & Setup
In our demo, we’ll manually install MLFlow onto our local system. If you wish to use Docker, the official image is provided here, but an alternative open-source Docker installation that features a simple config setup is provided here.
Install MLFlow by running:
pip install mlflowRun an MLFlow server with a filestore backend by entering the following command: mlflow server –backend-store-uri
file:///home/${USER}/mlflow-databasea. Reminder: There are many other options for your backend, such as
http://,https://,s3://,gs://,azure://, andpostgresql://.You should now be able to see the MLFlow dashboard at
http://localhost:5000.a. Note: The default port is
5000, but you can change this using the -p flag (i.e.,mlflow server -p 1234). For more server options, runmlflow server --helpEnsure the command from step 3 runs in the background for the remainder of the demo.
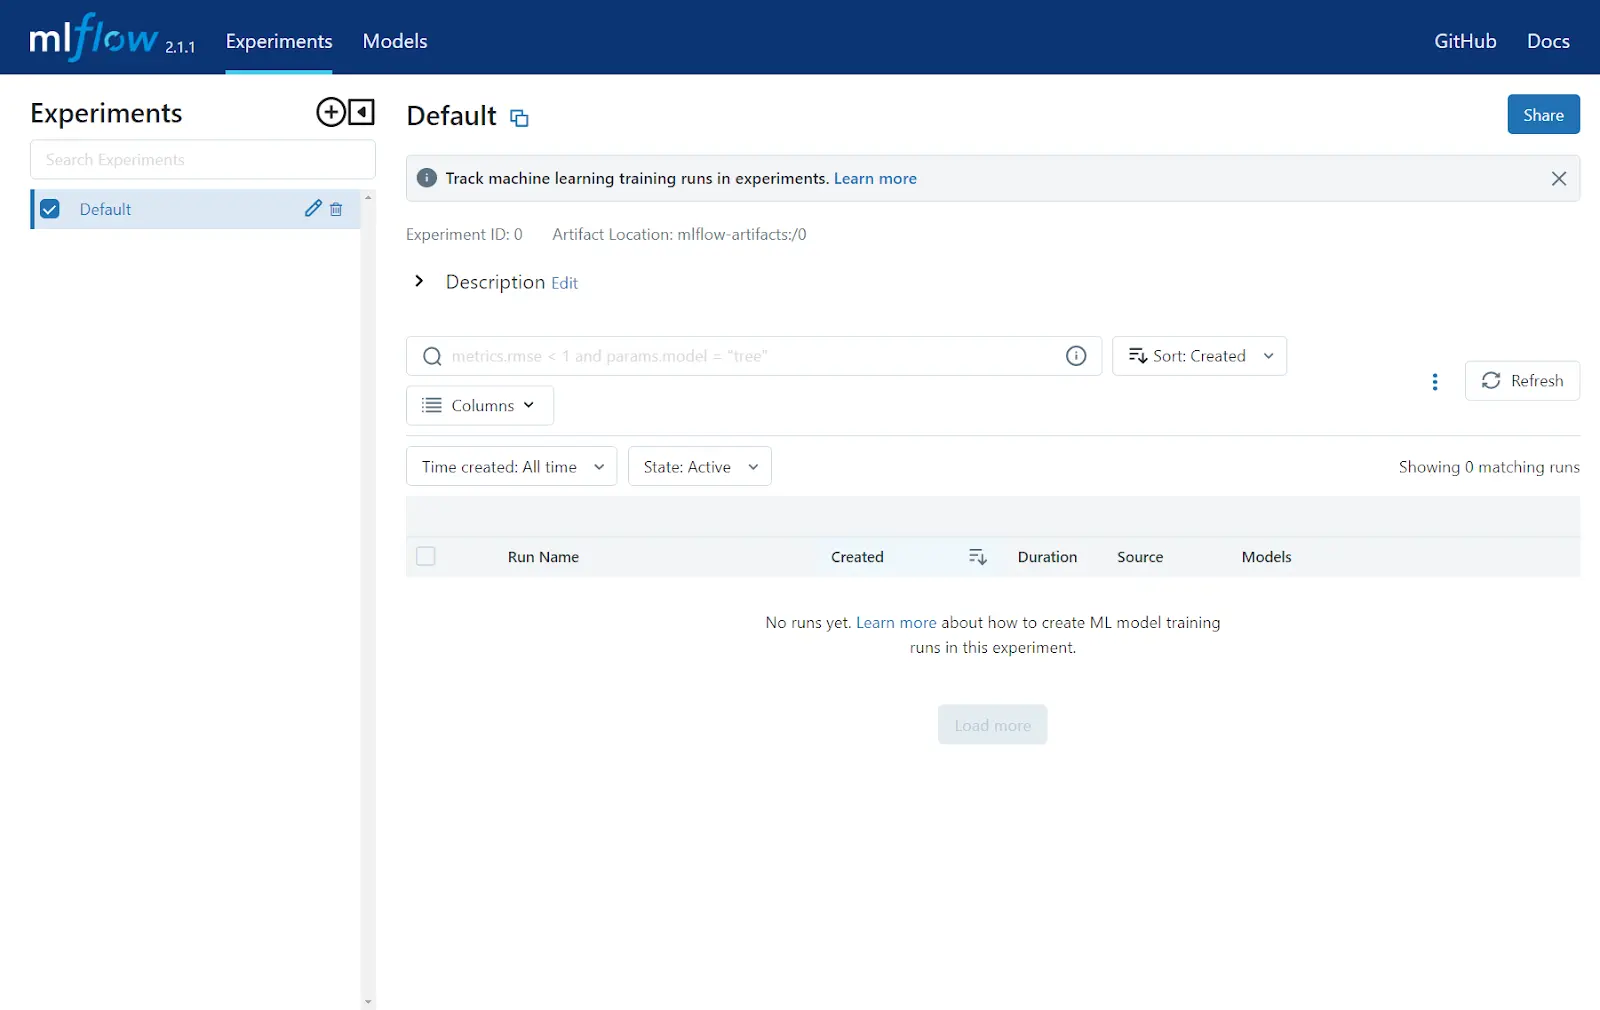
Understanding the Components of an MLFlow Experiment
Now that we have our server up and running, we can run an experiment to log onto the server. Before doing so, let’s take some time to understand the components of what make up an MLFlow project:
Clone the MLFlow repository:
git clone https://github.com/mlflow/mlflow.gitGo to the Scikit Learn logistic regression example:
cd mlflow/examples/sklearn_logistic_regression
From here, you’ll notice three files:
MLproject- This is a YAML that defines the structure of your MLFlow project. Think of this as all your settings and configurations. In this file, you can declare your environment (i.e., conda, pyenv, docker), entry point, and parameters for your training and validation scripts. It’s worth noting that this YAML file is not necessary to use MLFlow since you can use the Python API or CLI to invoke these settings, but using a YAML is good practice to keep all your configurations in one place. The MLProject file allows a convenient way to share configurations with collaborators.
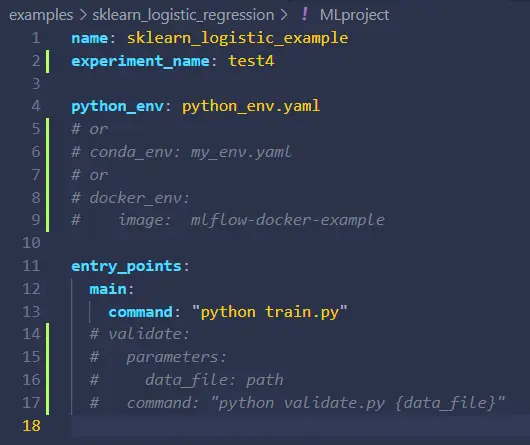
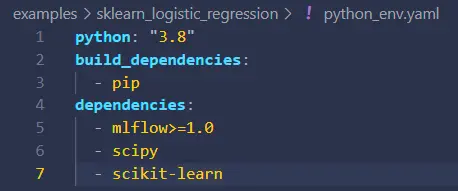
python_env.yaml- In this example, ourMLProjectfile indicates we are using a pyenv environment defined inpython_env.yaml. Every run in this MLFlow project will ensure the environment is available on the system running the experiment. If not, the environment will automatically prepare itself on the system based on the packages and dependencies of this YAML.
train.py- As declared in ourentry_pointssegment in our MLProject file, this is the script that will be called to commence training. The example’s score and model are logged using MLFlow’s Python API in this example. For those interested in an auto-logging feature for your framework, refer to these easy one-liners to log all metrics.
Running the MLFlow Experiment
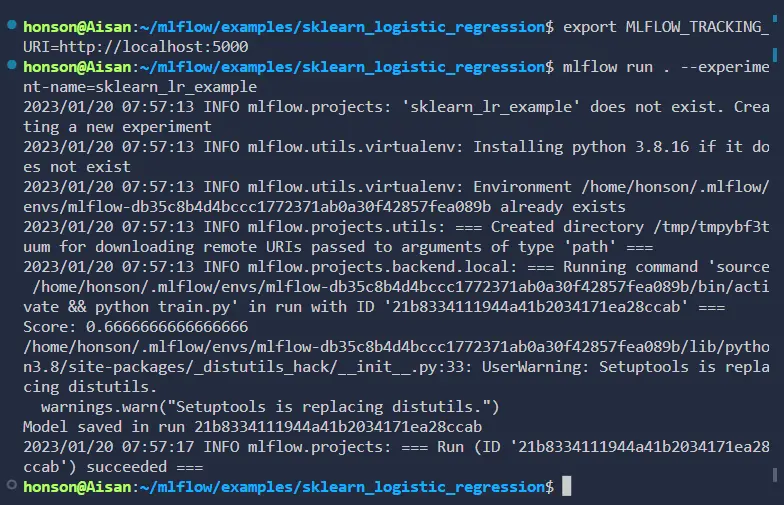
Before we run our experiment, make sure we set our tracking URI to our MLFlow server to ensure our results are logged. Simply export the environment variable in your terminal:
export MLFLOW_TRACKING_URI=http://localhost:5000.a. It’s possible to do this using the Python API or the
MLProjectfile, but we’ve found that the examples have been working when declaring an environment variable.b. If you wish to use the tracking URI more permanently, it’s possible to append this command to
~/.bashrcso that the variable auto imports itself upon opening a new shell. You can also temporarily use this by exporting within the shell and running your experiment afterward. To define the URI for a singular command, use:MLFLOW_TRACKING_URI=http://localhost:5000 mlflow run.--experiment-name=experiment_name_here.Once our server and URI are set, we’re ready to run the experiment! In the directory with our example, run the command:
mlflow run . --experiment-name=sklearn_lr_example.a. Once again, note that experiments and many other flags can be defined in other areas, such as the
MLProjectfile or within the script via the Python API or a supported language API of your choice.b. If you want to name this specific run, add
--run-name name_your_run_here.
MLFlow Dashboard and Model Serving
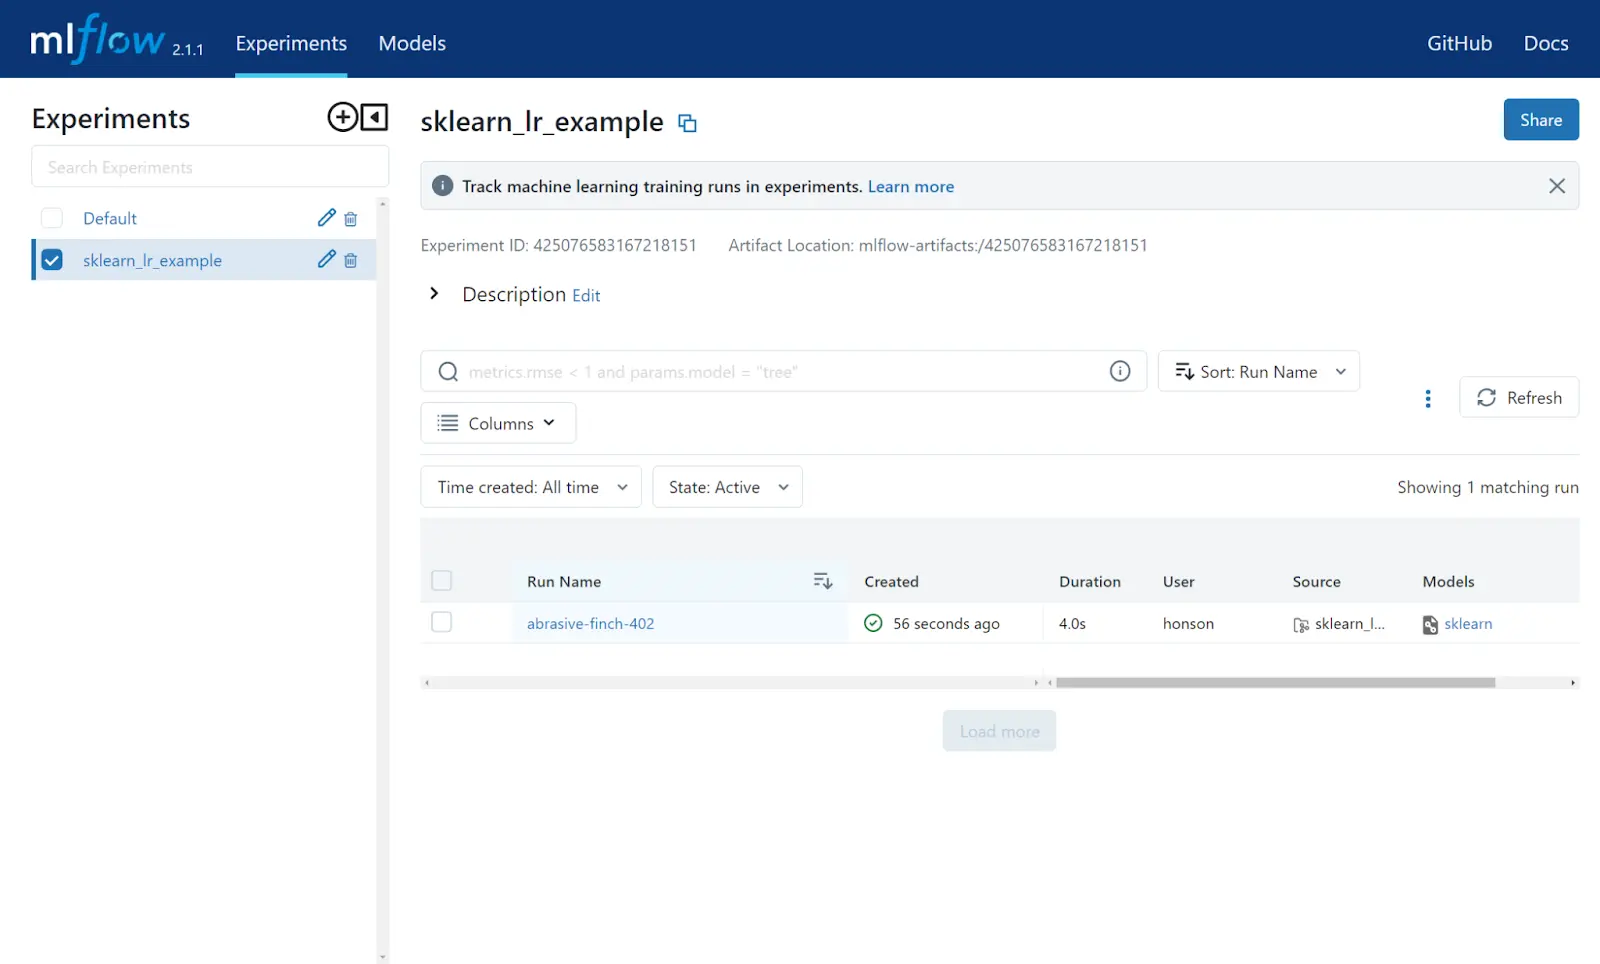
Now that our sample run is finished, we can take a closer look at how to access this experiment via the MLFlow server dashboard. After reloading the dashboard, you’ll notice a new experiment named sklearn_lr_example. Clicking this experiment will open up a list on the right side of the page to show all the past runs pertaining to this experiment.
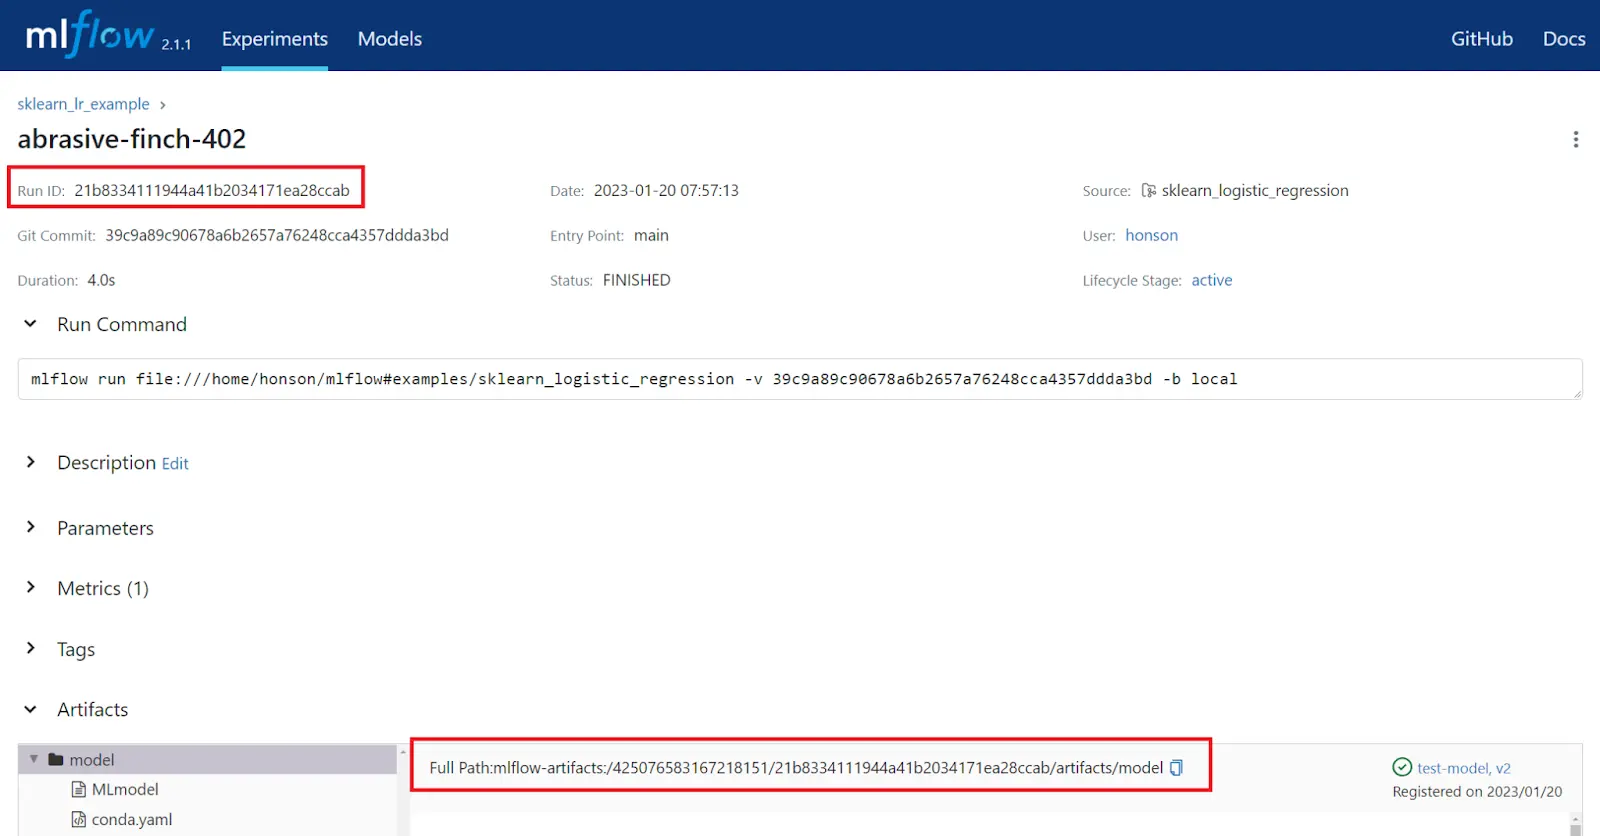
From here, you can click on the experiment (in the screenshot below, this is abrasive-finch-402) to view metrics and model artifacts generated.
To serve this model:
- Copy the “Run ID” or the “Full Path” of the model artifact for the specific run you would like to host.
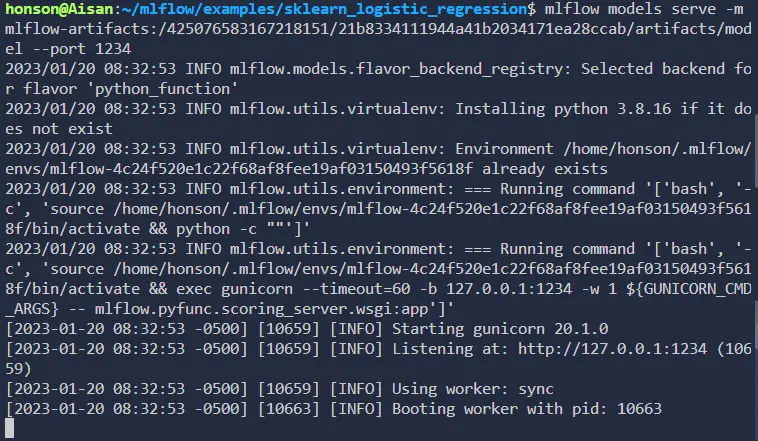
- Now, serve the model by running one of the commands below. This command will host the model on the machine with port
1234. It’s important to indicate the port number as the default port is5000, which is the default port of our MLFlow server. Feel free to change this port number as needed:
a.  If you used the “Run ID”: `mlflow models serve -m runs:/paste_your_ID_here --port 1234`.

b.  If you used the “Full Path”, paste the entire address after the `-m` flag. Similar to: `mlflow models serve -m mlflow-artifacts:/.../.../artifacts/model --port 1234`.

c.  Note: It’s also possible to serve this model using MLFlow’s API for their supported languages.
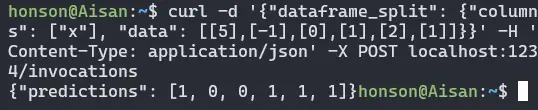
- We’re now ready to send a request to test our model. For a quick test, we’ll be using curl to send a
DataFrameover to the model:curl -d '{"dataframe_split": {"columns": ["x"], "data": [[5],[-1],[0],[1],[2],[1]]}}' -H 'Content-Type: application/json' -X POST localhost:1234/invocations
Model Registration & Version Control
One last important MLFlow feature we’ll be discussing is the model registry. Registering models in MLFlow is an essential step in the model management process as it allows for:
Versioning: When a model is registered, it is given a unique version number. This allows for tracking of changes to the model over time and rollback to previous versions if necessary.
Tracking: Registered models can be tracked, which means that the model’s performance, input, and output can be logged and visualized in the MLFlow UI. This allows for a better understanding of how the model is performing and how it is being used.
Deployment: Registered models can be easily deployed to a production environment. MLFlow provides a simple API for deploying models, which makes it easy to integrate models into existing systems.
Reproducibility: Registered models can be associated with metadata such as model descriptions, authors, and run information, which makes it easy to reproduce experiments and understand the context in which a model was created.
Collaboration: Registered models can be shared with others, making it easy for other team members to use and improve the model.
Model registry and serving are also available via the API. For now, let’s register one of our models via our server dashboard:
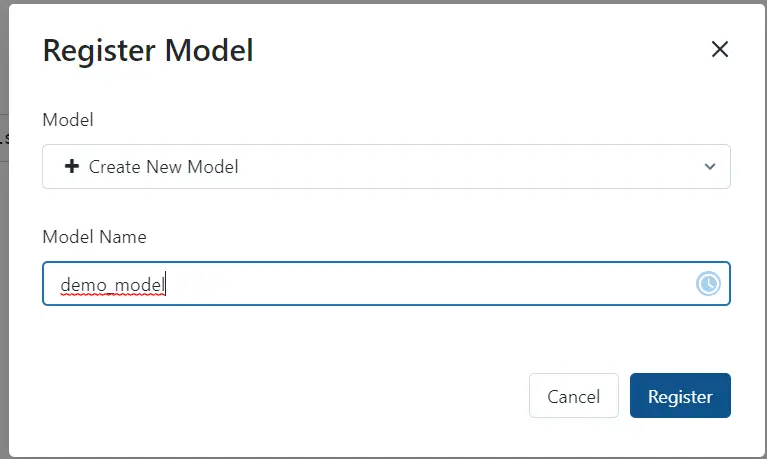
- Going back to one of our runs, you’ll notice a “Register Model” button. Click this to make a new model (or register this run to an existing model).

- After clicking “Register Model”, fill out the fields in the popup window, and click “Register”.
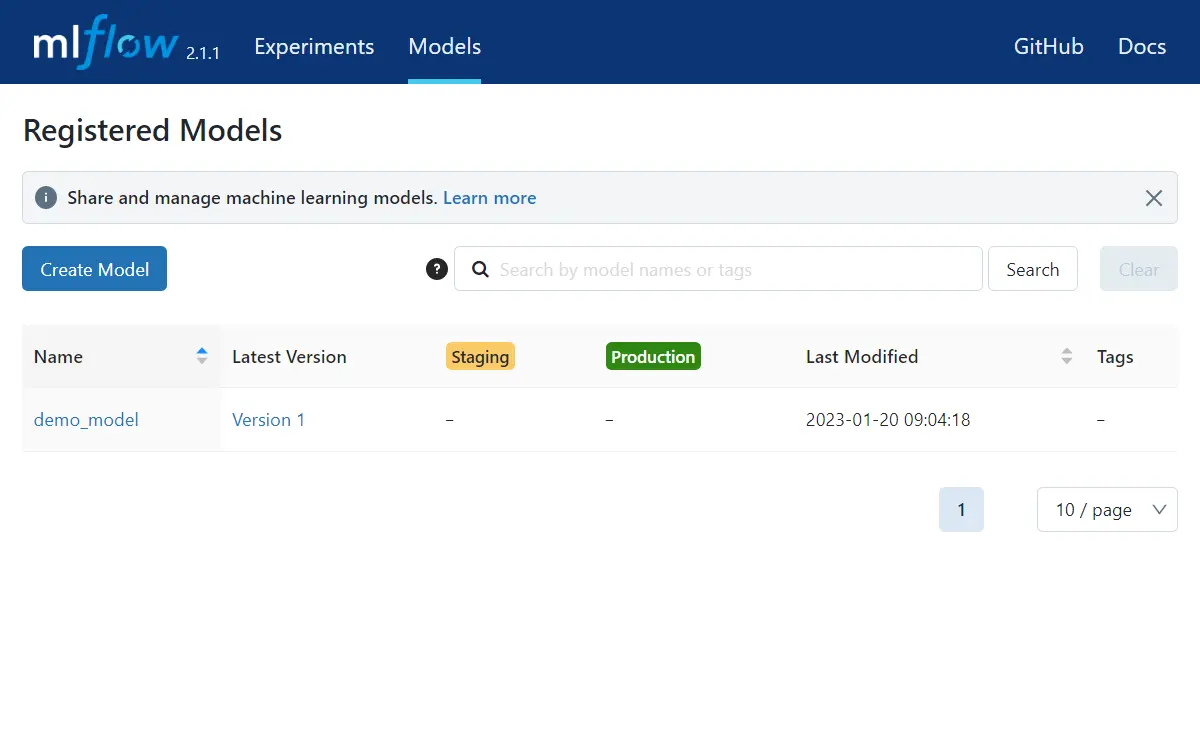
- You should see this in your server dashboard’s “Models” section. You’ll see an overview of the latest version, variants in the staging phase, and the current production model. To register a production model, click on the model name.
- Click on the version you wish to use as your production model.
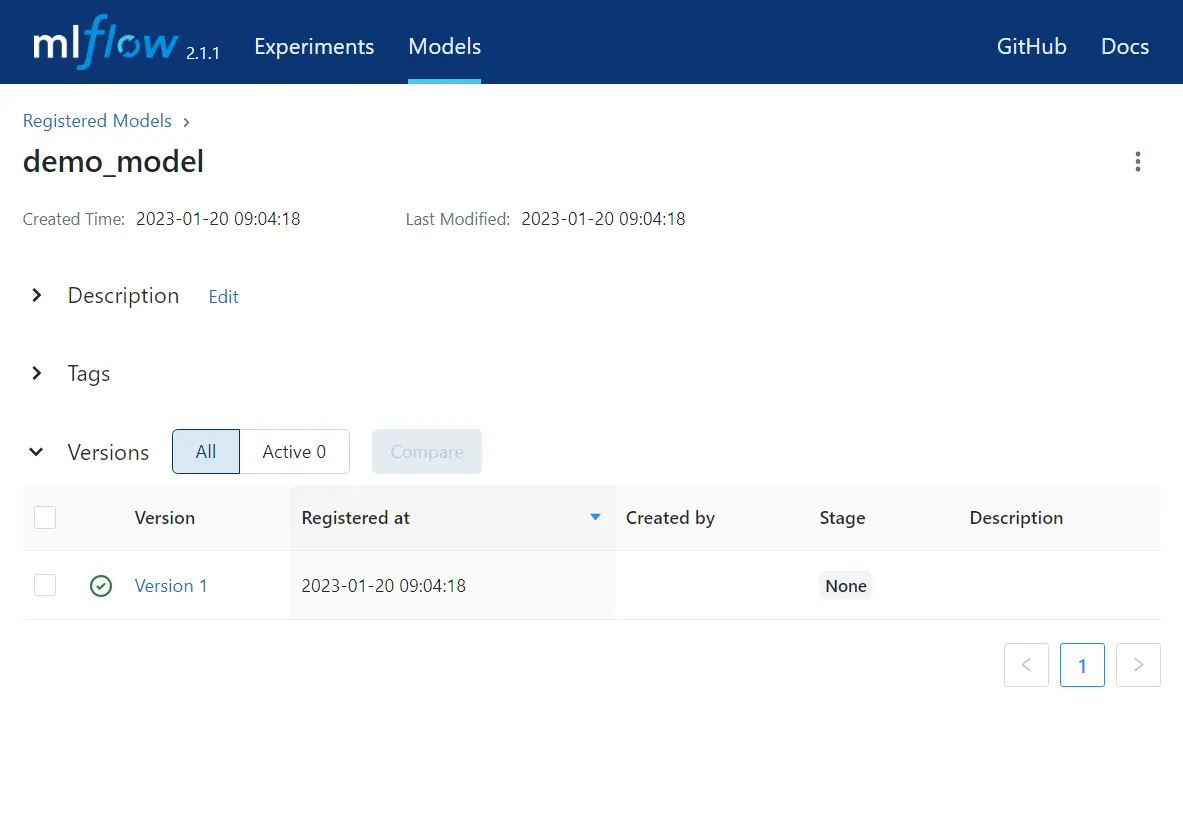
Set the status of this version to “Production”.
You can now use the same MLFlow command previously used to serve the model. This time, you can reference the model by its name and stage: mlflow models serve -m “models:/demo_model/Production” –port 1234.
Summary
Of course, there’s so much more to MLFlow than what was discussed here. Hopefully, this article serves as an excellent primer for getting started with MLFlow and using some of its capabilities. For a more in-depth understanding of these concepts and examples of what more you can do, refer to the additional resources below!
You may also be interested in:
Different ways to set up MLFlow run and model locations for servers
MLProject configuration options (i.e., environment, entry points, parameters)


