
This article was published when data science tooling like Dask and R was a primary focus for Saturn Cloud. Today, Saturn Cloud is the enterprise AI platform for any GPU infrastructure.
Introduction to Jupyter Notebook
Jupyter Notebook has become a popular tool among data scientists and analysts for its flexibility, ease of use, and ability to combine code, data, and documentation in a single document. In this comprehensive tutorial, we’ll cover everything you need to know to get started with Jupyter Notebook, from installation to advanced features.
Saturn Cloud offers seamless collaboration with cloud-based Jupyter notebooks designed for smooth teamwork and high-performance computing. Get started for free here.
Installation and Launch Jupyter Notebook
To get started with Jupyter Notebook, you’ll need to install it on your computer. There are several ways to install Jupyter Notebook, depending on your operating system and preferences. One of the most popular ways is to use the Anaconda distribution, which includes Jupyter Notebook along with many other scientific computing packages.
- Download Anaconda: Visit the Anaconda website https://www.anaconda.com/products/distribution and download the appropriate installer for your operating system (Windows, macOS, or Linux).
- Install Anaconda: Run the installer and follow the on-screen instructions. Make sure to add Anaconda to your system’s PATH during installation.
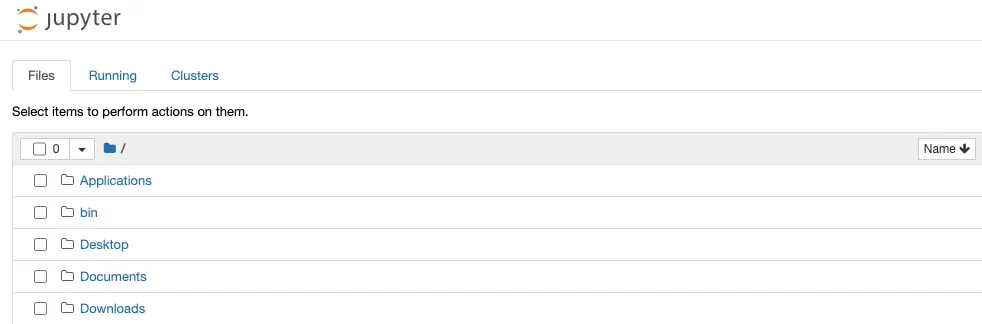
- Launch Jupyter Notebook: Open the Anaconda Navigator application and click on the “Jupyter Notebook” icon, or open a terminal (command prompt on Windows) and type jupyter notebook. This will open the Jupyter Notebook web interface in your default web browser.
Or you can install it using Pip
$ pip install jupyter
Once you have Jupyter Notebook installed, you can launch it from your command prompt or terminal by typing the command below and pressing enter. This will open the Jupyter Notebook in your web browser at http://localhost:8888/tree
$ jupyter notebook
Basic Functionality
Jupyter Notebook is organized into cells, which can contain code, text, or other content. Code cells allow you to write and execute code in real-time, while Markdown cells allow you to add text, headings, and formatting to your notebook. You can also add images, links, and other media to your notebook using Markdown syntax.
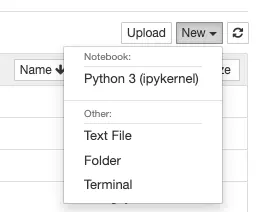
Let first create a new notebook by clicking New button and select Python3
To run a code cell in Jupyter Notebook, simply click on it and press the Run button in the toolbar, or use the keyboard shortcut Shift+Enter. The output of the code cell will be displayed directly below it.
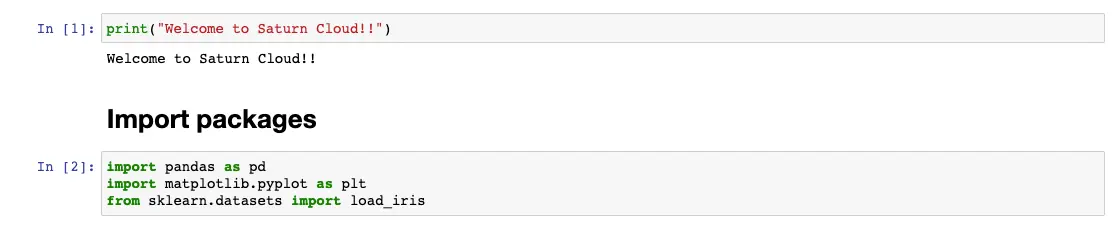
Most of the time, your code runs from top to bottom and the order is stated to the left of each cell such as In [1] or In [2] on the Figure above. However there might be sometimes that you want to restart and run the code again, here are some useful options from the Kernel menu:
- Restart: restarts the kernel, thus clearing all the variables, etc that were defined.
- Restart & Clear Output: same as above but will also wipe the output displayed below your code cells.
- Restart & Run All: same as above but will also run all your cells in order from first to last.
- Interrupt: If your kernel is ever stuck on computation and you wish to stop it, you can choose the Interrupt option.
Keyboard Shortcuts
Jupyter Notebook includes many useful keyboard shortcuts that can help you work more efficiently. While the graphical interface of Jupyter Notebook makes it easy to use, there are many keyboard shortcuts that can help you work more efficiently. In this article, we’ll cover some of the most useful keyboard shortcuts in Jupyter Notebook.
Command Mode vs. Edit Mode
Before we dive into the keyboard shortcuts, it’s important to understand the difference between Command Mode and Edit Mode in Jupyter Notebook. Command Mode is used to navigate and manipulate cells, while Edit Mode is used to edit the contents of a cell.
To enter Command Mode, press the Esc key on your keyboard. You’ll see that the color of the current cell changes to blue, indicating that you’re in Command Mode. To enter Edit Mode, press the Enter key on your keyboard. The color of the current cell changes to green, indicating that you’re in Edit Mode.
Keyboard Shortcuts
Here are 12 most useful keyboard shortcuts in Jupyter Notebook:
- Shift + Enter: Run the current cell and move to the next cell.
- Ctrl + Enter: Run the current cell and stay in the same cell.
- Alt + Enter: Run the current cell and insert a new cell below.
- A: Insert a new cell above the current cell.
- B: Insert a new cell below the current cell.
- D, D: Delete the current cell.
- M: Convert the current cell to a Markdown cell.
- Y: Convert the current cell to a code cell.
- Shift + Up/Down Arrow: Select multiple cells at once.
- Shift + M: Merge selected cells.
- Ctrl + S: Save the current notebook.
- Shift + L: Toggle line numbers.
These keyboard shortcuts can save you a lot of time when working in Jupyter Notebook, allowing you to navigate, edit, and run cells more quickly.
Customizing Keyboard Shortcuts
If you find that the default keyboard shortcuts in Jupyter Notebook don’t suit your workflow, you can customize them to your liking. To do this, go to Help > Edit Keyboard Shortcuts in the menu. This will open a modal window where you can view and edit the existing keyboard shortcuts, or add your own.
Working with Data
One of the main benefits of Jupyter Notebook is its ability to work with data. You can import data from a variety of sources, including CSV, Excel, and SQL databases. You can also use popular data manipulation libraries like Pandas and NumPy to manipulate and analyze data in your notebook. Next, let’s load a sample dataset using Pandas. For this example, we’ll use the Iris dataset, which contains measurements of iris flowers.
Load Data
import pandas as pd
import matplotlib.pyplot as plt
url = "https://archive.ics.uci.edu/ml/machine-learning-databases/iris/iris.data"
names = ['sepal-length', 'sepal-width', 'petal-length', 'petal-width', 'class']
dataset = pd.read_csv(url, names=names)
Visualize Data
Jupyter Notebook also supports data visualization using libraries like Matplotlib and Seaborn. Let’s visualize the Iris dataset using the code below:
plt.scatter(df['petal length (cm)'], df['petal width (cm)'], c=iris.target)
plt.xlabel('petal length (cm)')
plt.ylabel('petal width (cm)')
plt.show()
In this example, we’re using the scatter() function from Matplotlib to create a scatter plot of sepal length vs. sepal width

Collaborating with Others
Jupyter Notebook makes it easy to collaborate with others on your notebooks. You can share your notebooks with others by exporting them as HTML, PDF, or other formats, or by sharing them directly using Jupyter Notebook’s built-in sharing functionality.
You can also use version control systems like Git to collaborate on Jupyter Notebook projects with others. By using Git, you can track changes to your notebooks, revert to previous versions, and collaborate with others in real-time.
To ensure the notebook to be readable for the collaborators, it is advised to make sure the notebook contains no intermediate results, executed in order and contain the final result of the work. To do that, there are a few steps you should do before sharing or exporting the notebook:
- Click Kernel > Restart & Run All and wait for all code cells to finish
- Click File > Download as to export the notebook under any formats you want or just share the
.ipynbfile directly.
Advanced Features
Jupyter Notebook includes many advanced features that can help you work more efficiently and customize your environment. Some highlights can be listed below:
Jupyter Widgets: a powerful library for creating interactive GUIs (graphical user interfaces) in Jupyter Notebook. With Jupyter Widgets, you can add sliders, dropdown menus, checkboxes, and other interactive widgets to your notebooks, allowing users to explore and manipulate your data in real-time. Jupyter Widgets is built on top of the standard web technologies of HTML, CSS, and JavaScript, and provides a simple and intuitive API for creating and configuring widgets. Whether you’re exploring data, building models, or presenting results, Jupyter Widgets can help you create engaging and informative interactive visualizations that bring your work to life.
Jupyter Notebook Extensions: a collection of community-contributed packages that add extra functionality to Jupyter Notebook. These extensions can enhance your Jupyter Notebook experience by providing features like code highlighting, table of contents, spell-checking, and more. The extensions can be installed using Python’s package manager, pip, and enabled or disabled using the Jupyter Notebook configuration file. Jupyter Notebook Extensions can help you customize your Jupyter Notebook to your specific needs and workflow, and make it more powerful and user-friendly.
Parallel and Distributed Computing: With Jupyter Notebook, you can use parallel and distributed computing frameworks such as Dask, IPython parallel, and Apache Spark to run code in a distributed manner. This is particularly useful for data-intensive workloads and machine learning tasks, where the size of the data can be too large to fit into memory on a single machine. By leveraging parallel and distributed computing on Jupyter Notebook, you can scale your computation to handle larger datasets, reduce processing time, and improve the overall performance of your code.
Additionally, as a higher level of Jupyter Notebook, we also have Jupyterlab which is a web-based interactive development environment (IDE) for Jupyter Notebook. It provides a modern, flexible, and extensible interface for working with notebooks, code, and data. With JupyterLab, you can organize your work into tabs and panels, drag and drop files and folders, use a command palette for quick access to actions, and much more. It is a powerful and versatile tool for data science and scientific computing and JupyterHub, a multi-user server for Jupyter Notebook that allows multiple users to access and collaborate on notebooks through a web browser. It is particularly useful for organizations or educational institutions that need to provide a shared Jupyter Notebook environment to a large number of users. With JupyterHub, administrators can manage user accounts, permissions, and resources, ensuring that everyone has access to the resources they need while maintaining security and control over the environment.
Troubleshooting
As with any software, you may encounter issues or errors when using Jupyter Notebook. Here are 3 common issues and how to troubleshoot them:
Kernel not found: This error occurs when the Jupyter Notebook can’t find the kernel for the selected programming language. To fix this, make sure you have the kernel installed and set up correctly.Notebook not loading: This can occur if there is a problem with the notebook file or with Jupyter Notebook itself. Try restarting Jupyter Notebook or opening the notebook in a different web browser.Package not found: If you’re trying to import a package that a Jupyter Notebook can’t find, make sure the package is installed and accessible in your environment.
Conclusion
Jupyter Notebook is a powerful tool for data scientists and analysts that allows you to combine code, data, and documentation in a single document. In this comprehensive guide, we’ve covered everything you need to know to get started with Jupyter Notebook, including installation, basic functionality, keyboard shortcuts, working with data, visualization, collaboration, advanced features, best practices, and troubleshooting.
With this guide, you’ll be able to create and share powerful data-driven notebooks that can help you gain insights and make informed decisions.
Saturn Cloud offers seamless collaboration with cloud-based Jupyter notebooks designed for smooth teamwork and high-performance computing. Get started for free here.
Further Resources
You may also be interested in:
- Jupyter Official Documentation: These sections describe a few ways to get started with some of the most-commonly used tools in the Jupyter ecosystem..
- Saturn Cloud: A free computing platform where you can run JupyterLab for personal and enterprise use cases
- Jupyter Notebook GitHub Repository: The source code, issue tracker, and latest updates for Jupyter Notebook.
- Jupyter Notebook Tutorial for Beginners with Python by Dave Gray (YouTube): A detailed video tutorial that provides a set up, introduction, and quick start for Jupyter Notebooks
- Project Jupyter: The main website for Project Jupyter, which offers resources, documentation, and news related to the Jupyter ecosystem.


