
This article was published when data science tooling like Dask and R was a primary focus for Saturn Cloud. Today, Saturn Cloud is the enterprise AI platform for any GPU infrastructure.
Jupyter Notebook Change Directory: A Guide
As a data scientist, you may find yourself working with Jupyter Notebook quite often. While Jupyter Notebook is a great tool for data analysis and visualization, it can be frustrating when you need to change directories. In this guide, we’ll walk you through how to change directories in Jupyter Notebook.
What is Jupyter Notebook?
Jupyter Notebook is an open-source web application that allows you to create and share documents that contain live code, equations, visualizations, and narrative text. It is widely used by data scientists for data analysis, machine learning, and scientific computing.
Why Change Directories in Jupyter Notebook?
Changing directories in Jupyter Notebook is necessary when you need to access files that are not in the default directory. For example, if you have a data file stored in a different directory, you will need to change the directory to access that file.
How to Change Directories in Jupyter Notebook
There are two ways to change directories in Jupyter Notebook: using the command line and using the Jupyter Notebook interface.
Method 1: Using the Command Line
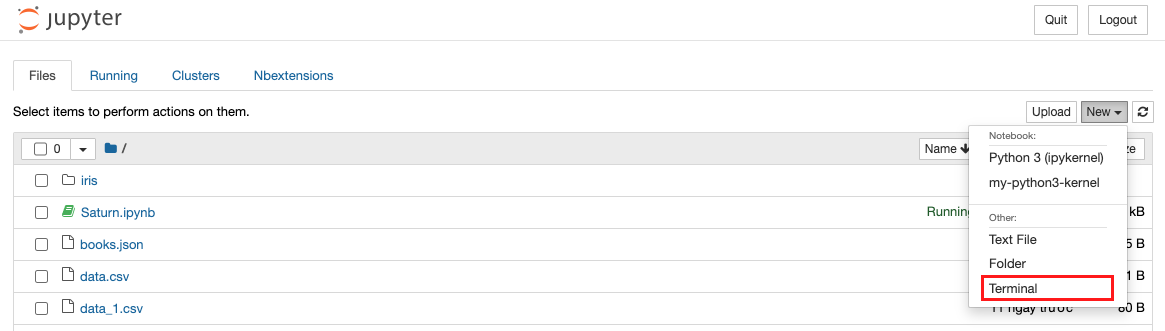
Open Jupyter Notebook in your web browser.
Click on the New button and select Terminal to open a new terminal window.
In the terminal window, use the cd command to change the directory to the desired location. For example, if you want to change to the Documents directory, type cd Documents.
Once you have changed to the desired directory, type “jupyter notebook” to launch Jupyter Notebook in the new directory.
Method 2: Using the Jupyter Notebook Interface
Open Jupyter Notebook in your web browser.
Click on the New button and select Notebook to open a new notebook.
In the first cell of the notebook, type the following command:
import os
os.chdir('/path/to/desired/directory')
Replace /path/to/desired/directory with the path to the directory you want to change to.
Press Shift + Enter to run the cell. This will change the directory to the desired location.
You can now access files in the new directory by specifying the path relative to the new directory.
Tips for Changing Directories in Jupyter Notebook
Here are a few tips to keep in mind when changing directories in Jupyter Notebook:
Use absolute paths: When specifying the path to the desired directory, it is best to use absolute paths instead of relative paths. This will ensure that the notebook runs correctly even if it is moved to a different location.
Be careful when using the command line: Changing directories using the command line can be risky if you are not familiar with the command line interface. Be sure to double-check the directory you are changing to before running any commands.
Save your notebook after changing directories: After changing directories, be sure to save your notebook to ensure that the changes are saved.
Conclusion
Changing directories in Jupyter Notebook is a necessary skill for any data scientist. Whether you are working with data files or other resources, being able to change directories will make your work much easier. By following the steps outlined in this guide, you can quickly and easily change directories in Jupyter Notebook.

