How to Show an Image in Google Colab

Step 1: Upload the image to Google Colab
The first step is to upload the image to Google Colab. There are two ways to do this:
Method 1: Upload the image from your local machine
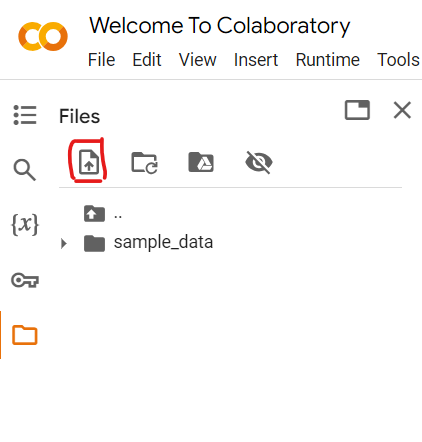
- Click on the “Files” tab on the left-hand side of the screen.
- Click on the “Upload” button and select the image from your local machine.
- Once the image is uploaded, it will appear in the “Files” tab.

Method 2: Download the image from the internet
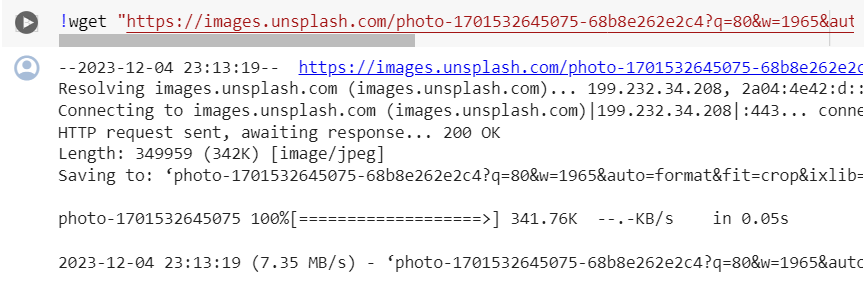
- Use the following code to download the image from the internet and save it to Google Colab.
!wget "image_url"
Replace “image_url” with the URL of the image you want to download.
You should see the following output:

- Use Matplotlib to display the image
Matplotlib is a popular data visualization library in Python. It can also be used to display images in Google Colab.
- Install the Matplotlib library using the following code:
!pip install matplotlib
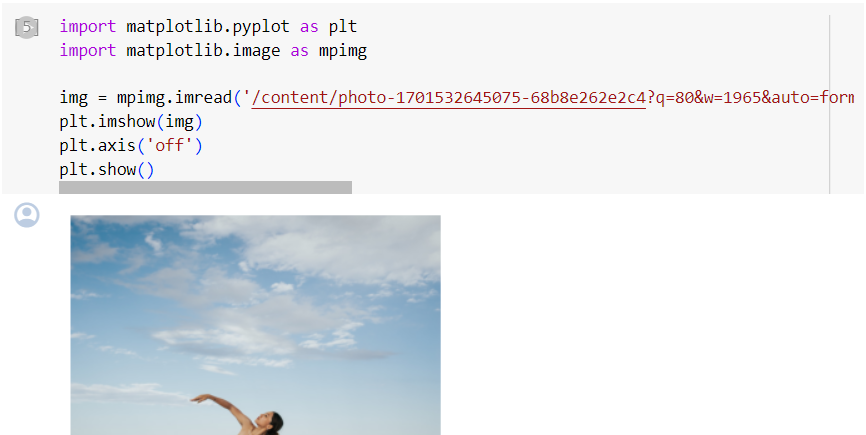
- Use the following code to display the image:
import matplotlib.pyplot as plt
import matplotlib.image as mpimg

img = mpimg.imread('image.jpg') #Replace "image.jpg" with the path of your image
plt.imshow(img)
plt.axis('off')
plt.show()
You will see the photo displayed like below:

Common Errors in Showing Images in Google Colab
While showing images in Google Colab is generally straightforward, several common errors can occur. Here are some of the most frequent ones:
- Incorrect image path:
- File not found: Ensure the image path you provide is correct and the file is accessible in Google Colab. Double-check if the file name or path contains typos or inconsistencies.
- Relative vs. absolute path: Be mindful of relative vs. absolute paths. Ensure your code uses the appropriate path based on the location of the image and the script.
- Unsupported image format:
- Colab supports limited image formats: While Colab supports commonly used formats like JPEG, PNG, and GIF, it might not support specific or less popular formats. Verify the image format and ensure it’s compatible with Colab.
- Conversion required: You might need to convert the image to a supported format before displaying it in Colab. Tools like ImageMagick or online converters can help with this.
- Improper library usage:
- Incorrect library import: ensure you import the correct library and modules for image processing and display. For instance, using cv2 instead of matplotlib.pyplot for displaying an image will lead to errors.
- Mismatched function parameters: Check the function documentation and ensure you pass the correct arguments and parameters for image loading and display. Using incorrect parameters can lead to unexpected behavior or errors.
Memory limitations: Large image files: Colab has memory limitations. Attempting to display very large images might exceed available memory and cause crashes or errors. Consider resizing or downsampling large images before displaying them.
Missing library installations: Matplotlib dependency: While Matplotlib is pre-installed in Colab, additional dependencies it requires might be missing. If you encounter errors related to missing modules, install them using pip before attempting to display the image.
Conclusion
In this blog post, we discussed how to show an image in Google Colab. We covered two methods to upload the image to Google Colab and how to display the image using Matplotlib which provides more advanced options for data visualization. By following these steps, you can easily display images in Google Colab and continue your development work seamlessly.
About Saturn Cloud
Saturn Cloud is a portable AI platform that installs securely in any cloud account. Build, deploy, scale and collaborate on AI/ML workloads-no long term contracts, no vendor lock-in.
Saturn Cloud provides customizable, ready-to-use cloud environments
for collaborative data teams.
Try Saturn Cloud and join thousands of users moving to the cloud without having to switch tools.


