
This article was published when data science tooling like Dask and R was a primary focus for Saturn Cloud. Today, Saturn Cloud is the enterprise AI platform for any GPU infrastructure.
As a software engineer, you may have come across Jupyter notebooks, a popular tool for developing and sharing code and data science projects. Jupyter notebooks are interactive web applications that allow you to create and share documents that contain live code, equations, visualizations, and narrative text. You can write code in a variety of programming languages, including Python, R, and Julia, and share your work with others.
Google Colaboratory, or Colab for short, is a free cloud-based Jupyter notebook environment that allows you to write and run code directly in your browser. Colab provides access to powerful computing resources, including GPUs and TPUs, and allows you to collaborate with others in real-time.
In this article, we will walk you through the process of running a downloaded Jupyter notebook on Google Colaboratory. This will allow you to take advantage of the powerful computing resources provided by Colab and collaborate with others on your project.
Table of Contents
- Introduction
- Step-by-Step Guide
- Pros and Cons of Running a Downloaded Jupyter Notebook on Google Colab
- Common Errors and Solutions
- Conclusion
Step-by-Step Guide
Step 1: Download the Jupyter Notebook
The first step is to download the Jupyter notebook that you want to run on Colab. You can download a Jupyter notebook from a variety of sources, including GitHub, Kaggle, and other online repositories.
Once you have downloaded the notebook, make sure to save it in a location where you can easily access it later. We recommend creating a new folder for your Colab projects and saving your notebook in that folder.
Step 2: Open the Jupyter Notebook in Google Colaboratory
Now that you have uploaded the notebook to Google Drive, you can open it in Colab. To do this, follow these steps:
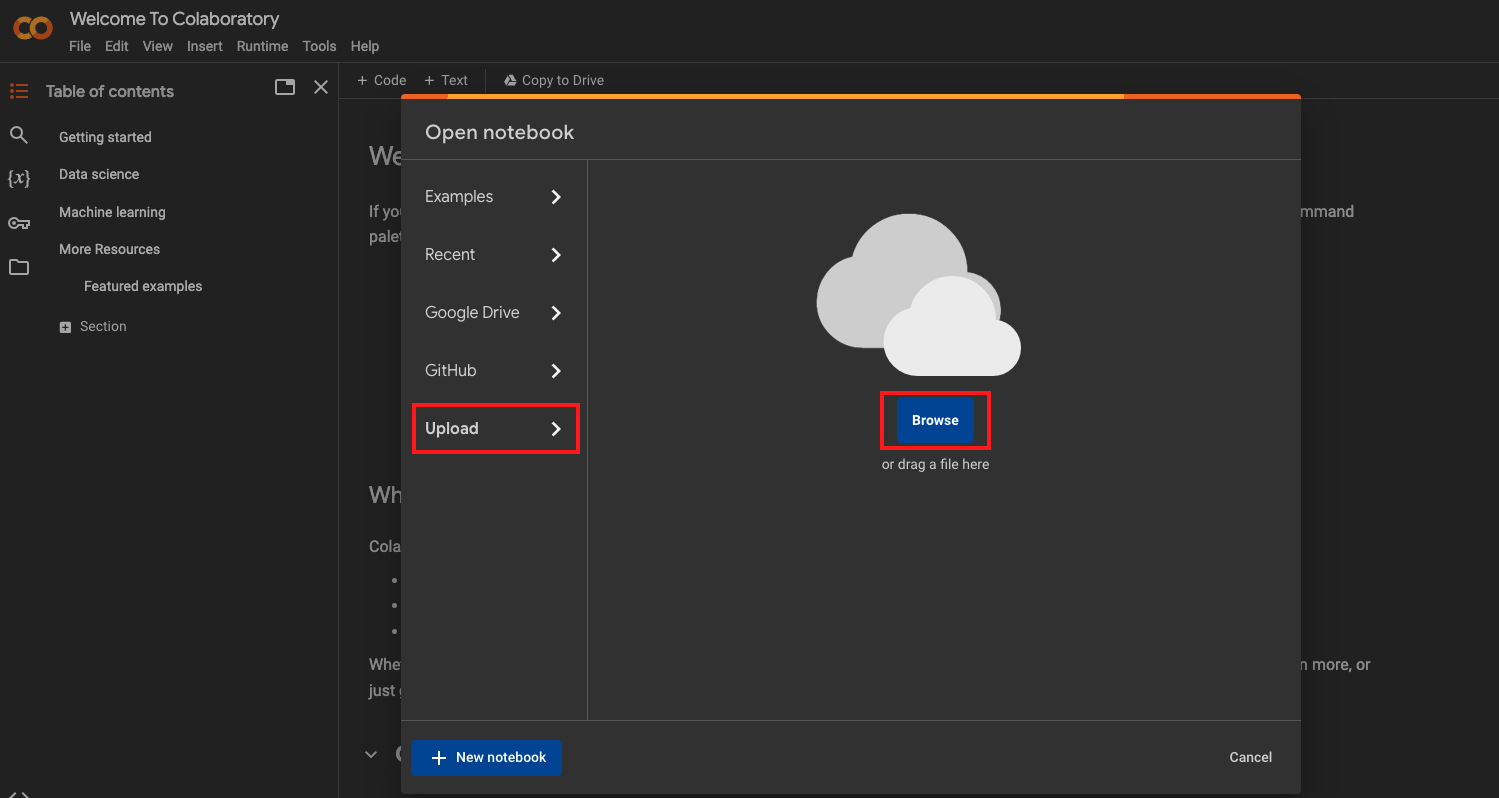
- Open Google Colaboratory in your browser.
- Click on the “Upload” button.
- Here you can either drag the downloaded notebook in or Navigate to the folder where you uploaded the Jupyter notebook in step 2 and select the notebook file.
- Wait for the notebook to load in Colab.
Step 3: Run the Jupyter Notebook in Google Colaboratory
Once you have opened the notebook in Colab, you can run the code cells just as you would in a local Jupyter notebook environment. Colab provides access to powerful computing resources, including GPUs and TPUs, so you can run computationally intensive code quickly and efficiently.
To run a code cell in Colab, simply click on the cell and press “Shift+Enter”. Colab will run the code in the cell and display the output below the cell.
Step 4: Collaborate with Others in Real-Time
One of the great features of Colab is the ability to collaborate with others in real-time. You can share your notebook with others by clicking on the “Share” button in the top right corner of the screen and entering their email addresses.
Once you have shared your notebook, others can view and edit the notebook in real-time. You can see who is currently viewing and editing the notebook by clicking on the “Collaborators” button in the top right corner of the screen.
Pros and Cons of Running a Downloaded Jupyter Notebook on Google Colab
Pros:
- Free GPU Access: Colab provides free GPU resources, allowing you to accelerate computations.
- Cloud-based: Access your notebooks from anywhere without worrying about hardware constraints.
- Integration with Google Drive: Seamlessly save and share your work on Google Drive.
Cons:
- Limited Session Lifetime: Colab sessions have a time limit, which may interrupt long-running processes.
- Dependency Installation: Installing external dependencies may take time and needs to be done each session.
Common Errors and Solutions
Notebook Not Opening
If the notebook doesn’t open, ensure it’s shared with the correct permissions. Make sure the file is not set to private, and the sharing settings allow access.
Library Compatibility Issues
If your notebook relies on specific libraries, ensure they are installed. Use !pip install commands in a cell to install any required dependencies.
Conclusion
In this article, we have walked you through the process of running a downloaded Jupyter notebook on Google Colaboratory. By following these steps, you can take advantage of the powerful computing resources provided by Colab and collaborate with others on your project.
Jupyter notebooks are a powerful tool for developing and sharing code and data science projects, and Colab makes it easy to run and collaborate on these notebooks in the cloud. Whether you are working on a personal project or collaborating with others on a team, Colab is a great choice for running your Jupyter notebooks.
