
As a software engineer, you know that PyTorch is one of the most popular deep learning frameworks out there. And with the increasing use of cloud computing, Google Colab has become a popular platform for running deep learning experiments without the need for expensive hardware. In this blog post, we will guide you through the process of installing PyTorch v1.0.0+ on Google Colab, step-by-step.
Table of Contents
- What is PyTorch?
- What is Google Colab?
- Installing PyTorch v1.0.0+ on Google Colab
- Common Errors and Solutions
- Conclusion
What is PyTorch?
PyTorch is an open-source machine learning framework that is used for building and training deep neural networks. It was developed by Facebook’s AI research team and is known for its flexibility and ease of use. PyTorch uses dynamic computation graphs, which allows for easy debugging and rapid prototyping.
What is Google Colab?
Google Colab is a cloud-based platform for running Jupyter notebooks that allows you to write and execute Python code using Google’s cloud infrastructure. It provides access to a free GPU, which makes it an ideal platform for running deep learning experiments.
Installing PyTorch v1.0.0+ on Google Colab
Here’s how you can install PyTorch v1.0.0+ on Google Colab:
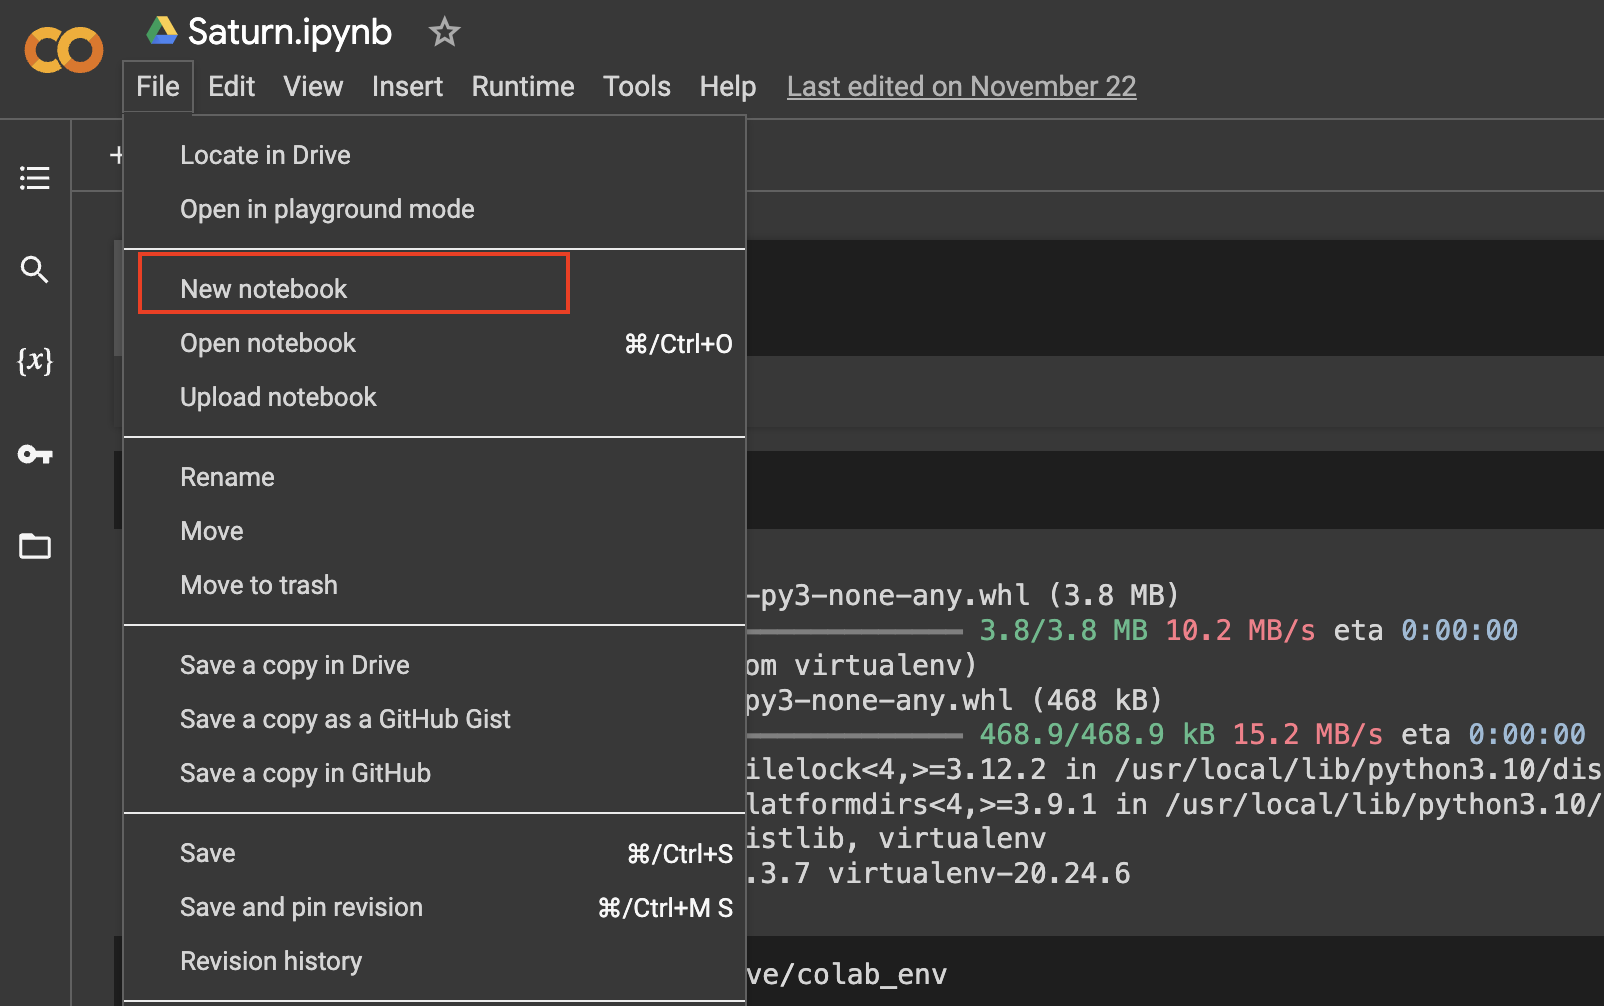
Step 1: Open a new Colab notebook
First, open a new Colab notebook by going to https://colab.research.google.com/ and clicking on New Notebook.
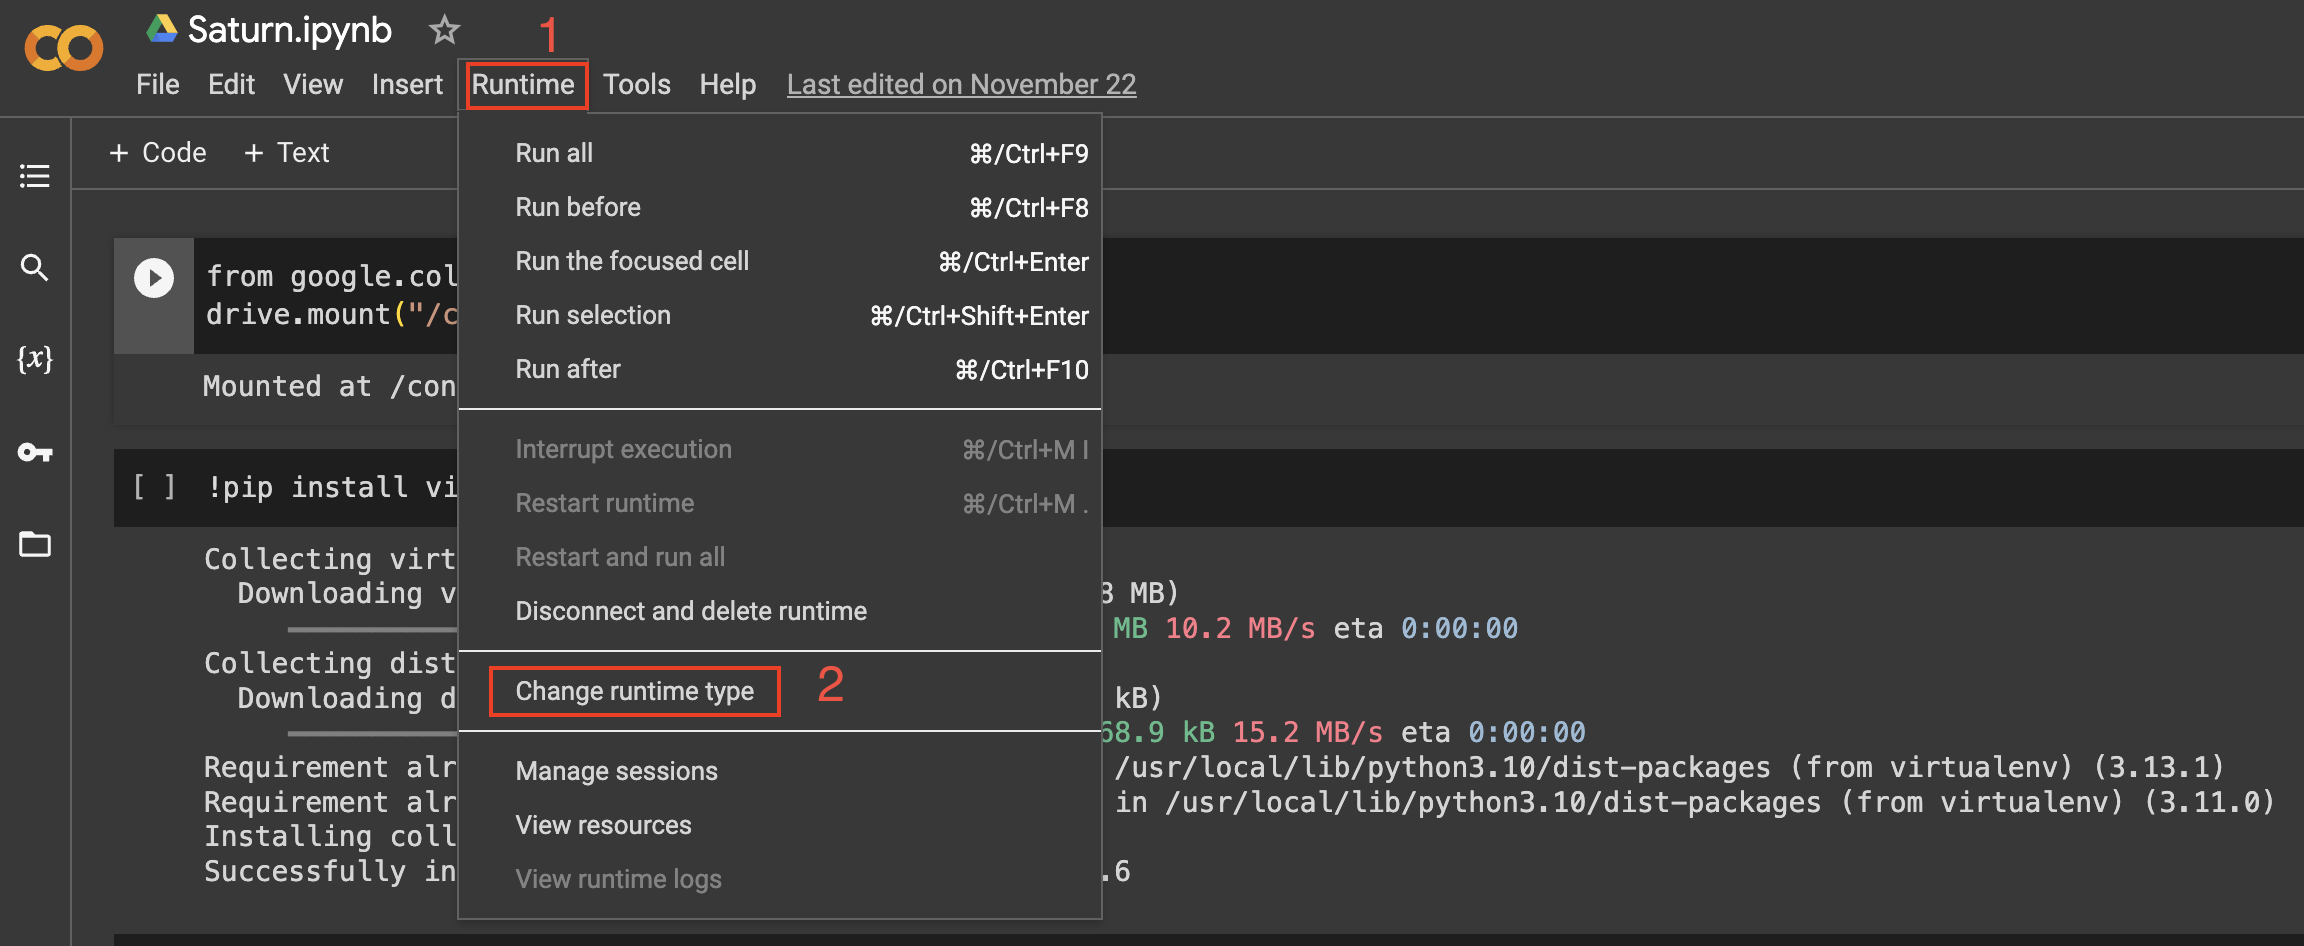
Step 2: Set the runtime type to GPU
Next, set the runtime type to GPU by going to Runtime > Change runtime type and selecting GPU from the dropdown menu. This will give you access to a free GPU, which is necessary for training deep neural networks.
Step 3: Install PyTorch
To install PyTorch v1.0.0+, run the following command in a code cell:
!pip install torch torchvision -U
This will install the latest version of PyTorch and torchvision.
Step 4: Verify the installation
To verify that PyTorch has been installed correctly, run the following code in a code cell:
import torch

print(torch.__version__)
Output:
2.1.0+cu118
This should print the version number of PyTorch that you just installed.
Common Errors and Solutions:
Error 1: CUDA Version Mismatch
If you encounter a CUDA version mismatch error, it’s likely due to Colab’s default CUDA version. To resolve this, install the correct version manually:
!pip install torch==1.0.0+cu92 torchvision==0.2.1+cu92 -f https://download.pytorch.org/whl/torch_stable.html
Error 2: ModuleNotFoundError: No module named ‘torch’
If you face this error, it might be due to an incomplete installation. Reinstall PyTorch and restart the runtime:
!pip uninstall torch
!pip install torch==1.0.0
Conclusion
In this blog post, we have shown you how to install PyTorch v1.0.0+ on Google Colab. By following these simple steps, you can start building and training deep neural networks on the cloud without the need for expensive hardware. PyTorch is a powerful tool for machine learning and Google Colab is an excellent platform for running experiments. We hope this guide has been helpful and wish you all the best in your deep learning endeavors!

