
This article was published when data science tooling like Dask and R was a primary focus for Saturn Cloud. Today, Saturn Cloud is the enterprise AI platform for any GPU infrastructure.
How to Install and Use Jupyter Notebook on Windows 10
As a data scientist or software engineer, Jupyter Notebook is an essential tool for your work. Not only does it allow you to organize and document your code, but it also makes it easy to visualize data and collaborate with others. In this article, we’ll guide you through the process of installing and using Jupyter Notebook on Windows 10.
What is Jupyter Notebook?
Jupyter Notebook is an open-source web application that allows you to create and share documents that contain live code, equations, visualizations, and narrative text. It supports multiple programming languages, including Python, R, Julia, and more. With Jupyter Notebook, you can create interactive data visualizations, conduct data analysis, and write code in an organized and efficient manner.
Installing Jupyter Notebook on Windows 10
Before we can start using Jupyter Notebook, we need to install it on our Windows 10 machine. Here are the steps to follow:
First, you need to have Python installed on your machine. You can download the latest version of Python from the official website (https://www.python.org/downloads/). Make sure to select the option to add Python to your system PATH during the installation process.
Once Python is installed, open the command prompt by pressing the Windows key + R and typing
cmdin the Run dialog box.In the command prompt, type the following command to install Jupyter Notebook:
pip install jupyterThis will download and install Jupyter Notebook and its dependencies.
After the installation is complete, type the following command to start Jupyter Notebook:
jupyter notebookThis will open a new tab in your web browser with the Jupyter Notebook interface.
Using Jupyter Notebook on Windows 10
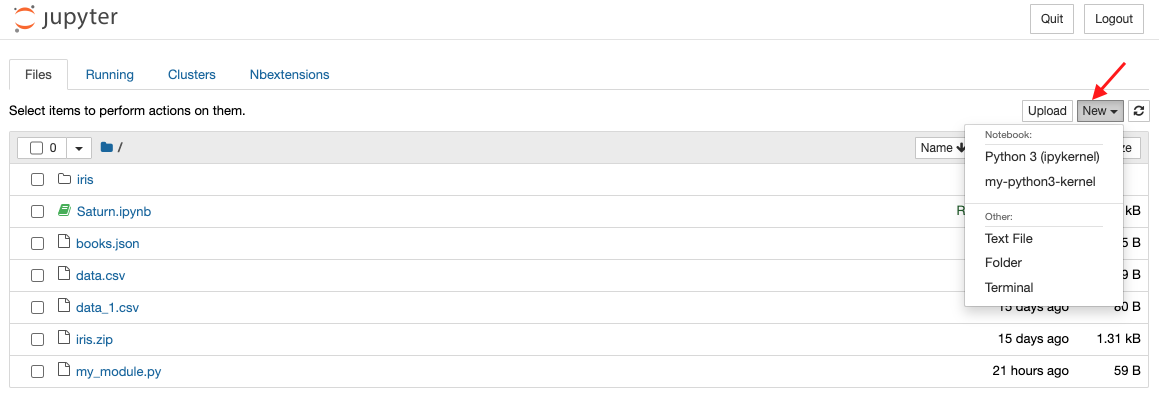
Now that we have Jupyter Notebook installed, let’s take a look at how to use it. When you first open Jupyter Notebook, you’ll see a dashboard with a list of files and folders in your current directory. To create a new notebook, click on the New button in the top right corner and select Python 3 (or any other language you want to use).
Once you’ve created a new notebook, you can start writing code in the cells. To run a cell, press Shift + Enter or click the Run button in the toolbar. You can also add text, equations, and visualizations to your notebook using Markdown syntax.
Jupyter Notebook also supports a variety of keyboard shortcuts to make your work more efficient. Here are some of the most useful shortcuts:
- Shift + Enter: Run the current cell and move to the next one.
- Ctrl + Enter: Run the current cell.
- Esc: Enter command mode.
- Enter: Enter edit mode.
- A: Insert a new cell above the current cell.
- B: Insert a new cell below the current cell.
- D + D: Delete the current cell.
- M: Change the current cell type to Markdown.
- Y: Change the current cell type to code.
Conclusion
Jupyter Notebook is a powerful tool for data scientists and software engineers alike. With its ability to create interactive data visualizations, organize and document code, and support multiple programming languages, Jupyter Notebook is an essential part of any data science workflow. By following the steps outlined in this article, you can install and start using Jupyter Notebook on your Windows 10 machine.
