How to Find and Limit GPU Usage by Process in Windows

Table of Contents
- 3.1 MSI Afterburner
- 3.2 NIVIDIA Inspector
Introduction to GPU:
GPU or Graphics Processing Unit is a dedicated hardware component that is designed to accelerate the rendering of graphics and video. In recent years, GPUs have become increasingly popular in the field of data science and machine learning due to their ability to perform parallel computations. However, running computationally intensive tasks on a GPU can often cause the system to slow down or crash.
GPU usage refers to the amount of processing power that is being consumed by a specific process or application on the GPU. By monitoring and limiting GPU usage, we can ensure that the system runs smoothly and efficiently.
Finding GPU Usage by Process
To find GPU usage by process in Windows, we can use the Task Manager. The Task Manager is a built-in tool in Windows that allows users to monitor the performance of their system and manage running processes. Here are the steps to find GPU usage by process using Task Manager:
Open the Task Manager by pressing the Ctrl + Shift + Esc keys on your keyboard or by right-clicking on the taskbar and selecting Task Manager from the menu.
Click on the “Performance” tab in the Task Manager.
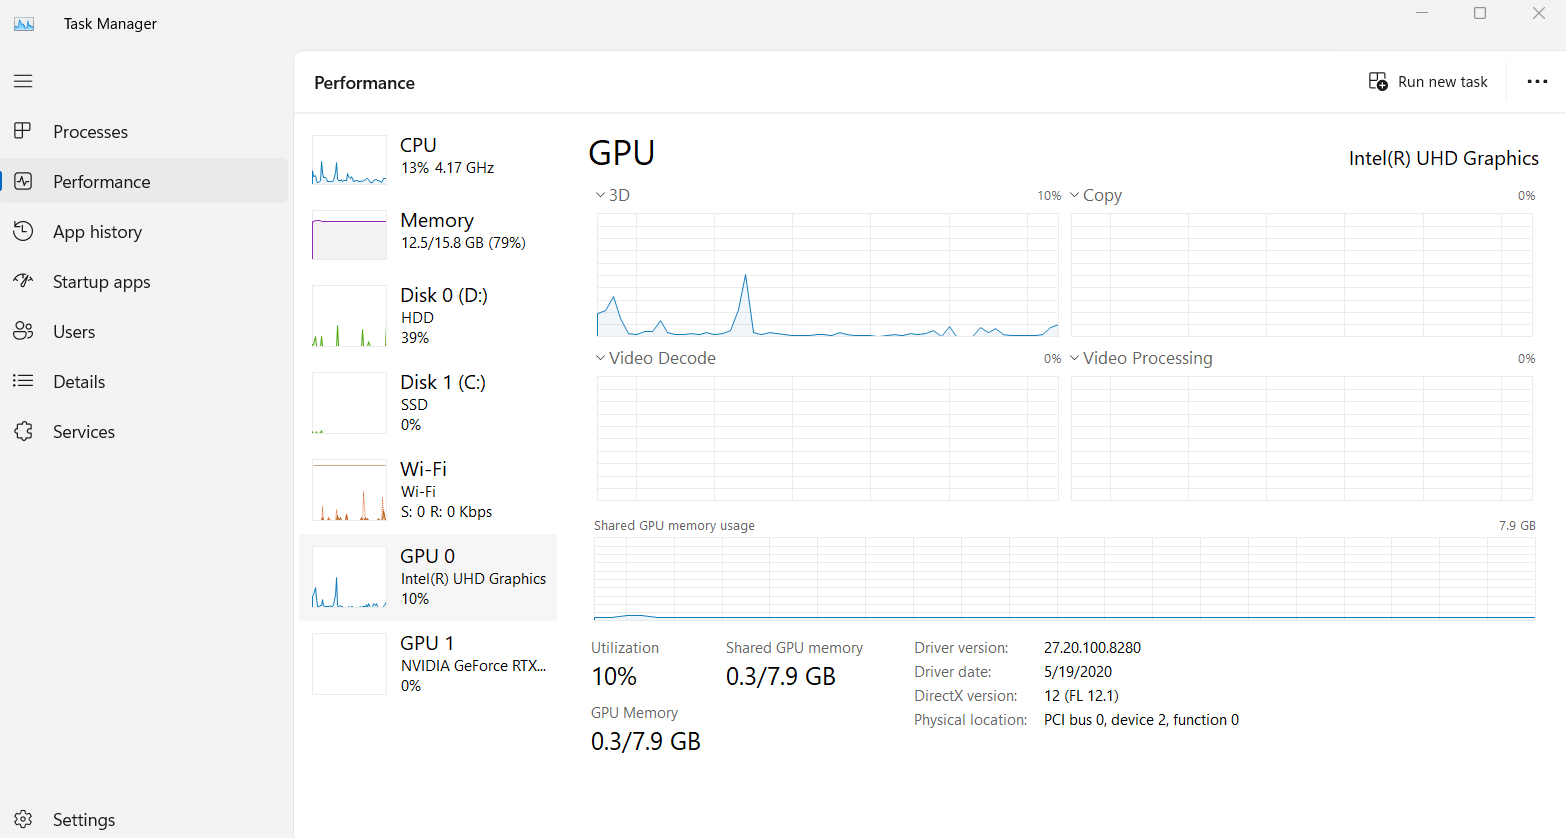
Select “GPU” from the left-hand menu to view the GPU usage of all running processes.
By default, the Task Manager displays the GPU usage of processes in descending order of usage. You can click on the “GPU” column to sort the processes by ascending or descending order of usage.
You can also right-click on a process and select “Go to details” to view more information about the process.
Limiting GPU Usage by Process
To limit GPU usage by process in Windows, we can use third-party tools such as MSI Afterburner or NVIDIA Inspector. These tools allow users to set a maximum limit on the GPU usage of specific processes or applications.
MSI Afterburner:
Here are the steps to limit GPU usage by process using MSI Afterburner:
Download and install MSI Afterburner from the official website: https://www.msi.com/Landing/afterburner/graphics-cards
Open MSI Afterburner and click on the “Settings” button.
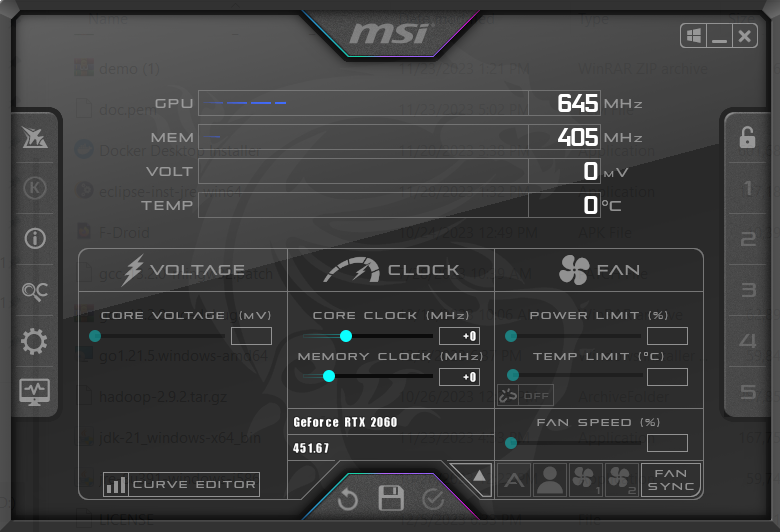
In the “Settings” window, click on the “Monitoring” tab.
Select “GPU usage” from the list of items to monitor.
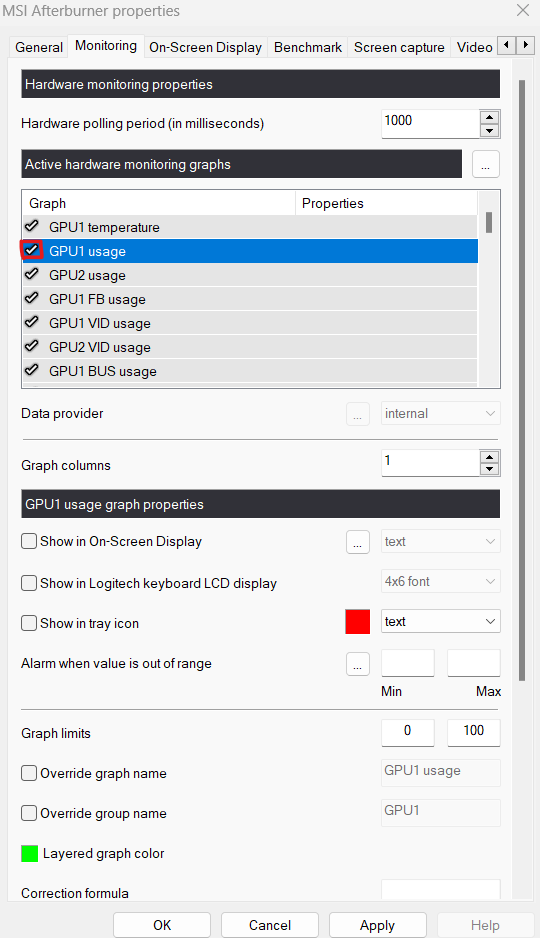
Click on the “Apply” button to save the changes.
Close the “Settings” window and return to the main MSI Afterburner window.
You can then adjust the GPU usage, the fan speed, and many other features through MSI Afterburner. You can apply and save your changes when you are done.
NIVIDIA Inspector:
Alternatively, you can also use NVIDIA Inspector to limit GPU usage by process. Here are the steps to do so:
Download and install NVIDIA Inspector from the official website.
Open NVIDIA Inspector and click on the “Profile Settings” button.
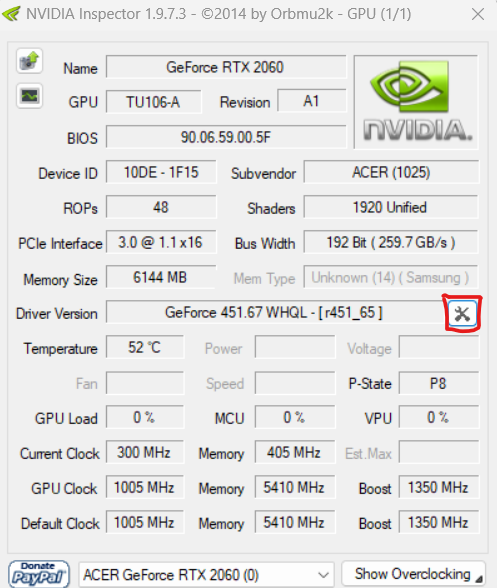
- Click on the “Create a New Profile” button to create a new profile and give it a name
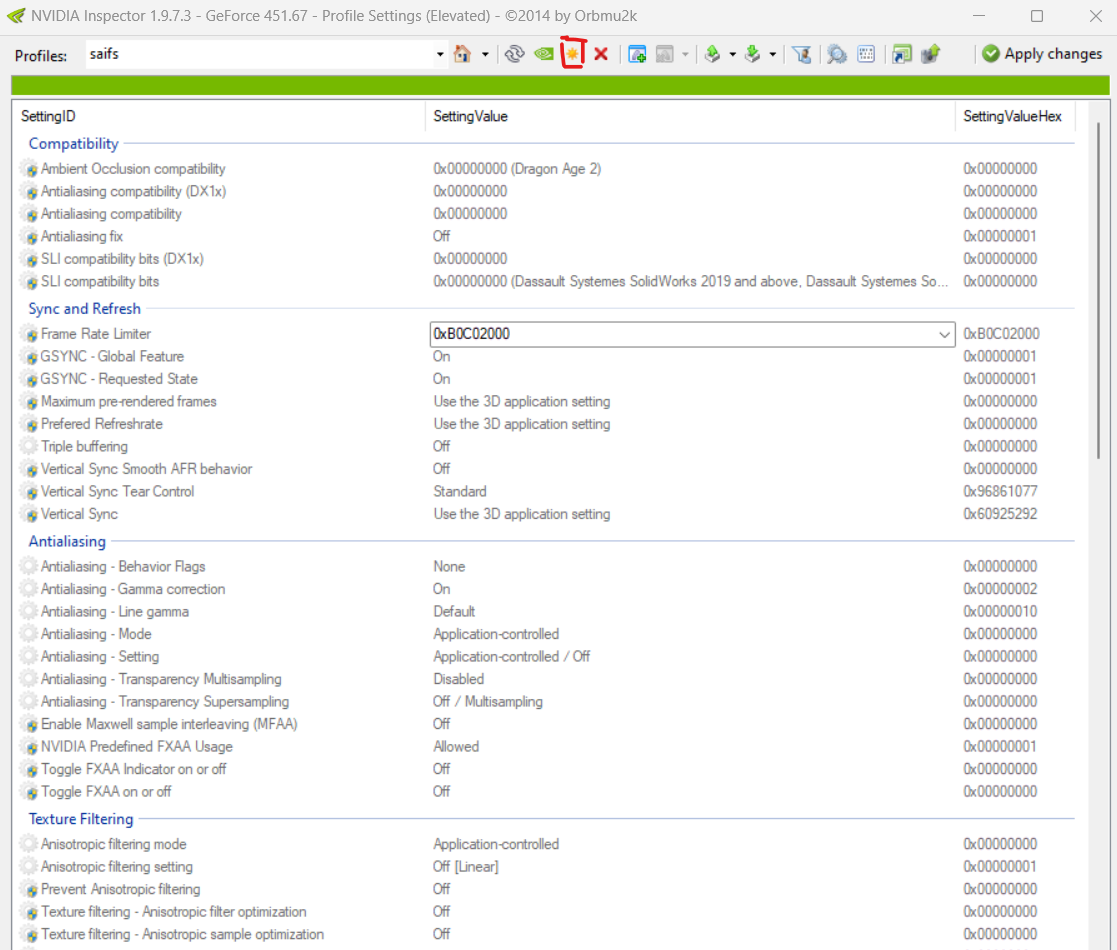
- Then you can set the values for many items as you wish in your new profile.
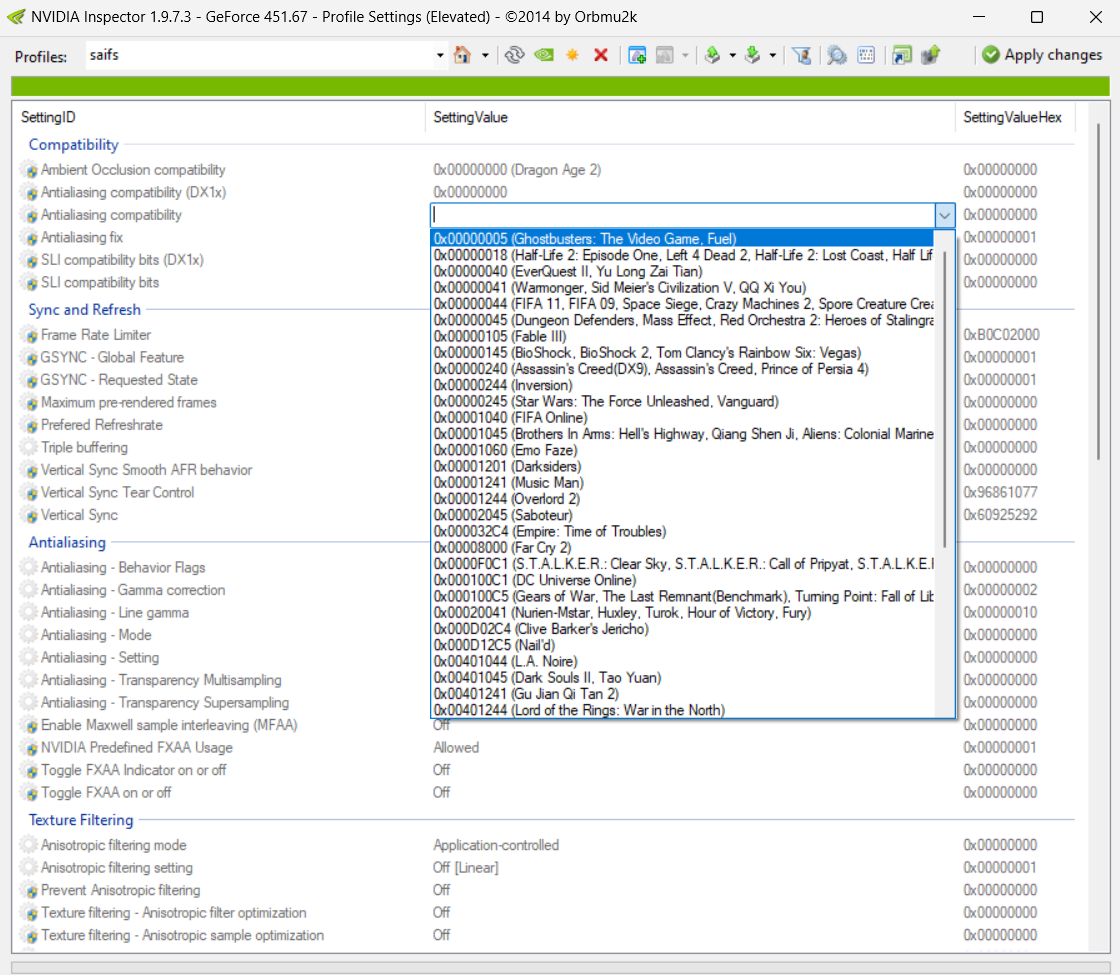
- When you are done, click on the “Apply Changes” button to save the changes.
Conclusion
In conclusion, monitoring and limiting GPU usage by process is essential to ensure smooth functioning of your system while running computationally intensive tasks. By using the Task Manager or third-party tools such as MSI Afterburner or NVIDIA Inspector, you can easily find and limit GPU usage by process in Windows. We hope this article has been helpful in understanding how to monitor and limit GPU usage by process in Windows.
About Saturn Cloud
Saturn Cloud is a portable AI platform that installs securely in any cloud account. Build, deploy, scale and collaborate on AI/ML workloads-no long term contracts, no vendor lock-in.
Saturn Cloud provides customizable, ready-to-use cloud environments
for collaborative data teams.
Try Saturn Cloud and join thousands of users moving to the cloud without having to switch tools.


