
How to Create and Open a Jupyter Notebook (.ipynb) File Directly from Terminal
As a data scientist or software engineer, you may find yourself frequently working with Jupyter Notebook files (.ipynb) for data analysis and interactive programming. While Jupyter Notebooks provide a great platform for data exploration and analysis, navigating to the correct directory and opening the notebook file using the GUI can be a cumbersome process. In this article, we will explore how to create and open a Jupyter Notebook file directly from the terminal, streamlining your workflow and saving you time.
Creating a Jupyter Notebook from Terminal
To create a new Jupyter Notebook file directly from the terminal, follow the steps below:
- Open the terminal on your computer.
- Navigate to the directory where you would like to create the new Jupyter Notebook file. You can use the
cdcommand to change directories. - Once you are in the desired directory, type
jupyter notebookand hit enter. This will launch the Jupyter Notebook server in your default web browser. - In the Jupyter Notebook interface, click on the
Newbutton in the top right corner and select Python 3 (or any other kernel of your choice) to create a new Jupyter Notebook file.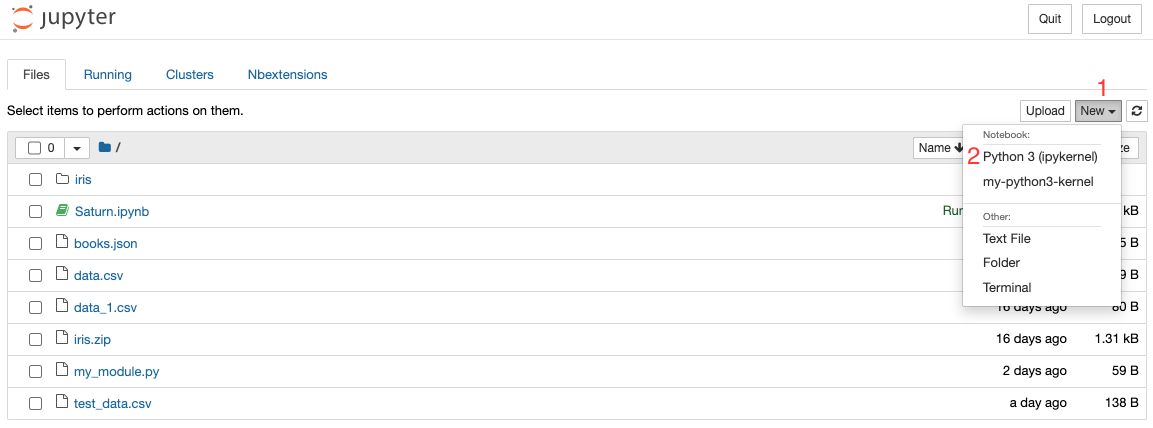
- Give the file a name and click
Createto create the new Jupyter Notebook file. The file will be saved in the current directory.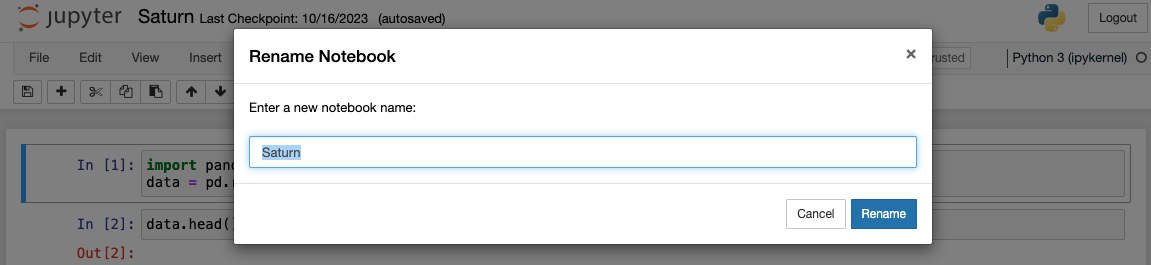 Congratulations, you have now created a new Jupyter Notebook file directly from the terminal!
Opening a Jupyter Notebook from Terminal
To open an existing Jupyter Notebook file directly from the terminal, follow the steps below:
- Open the terminal on your computer.
- Navigate to the directory where the Jupyter Notebook file is located.
- Once you are in the desired directory, type
jupyter notebook your-notebook-name.ipynband hit enter. This will launch the Jupyter Notebook server in your default web browser.
Replace your-notebook-name.ipynb with your notebook’s name.
Congratulations, you have now opened an existing Jupyter Notebook file directly from the terminal!
Conclusion
In this article, we explored how to create and open a Jupyter Notebook file directly from the terminal, streamlining your workflow and saving you time. By using the terminal to create and open Jupyter Notebook files, you can avoid the cumbersome process of navigating to the correct directory and opening the notebook file using the GUI. We hope that this article has been helpful in improving your productivity as a data scientist or software engineer.

