
This article was published when data science tooling like Dask and R was a primary focus for Saturn Cloud. Today, Saturn Cloud is the enterprise AI platform for any GPU infrastructure.
In this article, we’ll explore how to set up auto shutdown and start for your EC2 instances on Amazon Web Services (AWS).
What is Auto Shutdown and Start for EC2 Instances?
Auto shutdown and start for EC2 instances is a feature on AWS that allows you to schedule when your EC2 instances should be turned off and on. This feature is especially useful if you only need your instances to be running during certain times of the day, such as during business hours. By automating the shutdown and start of your EC2 instances, you can save money on your AWS bill and reduce unnecessary resource consumption.
How to Set Up Auto Shutdown and Start for EC2 Instances
To set up auto shutdown and start for your EC2 instances, you’ll need to follow these steps:
Step 1: Create an IAM Role
The first step is to create an IAM role that allows your EC2 instances to assume the permissions of the IAM policy you just created. To do this, navigate to the IAM console on AWS and create a new role with the following settings:
- Select “AWS service” as the type of trusted entity
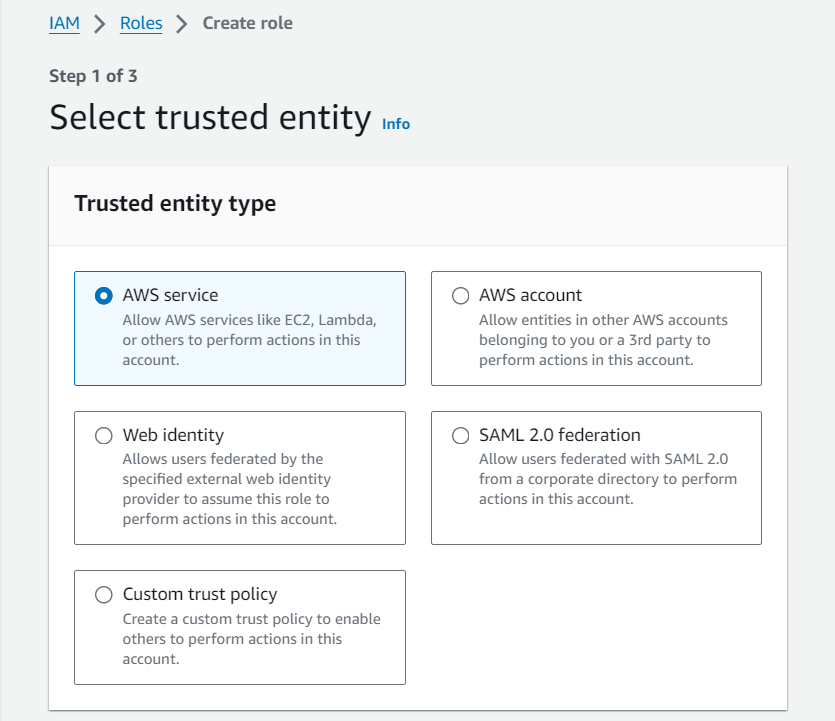
- Choose “lambda” as the service that will use this role (You can skip the permissions page)
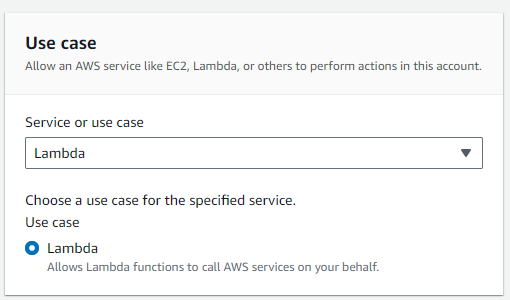
- Save this role with a unique name, such as “EC2-Start-Stop-Role”
Step 2: Create an IAM Policy
The next step is to create an IAM policy that allows your EC2 instances to be stopped and started. To do this, navigate to the IAM role you created on AWS and choose Create inline policy from the add permissions menu. Choose the JSON editor and add the new policy with the following permissions:
{
    "Version": "2012-10-17",
    "Statement": [
        {
            "Effect": "Allow",
            "Action": [
                "ec2:StartInstances",
                "ec2:StopInstances"
            ],
            "Resource": "*"
        }
    ]
}
It should look like this:
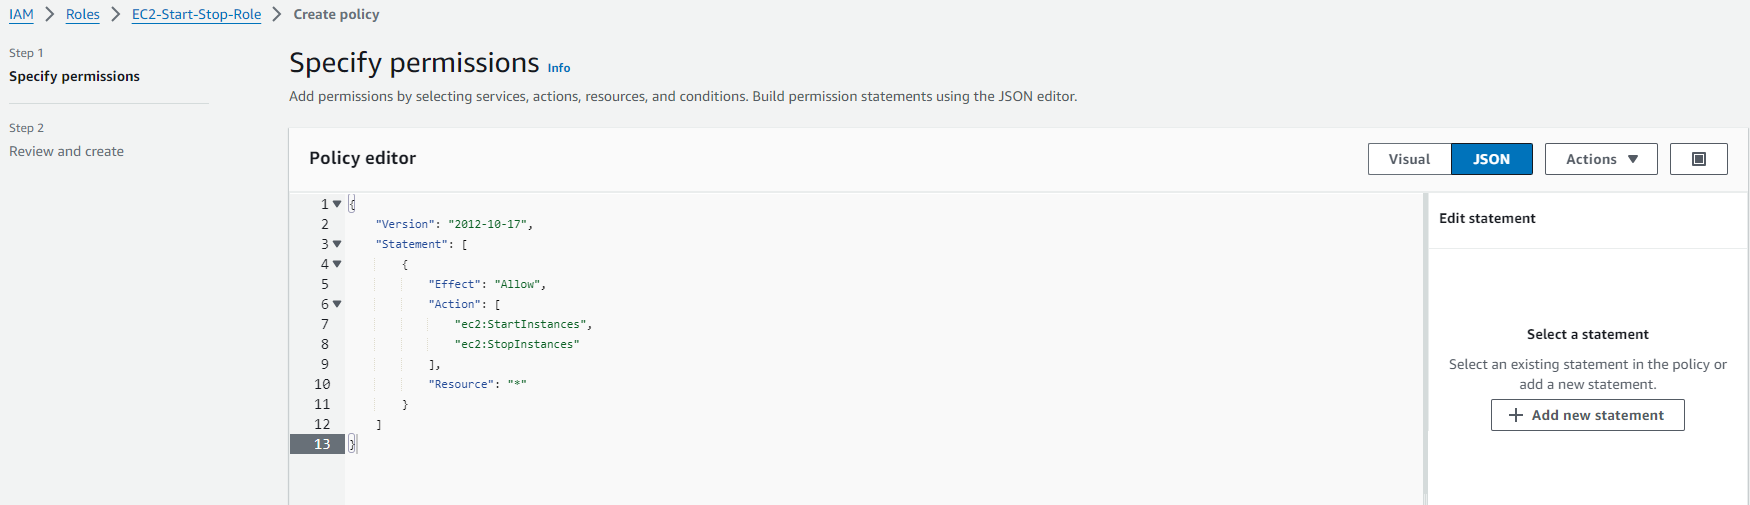
Save this policy with a unique name, such as “EC2-Start-Stop”.
Step 3: Create a Lambda Function
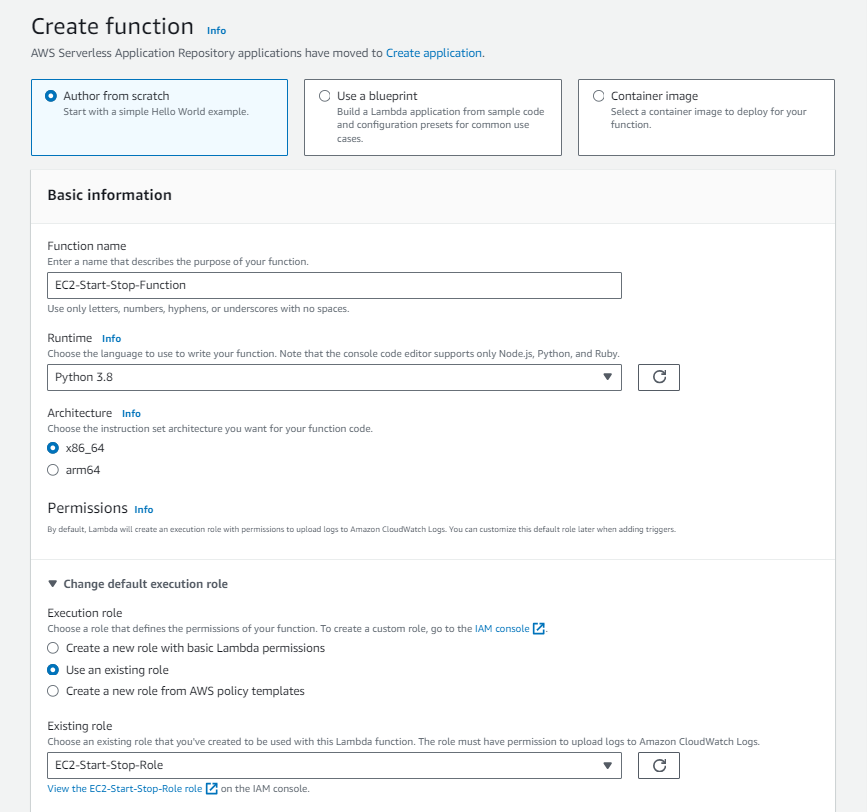
The next step is to create a Lambda function that will execute the start and stop commands on your EC2 instances. To do this, navigate to the Lambda console on AWS and create a new function with the following settings:
- Choose “Author from scratch”
- Name your function with a unique name, such as “EC2-Start-Stop-Function”
- Choose “Python 3.8” as the runtime
- Choose “Use an existing role” and select the “EC2-Start-Stop-Role” you just created
- Copy and paste the following code into the function editor and hit
Deploy:
import boto3

def lambda_handler(event, context):
    ec2 = boto3.client('ec2')
    instances = ec2.describe_instances(Filters=[{'Name': 'tag:AutoStop', 'Values': ['True']}])
    for reservation in instances.get("Reservations"):
        for instance in reservation.get("Instances"):
            instance_id = instance['InstanceId']
            state = instance['State']['Name']
            if state == 'running':
                ec2.stop_instances(InstanceIds=[instance_id])
                print('Stopped instance: ' + instance_id)
            elif state == 'stopped':
                ec2.start_instances(InstanceIds=[instance_id])
                print('Started instance: ' + instance_id)
            else:
                print('Instance ' + instance_id + ' in state ' + state + ', skipping...')
This code uses the Boto3 library to interact with the AWS EC2 API and get a list of instances with the tag “AutoStop” set to “True”. It then checks the state of each instance and starts or stops it accordingly.
Step 4: Create a CloudWatch Event Rule
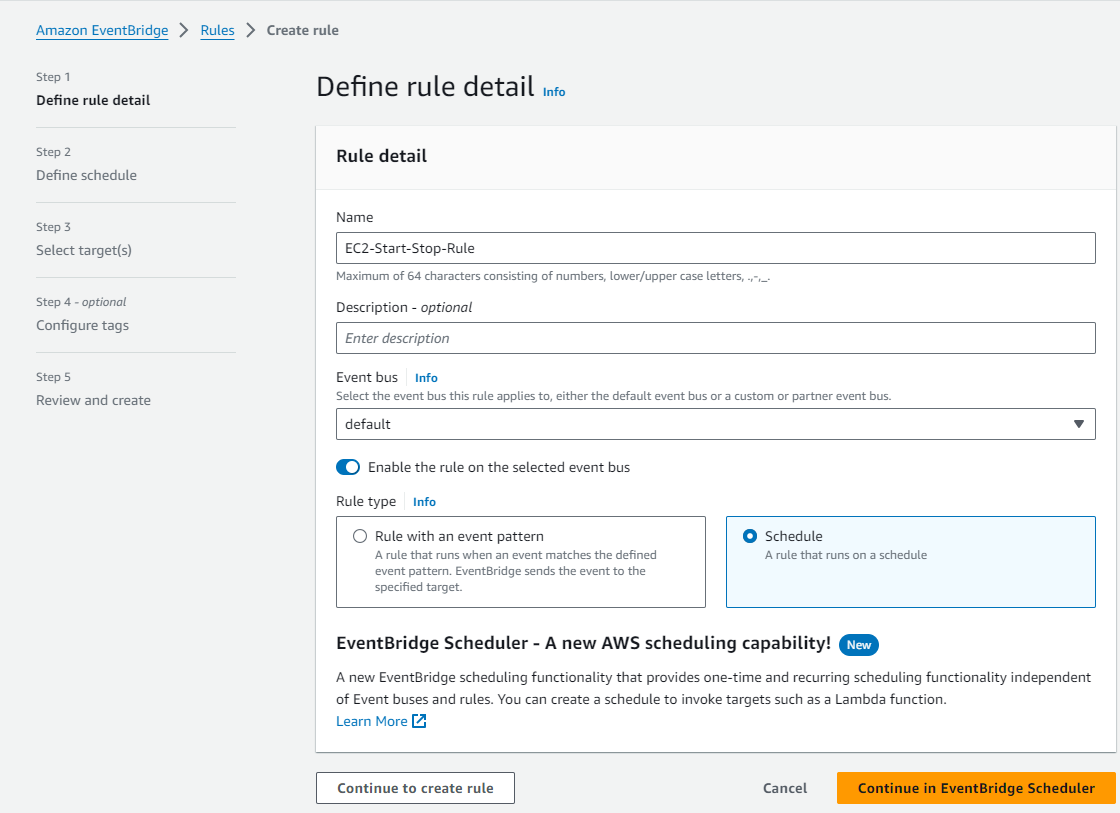
The next step is to create a CloudWatch event rule that triggers the Lambda function at the desired times. To do this, navigate to the Amazon EventBridge console on AWS and choose Rules from the left hand menu. Choose create rule with the following settings:
- Choose a name for the rule, such as “EC2-Start-Stop-Rule”
- Choose “Schedule” as the event source and choose “Continue to create a rule”
- Choose the desired schedule for your EC2 instances to start and stop
- Choose
Lambda Functionas the target and select the “EC2-Start-Stop-Function” you just created
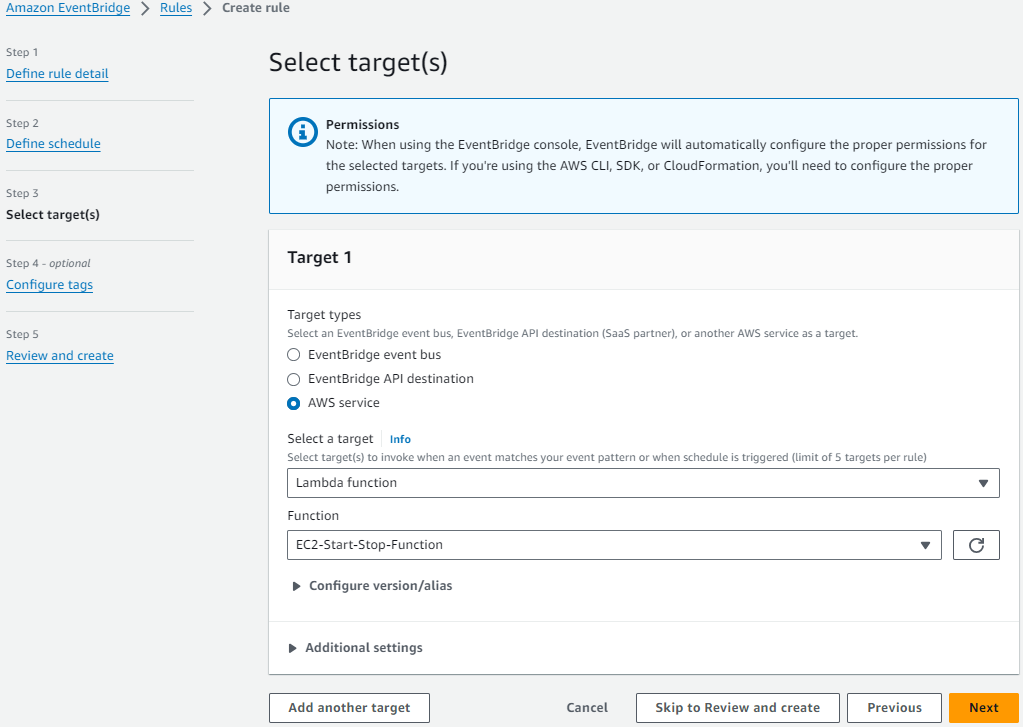
- Hit next and finish up creating the rule
Step 5: Add the IAM Role to the EC2 Instance
The final step is to add the IAM Role to the desired EC2 Instance so that these changes take effect.
- Navigate to your instance
- From the
Actionsdropdown menu, selectSecurityand thenModify IAM Role - Choose the IAM role you created and click
Update IAM Roleand VOILA!
Conclusion
Auto shutdown and start for EC2 instances is a powerful feature on AWS that can save you money and reduce unnecessary resource consumption. By following the steps outlined in this article, you can set up auto shutdown and start for your EC2 instances and ensure that they are only running when you need them. With this automation in place, you can focus on your data science or software engineering work without worrying about managing your EC2 instances manually.

