My mother recently asked me to take a look at some old family photos that she wanted to scan, print, and frame as gifts. Unfortunately, they were not in great condition. Some had suffered a bit over time–colors had faded and scratches had been added–and some were originally out of focus. My father had attempted to clean them up on his personal computer using PhotoShop, but to little avail. Despite his efforts, he wasn’t able to significantly improve the condition of the images.
| The Befores | |
|---|---|
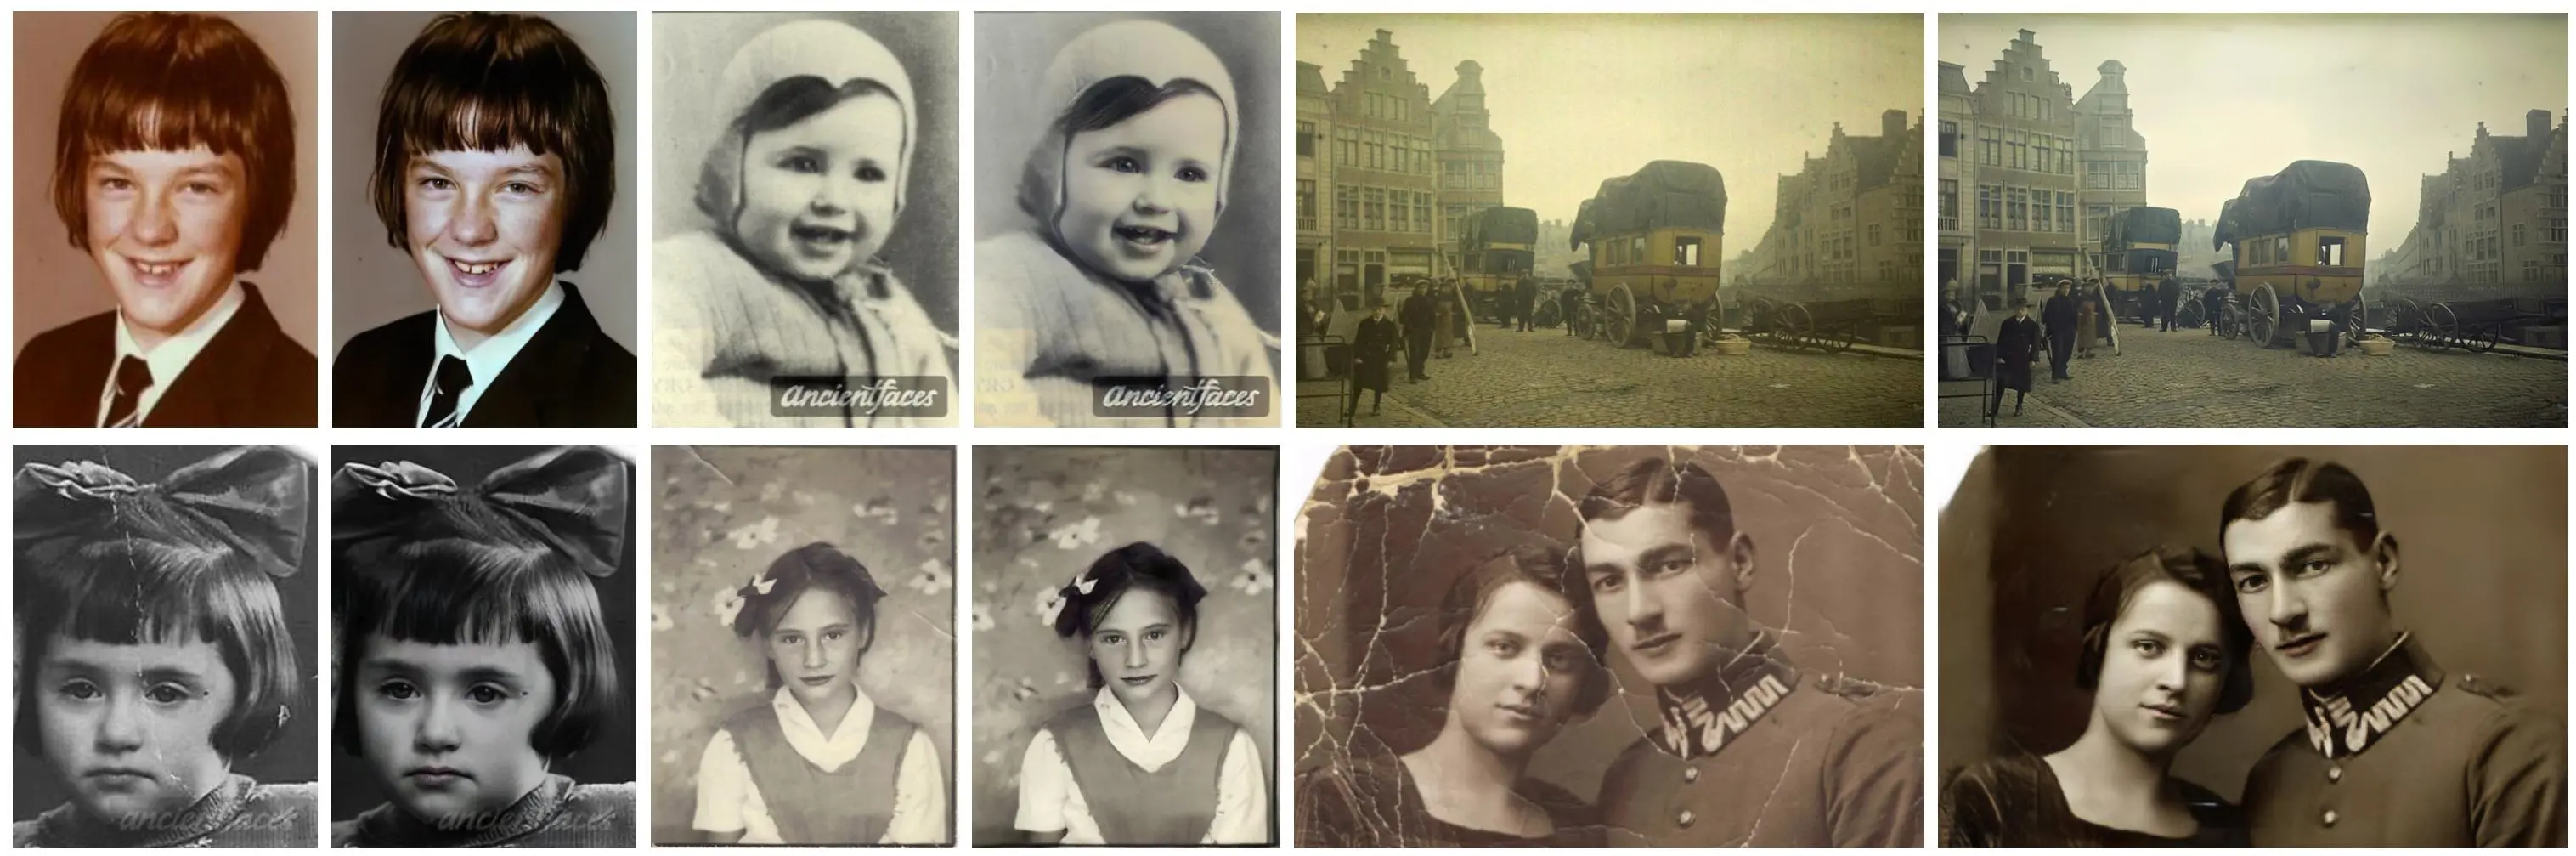
 |  |
My dad called me up to see whether I knew of any good resources, and I recalled a paper released a few years ago by Microsoft Research, called “Bringing Old Photos Back to Life." I figured that I could implement Microsoft’s approach to photo restoration in order to make the photos more presentable. I knew that if I could run this process using machine learning, I would be able to make pretty quick work of it, too.
My father scanned some of the photos, and I set to work.
Read more about my process below, or get started on your own restoration project in Saturn Cloud.
Understanding the Microsoft Model
The Microsoft Research paper identifies the problem of old image enhancement as a mixed distortion problem. It explains that images have both unstructured distortion (e.g., noise, blurriness, fading) as well as structured distortion (e.g., scratches). To overcome this distortion problem, the authors suggest employing a semi-supervised restoration method.

Real photos that need restoration (r) and synthetic images that were degraded (x) are passed through the top variational autoencoder (VAE) and mapped onto a shared latent space. A second VAE maps the latent space of the clean version of the synthetic images (y). Because these synthetic images are paired, the latent spaces can be mapped together to produce a final restored image. The authors designed the interior mapping step to de-noise, to color-correct, and to inpaint using a mask.
You can find a more detailed explanation of the model architecture in this YouTube video.
The code runs a four-stage architecture to improve the appearance of an old photo:
- Overall restoration using the VAEs above
- Face detection
- Face Enhancement
- Blending of the results
The bulk of the processing happens during step 1, when a photo is run through the VAEs and an intermediate result is created.
This intermediate result is then passed through step 2, where any faces are detected and bounded. Focusing on and retouching faces is elemental to photo restoration because faces are often the subject of a photo, so they should be as clear as possible.
Faces are then refined in step 3 using the following network architecture:

Lastly, in step 4, the improved faces are blended with the restored photo to create the final image.
Implementing the Code in Saturn Cloud
Fortunately, the GitHub repo already had detailed instructions and examples of how to use the Microsoft code in a local environment.
Unfortunately, my laptop isn’t really up to the task. Although it’s a pretty beefy laptop, I don’t have a GPU, and I have only 32 GB of RAM. Running the code on it often resulted in memory errors for larger images.
Realizing that my laptop wouldn’t do the trick, I turned to Saturn Cloud. I initially tried to run the Microsoft code on a GPU instance using the PyTorch image on Saturn Cloud. This instance type worked really well for the examples and for smaller photos, but I still ran into CUDA memory errors when trying to reconstruct high-resolution photos. In order to circumvent this error, I ran the code on a CPU instance instead. A few observations about using a CPU:
- Using a CPU was slightly slower at inference time–though not dramatically so. Just the same, it worked!
- It used more memory than when applying the same code on a GPU instance, but because of the higher limits on CPU instances (64 GB), this shouldn’t be a problem for all but the largest of images. As a point of reference, for a 125 GB tiff image, I used approximately 42 GB of RAM.
- Because I wasn’t using a prebuilt PyTorch image, a lot of my work focused on installing all the appropriate libraries. (Luckily for you, I’ve now done this work, so you don’t have to!)
Overall, I found these trade-offs to be worthwhile because using a CPU allowed me to process large, high-resolution images.
I did find a few small bugs in the Microsoft code, but I was able to fix them pretty simply. For instance, blending was not occurring properly due to a mismatch in variable types. To resolve these bugs, I forked Microsoft’s code, and you can find my version here.
Let’s Run the Code!
Overall, running the code is rather straightforward, but getting the setup right is a little tricky. I encapsulated the startup step into a start script in order to simplify this process:
cd Code/Face_Enhancement/models/networks
git clone https://github.com/vacancy/Synchronized-BatchNorm-PyTorch
cp -rf Synchronized-BatchNorm-PyTorch/sync_batchnorm .
cd ../../../

cd Global/detection_models
git clone https://github.com/vacancy/Synchronized-BatchNorm-PyTorch
cp -rf Synchronized-BatchNorm-PyTorch/sync_batchnorm .
cd ../../

cd Face_Detection/
wget http://dlib.net/files/shape_predictor_68_face_landmarks.dat.bz2
bzip2 -d shape_predictor_68_face_landmarks.dat.bz2
cd ../

cd Face_Enhancement/
wget https://facevc.blob.core.windows.net/zhanbo/old_photo/pretrain/Face_Enhancement/checkpoints.zip
unzip checkpoints.zip
cd ../

cd Global/
wget https://facevc.blob.core.windows.net/zhanbo/old_photo/pretrain/Global/checkpoints.zip
unzip checkpoints.zip
cd ../../
Once you have the checkpoints and other data downloaded, the rest is relatively simple. Microsoft packaged the code into a single script that you can run with only a few arguments. Below you can see an example snippet to run the model:
!python Code/run.py --input_folder Upload-Photos-Here --output_folder Output --GPU -1 --with_scratch --HR
Picture Perfect
Overall, I was rather happy with the results. In two of my favorite restorations–shown below–you can see that the model upped the contrast, improved the faces, and removed some artifacts and degradation. Nice!
| The Befores | The Afters |
|---|---|
| My Father as a Young Child | |
| 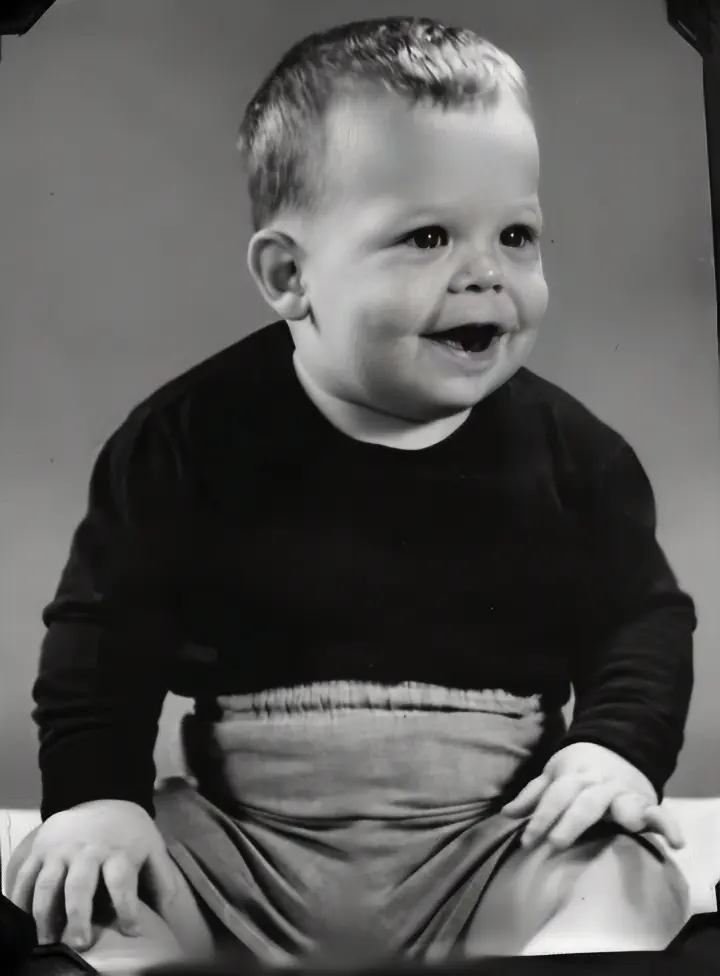 |
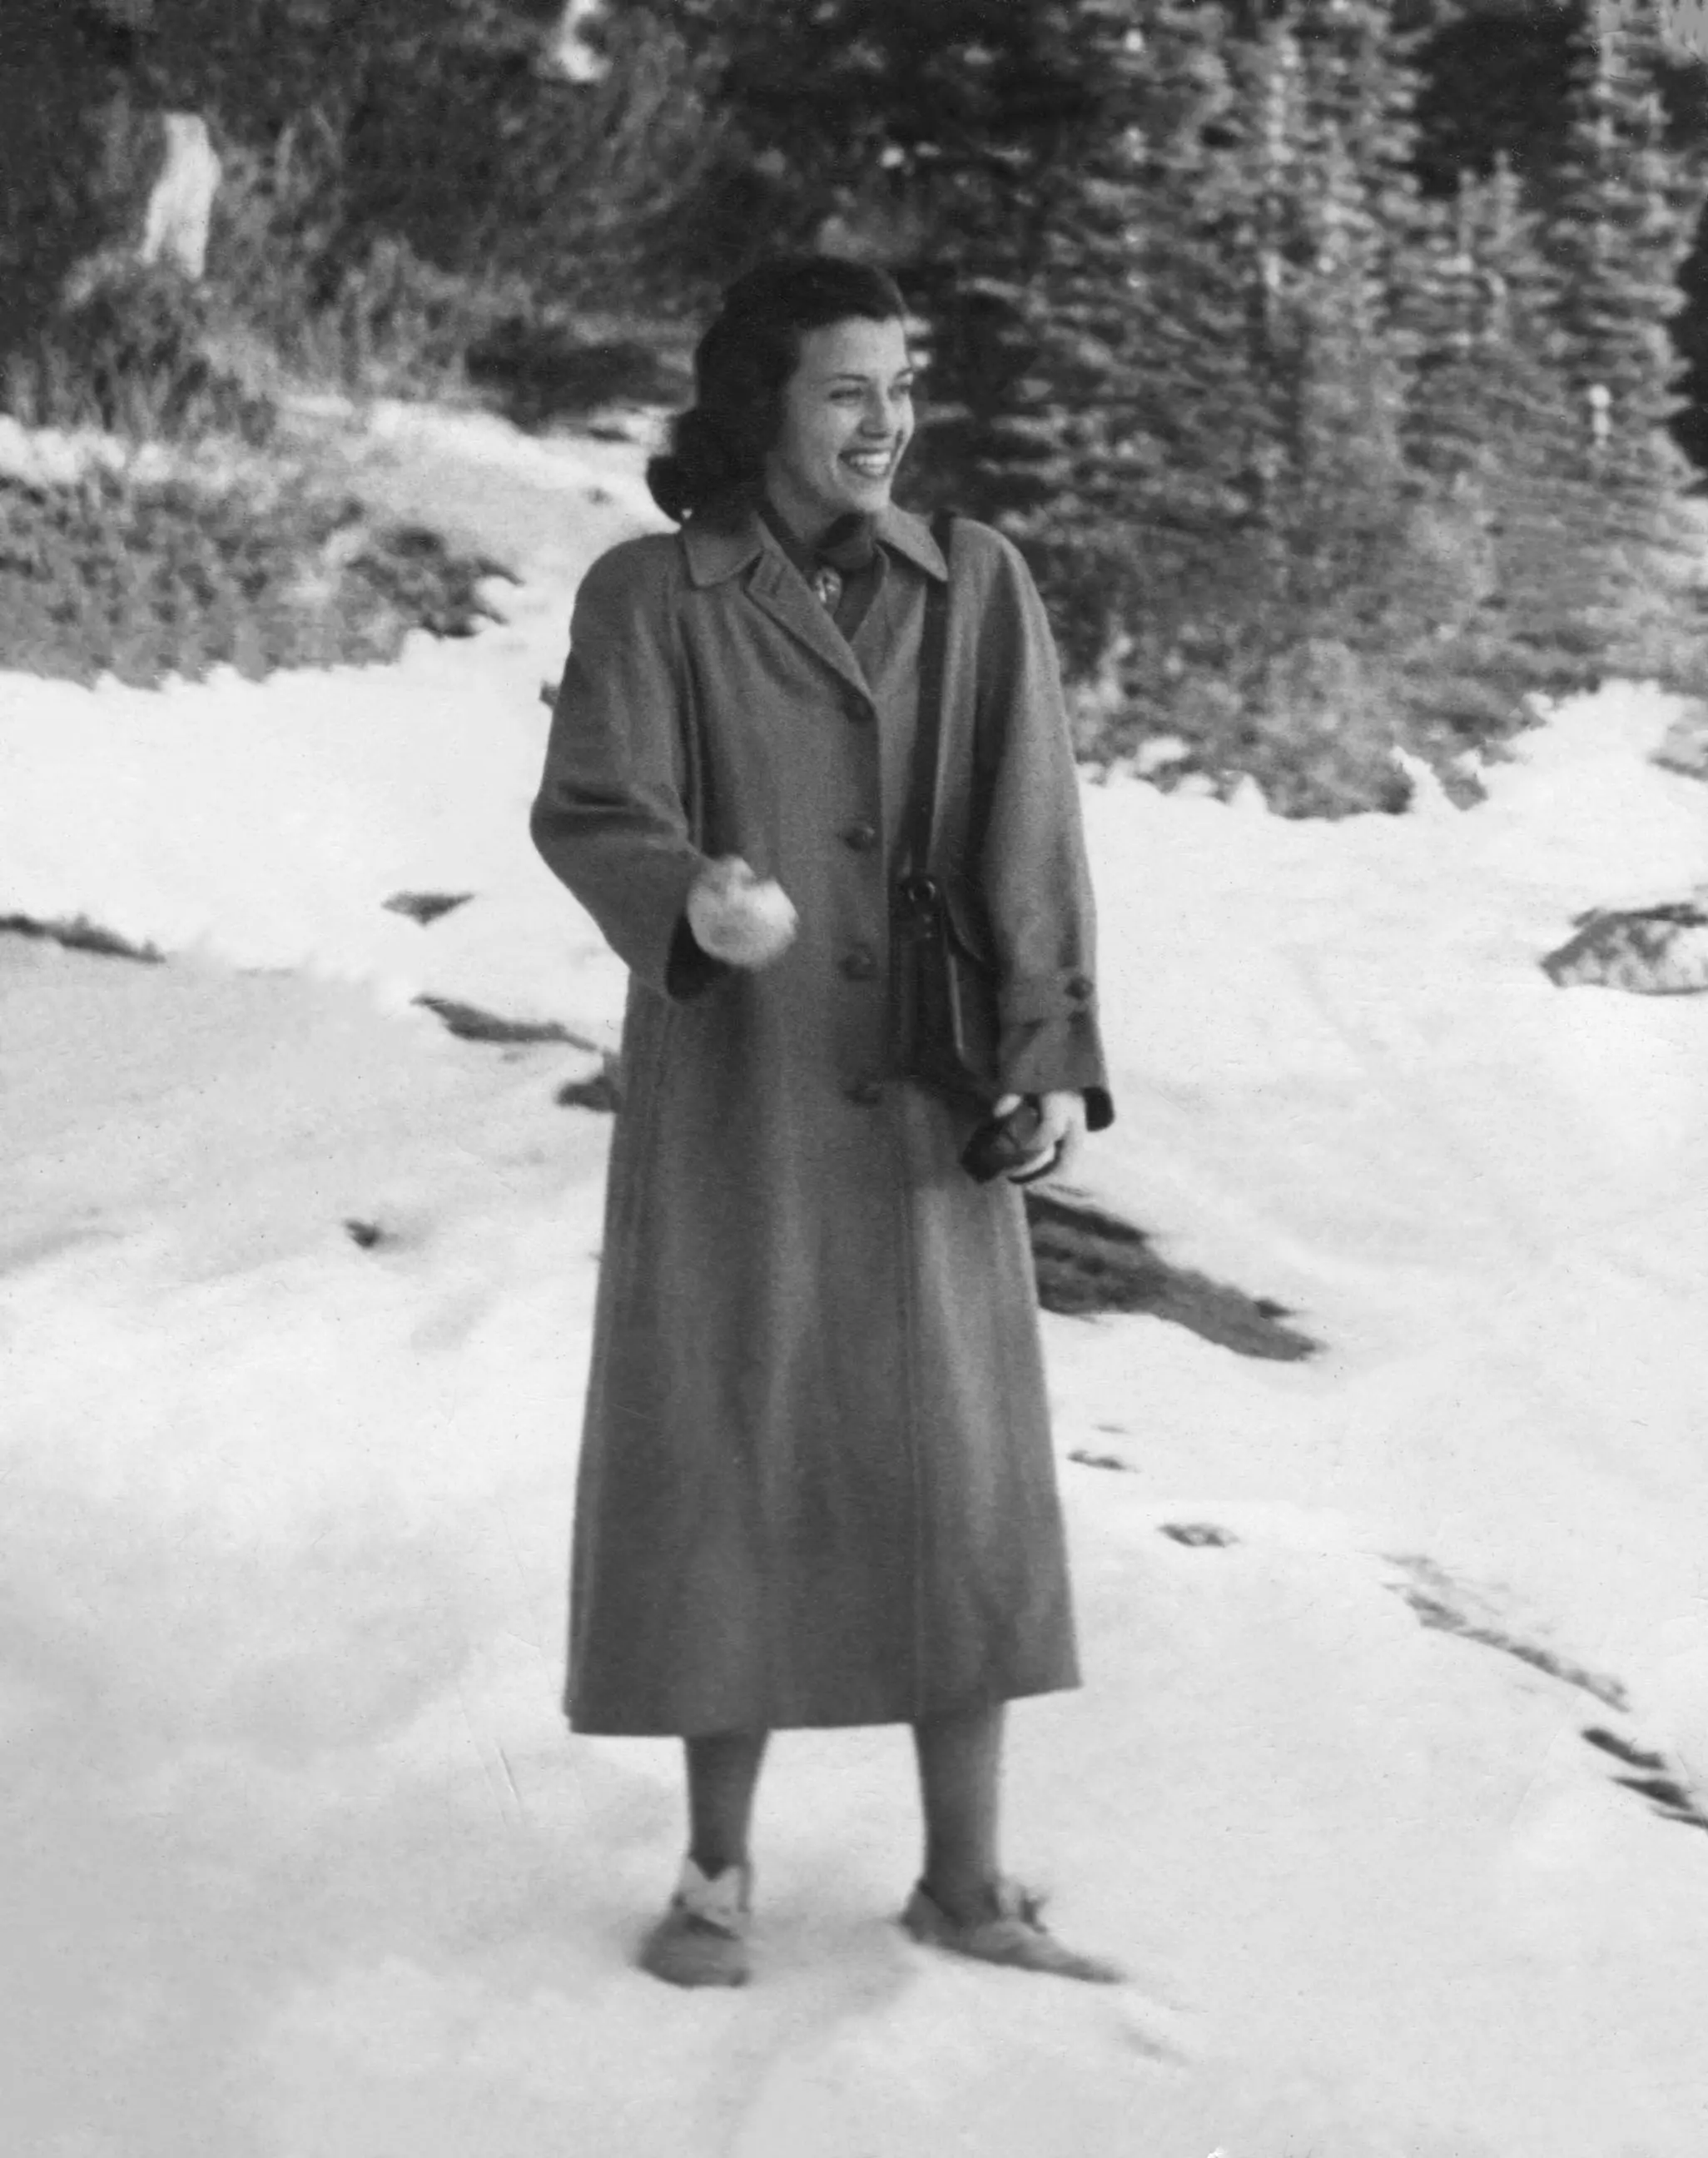
| My Grandmother on Her Honeymoon | |
| 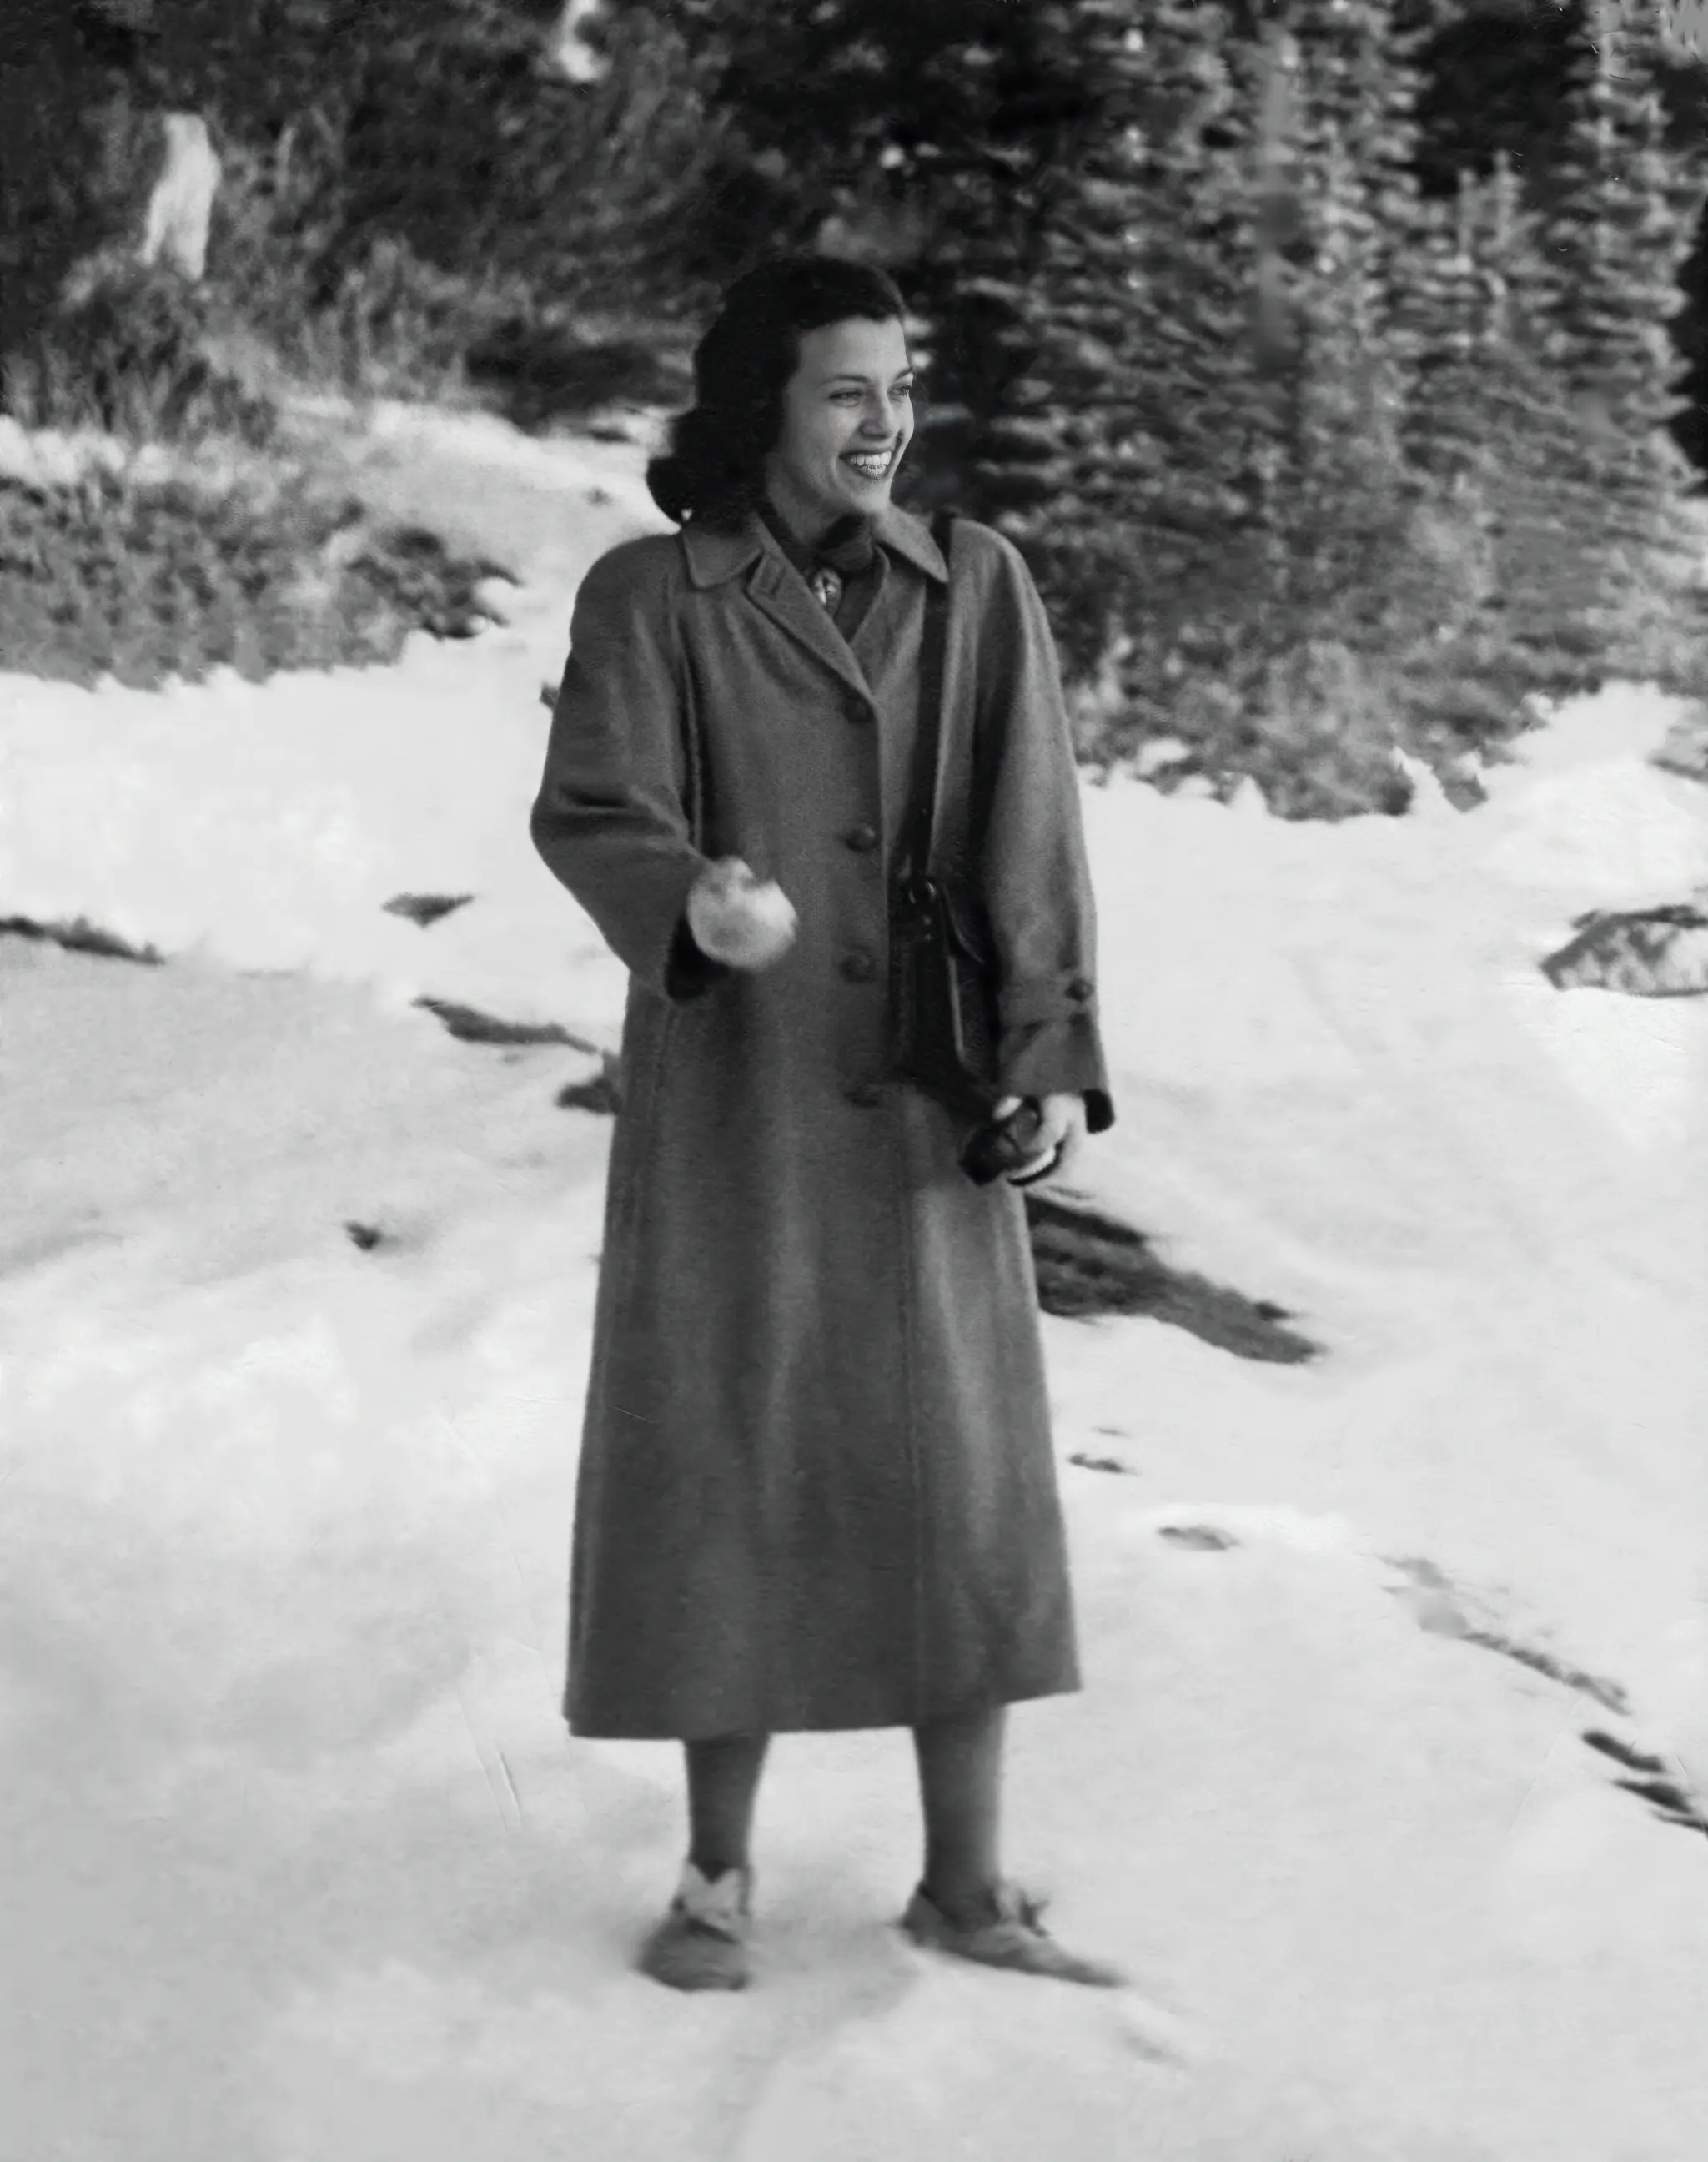 |
However, the model did not work for every photo. Some fell into the uncanny valley, particularly with changes to teeth. And some photos were simply too degraded to be improved.
The mask does not seem to do a particularly good job at identifying dust on photos. This failure is likely due to the relatively low resolution of the mask in comparison to the size of the dust marks.
But most came out looking much clearer than before. Not bad for a few minutes' work! And far less tedious than restoring photos in Adobe Photoshop.
Try It Yourself
To try a photo restoration model yourself in Saturn Cloud, click

Select the Start button to start up the Jupyter server. The resource will take about ten minutes to start. This delay is due to large downloads of model checkpoints and libraries that are taking place in the background.
Once the resource has started, click on the JupyterLab button.
You will see two scripts in the repository:
- Examples.ipynb – A script to view the examples provided by the researchers and their results. Run the cells to see the outputs.
- Upload-Your-Own-Pictures.ipynb – A script to upload your own photos. Simply add your photos to the Upload_Photos_Here folder and run the code cells.
Note: If you are working with smaller photos and want to use a GPU to do the calculations, simply edit the resource to use a GPU and change
GPU = -1toGPU = 0in the code.
Happy photo restoring!
Header image credit: Bo Zhang


