Jupyter Servers
Details on using Jupyter server resources for the JupyterLab IDE
A Jupyter server resource is a resource that provides access to the JupyterLab IDE for interactive development. It is best used for day to day data science tasks.
To create a Jupyter Server resource, click the Create Jupyter Server button at the top right of the Resources page. You will be presented with the following form:
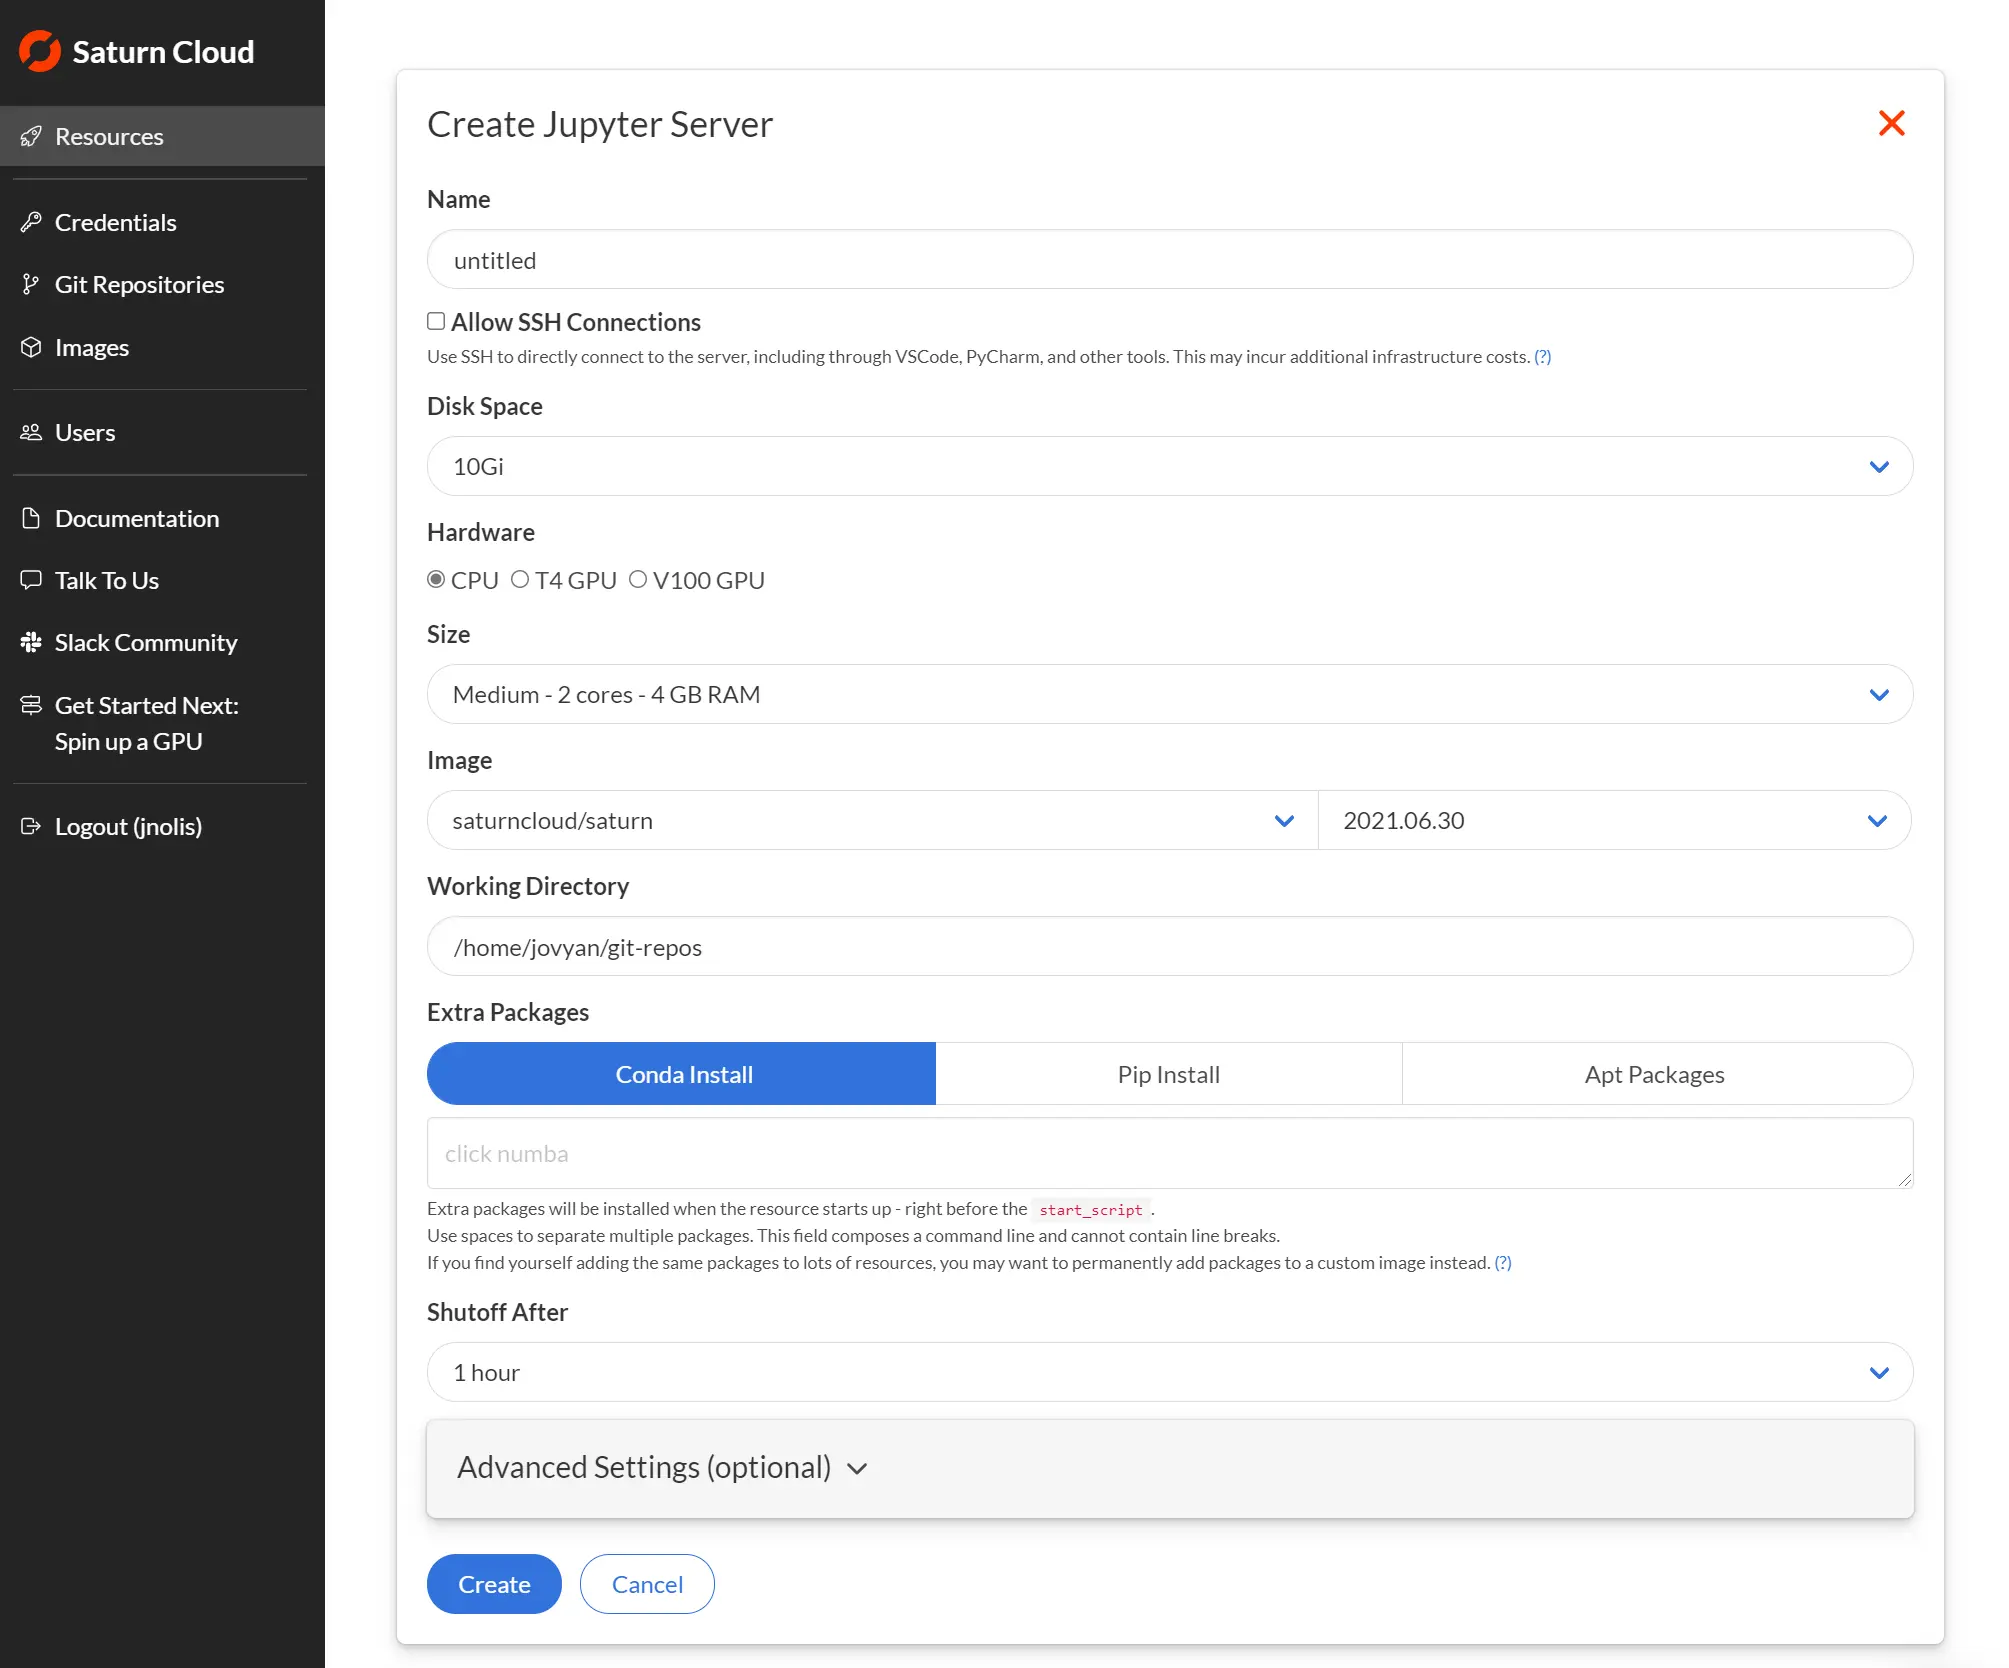
In the above form, you’ll supply the following details:
- Name: Identify the resource with a name of your choosing, and if you like, provide a description. If you want to use SSH to access this resource, check that box.
- Disk Space: The default of 10GB is a good place to start, but if you plan to store very big data files, you may want to increase this.
- Hardware: Whether the resource uses only a CPU or also a GPU.
- Size: How powerful the machine will be. This adjusts the CPU and memory, and in the case of GPU hardware the size and number of GPUs.
- Image: An image is a Docker image that describes the libraries and packages you need to run your code. Make sure that if you choose a GPU based machine, you also choose a GPU image. If you don’t know what sort of image you want, or need to set up a custom image, consult our Images documentation. Note that if there is a Dask cluster associated with the resource, it will use the same image.
- Working Directory: This is your working directory at resource startup. Most times, you can leave this as the default.
- Extra Packages: You can use Conda, Pip, or Apt to install packages at resource startup. Simply click on the appropriate package manager(s), then list the package(s) in the textbox.
- Shutoff After: Choose an auto-shutoff time interval that works for you. This will help you avoid any unwanted expenses. (Hosted Pro and Enterprise accounts only)
- Advanced Settings (optional): You can customize the Start Script and/or Environment Variables for the client and the workers your resource might contain. These settings are applied every time the Jupyter server starts.
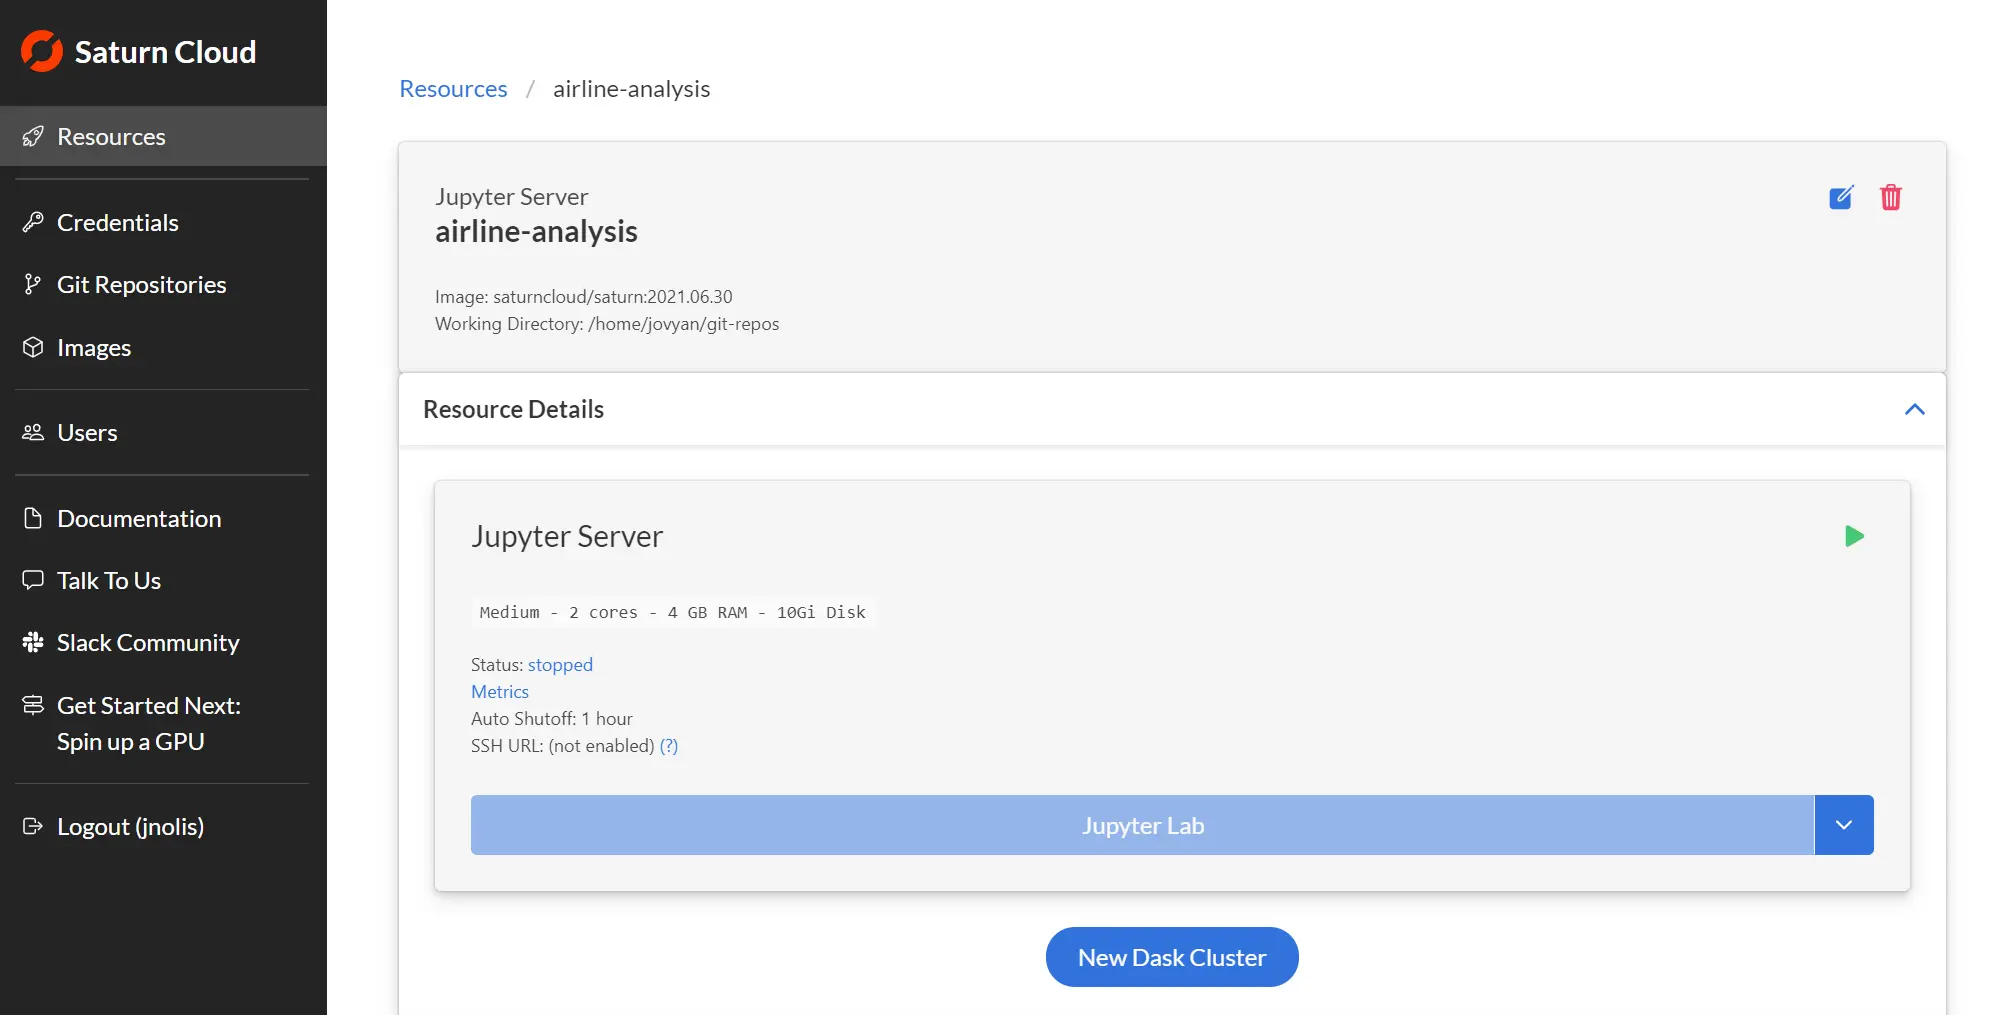
Click Create to have your new resource built. After this, you’ll be taken to the resource page that shows the parameters you’ve requested. To attach a Dask cluster, click New Dask Cluster.